
Vintage Halloween decor defines a display that looks collected over decades, not purchased in one trip to a seasonal aisle. This aesthetic replaces neon plastic props with muted orange, black, and cream pieces that carry real texture and age. This guide delivers 23 specific strategies for building an authentic vintage Halloween display, from sourcing chalkware pumpkins to styling a mantel vignette. Start by choosing one decade to anchor your entire display before you buy a single piece.
Before You Begin: 3 Foundation Steps for Vintage Halloween Decor
A cohesive vintage Halloween look starts before any shopping happens. Skipping these three foundation steps is the single most common reason vintage-style displays end up looking mismatched instead of curated.
1. Anchor Your Display Around One Vintage Halloween Era
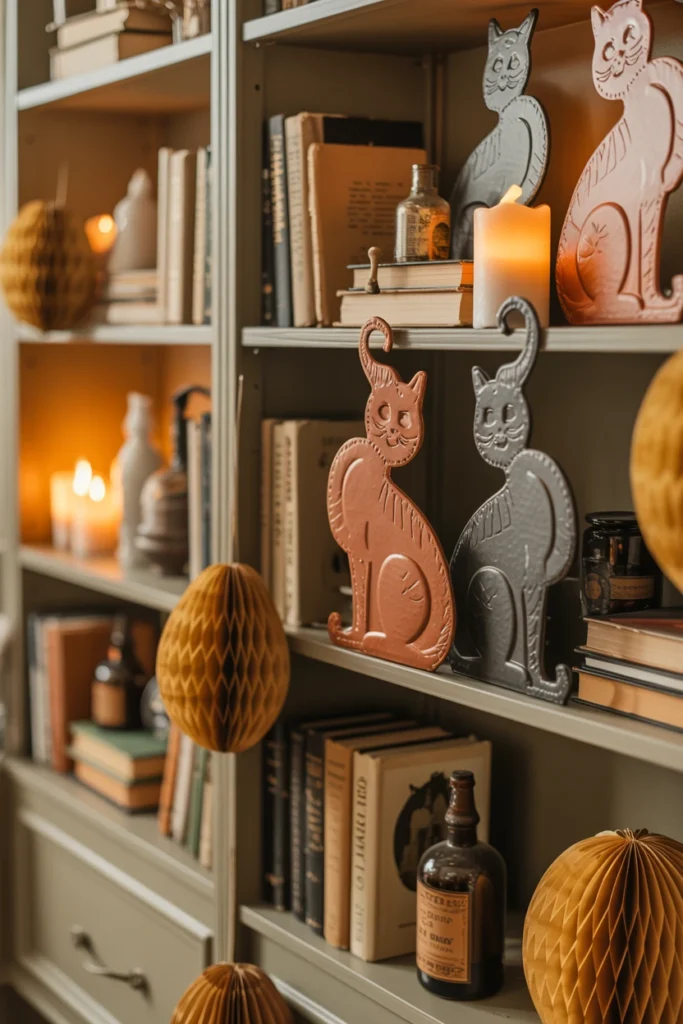
Mixing decades in one display flattens the vintage effect completely. A shelf that combines 1940s die-cuts with 1990s plastic reproductions reads as cluttered rather than curated, confusing the eye instead of telling a story. Locking your display to a single decade — 1920s to 1960s are the most collected — creates instant visual cohesion across every piece you add.
Start by picking one decade — 1940s Beistle-style die-cuts or 1960s plastic blow-molds are the most accessible entry points. Reproduction pieces should list the era they replicate on the packaging or product description, so check that detail before adding anything to your cart. This decade lock also makes future purchases faster, because you can skip anything that doesn’t match on sight.
| Decade | Signature Materials |
| 1920s–1930s | Die-cut cardstock, honeycomb tissue |
| 1940s–1950s | Chalkware, crepe paper garlands |
| 1960s–1970s | Blow-mold plastic, tin litho |
| 1980s–1990s | Ceramic figurines, printed cardboard |
2. Set a Vintage Halloween Decor Budget Before You Shop
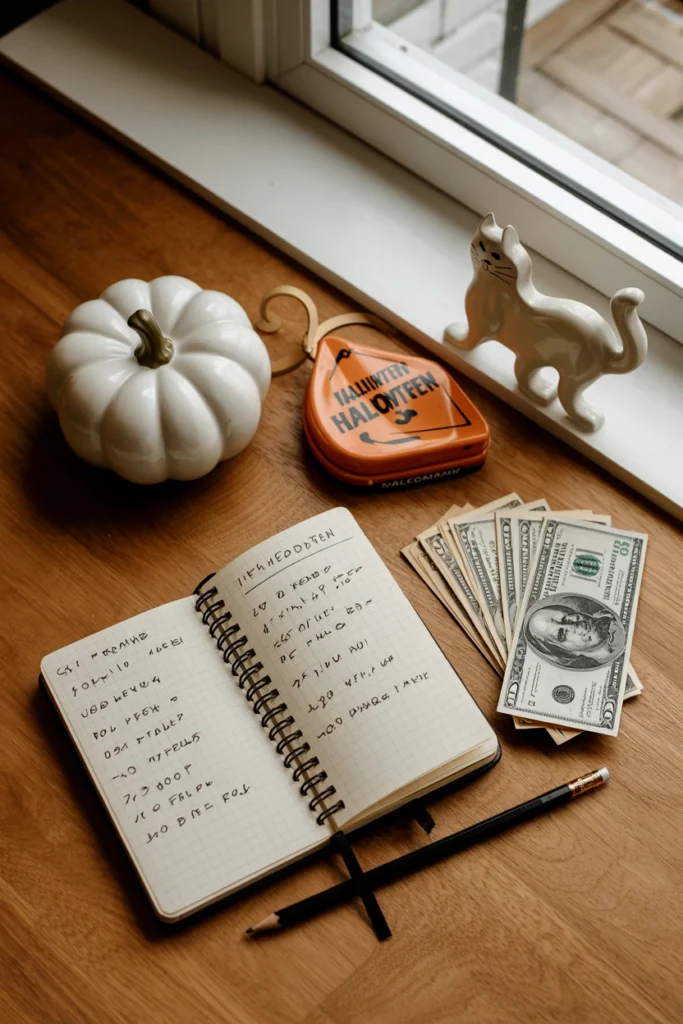
Vintage Halloween pieces without a budget cap turn into an expensive habit fast. A single chalkware jack-o’-lantern can run $40 to $150 depending on condition, and buying without limits drains funds needed for the rest of the display. Setting a per-category budget before shopping keeps your entire vignette balanced instead of front-loaded on one showpiece.
Start by splitting your total budget into three categories: one anchor piece, five to eight supporting pieces, and finishing touches like garland or lighting. Allocate roughly 40% to the anchor piece, 40% to supporting pieces, and 20% to finishing touches for a balanced $200–$400 total display. This split also stops impulse buys at estate sales, because you already know which category has room left.
| Budget Tier | Suggested Allocation |
| $100 total | $40 anchor, $40 supporting, $20 finishing |
| $250 total | $100 anchor, $100 supporting, $50 finishing |
| $400 total | $160 anchor, $160 supporting, $80 finishing |
| $600+ total | $240 anchor, $240 supporting, $120 finishing |
3. Establish a Muted Color Palette Before Buying Pieces
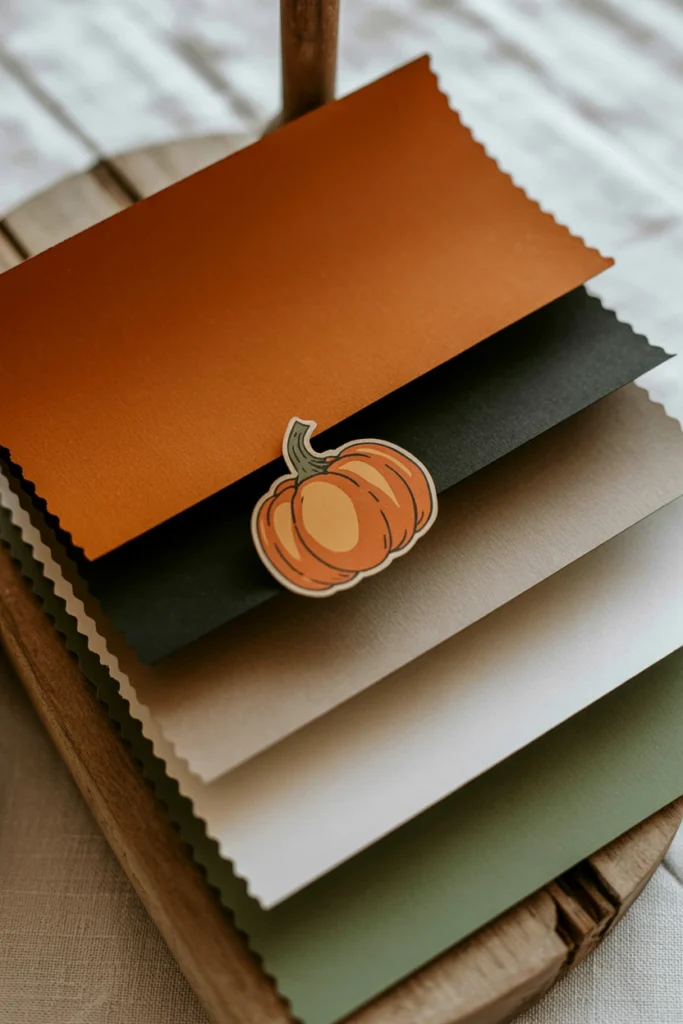
Bright neon orange instantly breaks a vintage Halloween look. Modern Halloween decor leans on saturated orange and lime green, colors that did not exist in pre-1980s manufacturing dyes. Choosing a muted palette of burnt orange, black, cream, and olive before you shop prevents mismatched pieces from entering your collection.
Start by pulling three fabric or paint swatches — burnt orange, aged cream, and matte black — and carry them when you shop. Reject any piece with fluorescent or neon-bright orange, since true vintage dyes fade to a rust or pumpkin-spice tone over time. This swatch habit also speeds up thrift store visits, since you can scan shelves for color matches in seconds.
| Color | Vintage Match | Modern Mismatch |
| Orange | Burnt/rust orange | Neon/fluorescent orange |
| Black | Matte charcoal-black | Glossy jet black |
| White/Cream | Aged ivory | Bright white |
| Green | Olive/moss | Lime/acid green |
Choosing Authentic Vintage Halloween Decorations
Sourcing genuine vintage Halloween pieces requires knowing which materials define each era. These five strategies target the specific decorations that separate an authentic display from a costume-aisle purchase.
4. Choose Die-Cut Paper Decorations Over Plastic Props
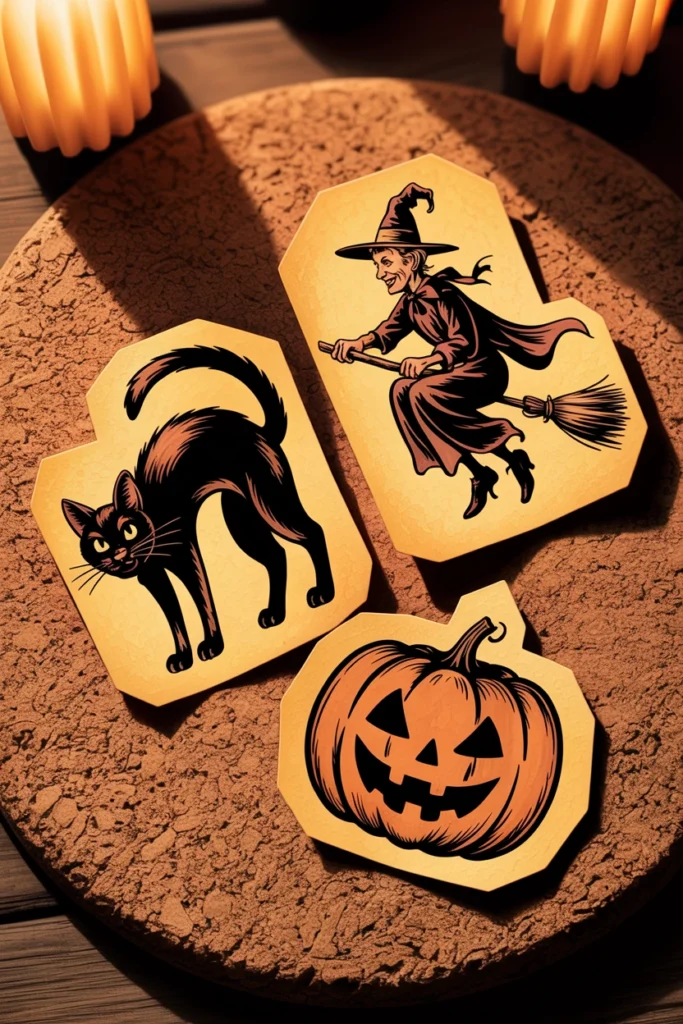
Plastic Halloween props instantly signal a modern purchase. Molded plastic pumpkins and skeletons became mass-market only after the 1960s, so using them undercuts an earlier-decade display. Die-cut paper decorations — cardstock cats, witches, and pumpkins — read as authentic across every pre-1960s decade you might choose.
Start by searching for die-cut decorations from Beistle, Dennison, or Gibson, the three companies that dominated pre-1960s Halloween paper goods. Original pieces run $15–$60 depending on size, while licensed reproductions cost $5–$20 and reference the original artwork on the packaging. Die-cuts also fold flat for storage, so you can rotate a larger collection without needing extra shelf space.
| Die-Cut Type | Typical Size | Price Range |
| Cat silhouette | 8–12 inches | $10–$35 |
| Witch figure | 12–18 inches | $20–$50 |
| Jack-o’-lantern | 6–10 inches | $8–$25 |
| Owl or bat | 6–9 inches | $10–$30 |
5. Hunt for Chalkware Jack-O’-Lanterns at Estate Sales
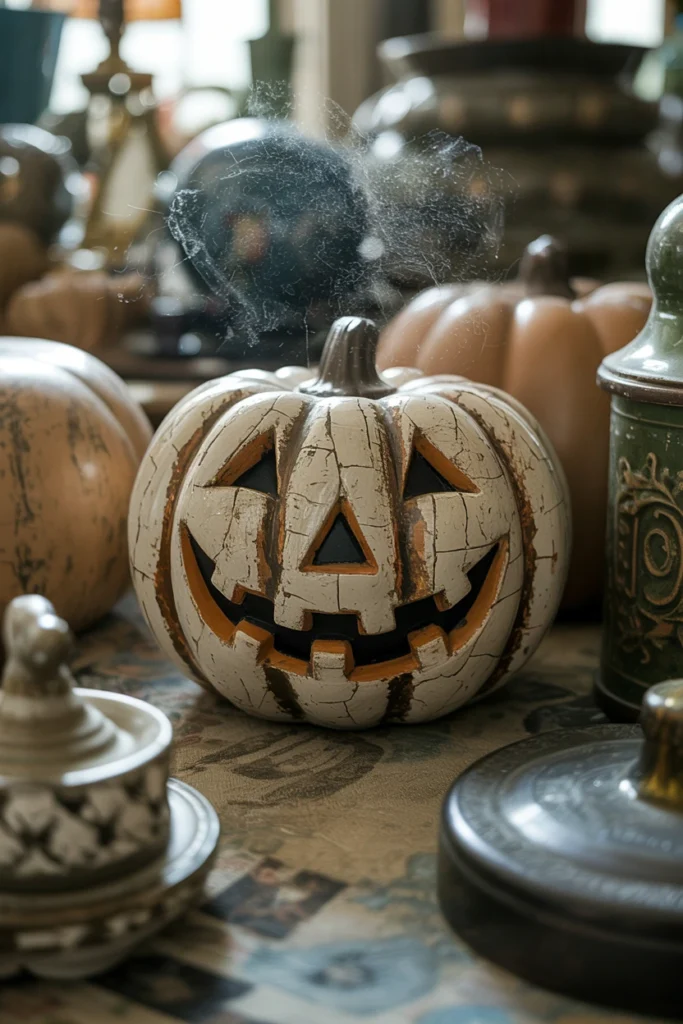
Chalkware pumpkins define the 1940s Halloween look. These plaster-based figures chip and fade with age, so buying a mass-produced substitute skips the texture that makes chalkware instantly recognizable. Sourcing real chalkware at estate sales gets you authentic crackle and hand-painted detail no reproduction fully matches.
Start by checking estate sale listings for “chalkware” or “plaster” Halloween figures rather than searching “vintage pumpkin,” which returns mostly plastic results. Expect to pay $30–$120 for an intact 6–10 inch chalkware jack-o’-lantern, with hairline cracks lowering price without ruining display value. Minor chips actually increase authenticity, since collectors read visible wear as proof of genuine age.
| Condition | Price Impact | Display Suitability |
| Mint, no cracks | Full price | Anchor piece |
| Hairline cracks | 20–30% discount | Supporting piece |
| Chipped paint | 40–50% discount | Background piece |
| Repainted | 50%+ discount | Avoid for authenticity |
6. Add Honeycomb Tissue Centerpieces for Instant Texture
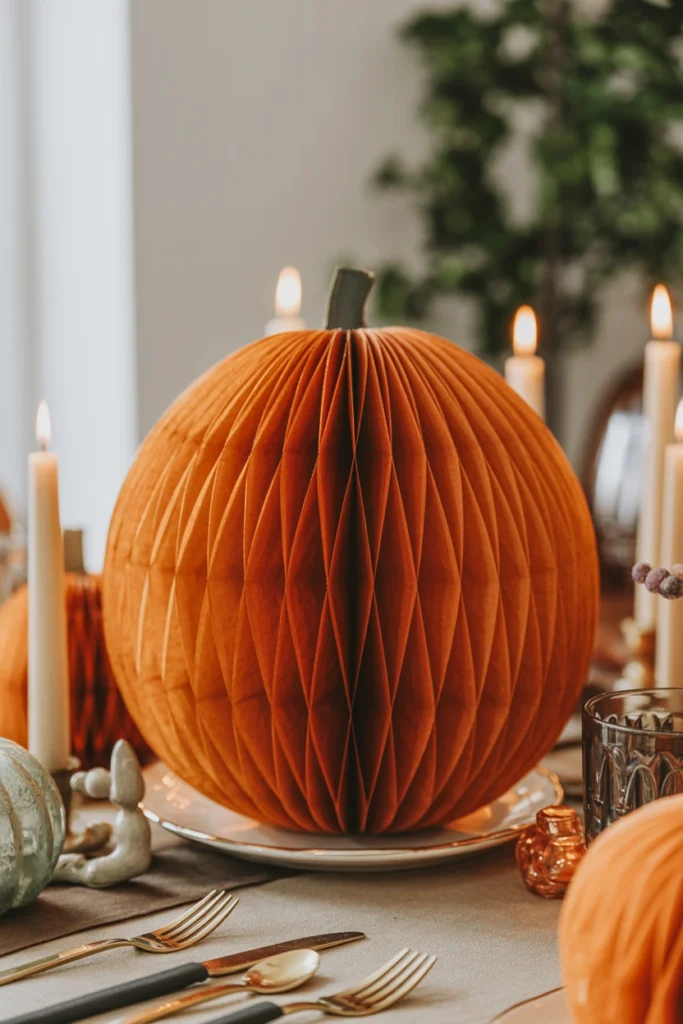
Flat paper decorations leave a display looking two-dimensional. A table with only die-cuts and garland lacks the dimensional focal point that draws the eye to a specific spot. Honeycomb tissue centerpieces — pumpkins, cats, or skulls — expand into 3D shapes that instantly add texture and height.
Start by placing one 8–12 inch honeycomb centerpiece at the middle of your main table or mantel. Honeycomb pieces from Beistle-style reproductions cost $8–$18 and collapse flat for storage between seasons. The accordion texture also catches candlelight differently than flat paper, adding shadow detail after dark.
| Honeycomb Shape | Size | Best Placement |
| Pumpkin | 8–10 inches | Table centerpiece |
| Skull | 6–8 inches | Mantel accent |
| Black cat | 10–12 inches | Entry table |
| Owl | 6–9 inches | Shelf accent |
7. Layer In Tin Litho Noisemakers as Accent Pieces
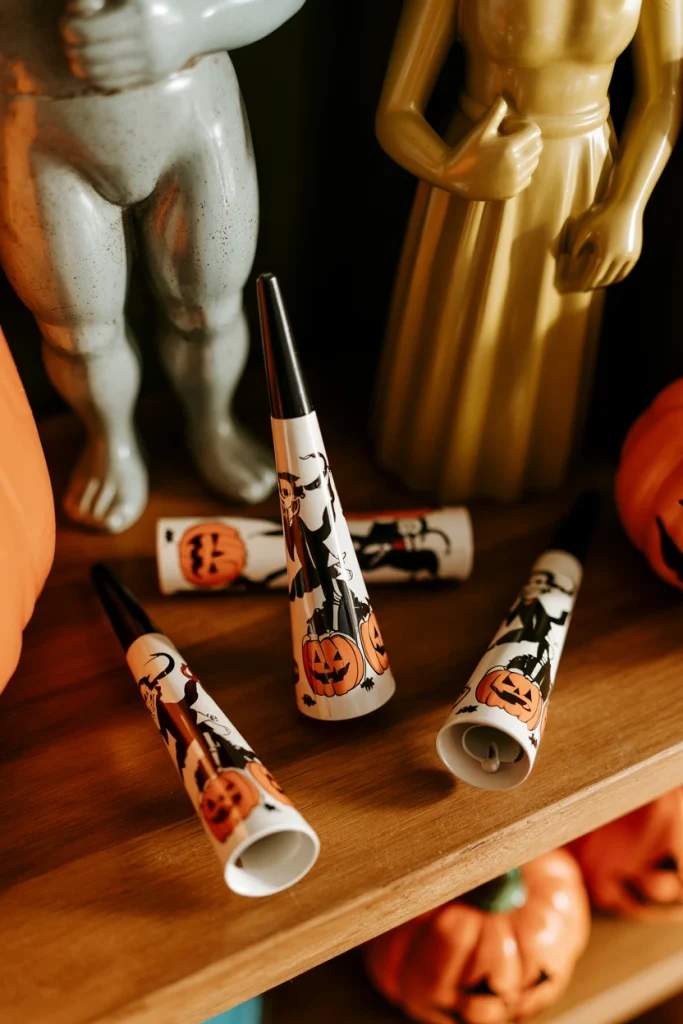
A display without small collectible accents looks sparse. Large pieces alone leave gaps between them that feel empty rather than intentionally minimal. Tin litho noisemakers — small metal horns and clickers printed with Halloween scenes — fill those gaps with genuine mid-century detail.
Start by scattering 3–5 tin noisemakers across open surfaces between your larger pieces. Original US Metal Toy or Kirchhof noisemakers from the 1950s run $10–$40 each depending on the printed scene. These small pieces also work as functional party favors, doubling their purpose beyond static decor.
| Noisemaker Brand | Era | Price Range |
| Kirchhof | 1940s–1950s | $15–$35 |
| US Metal Toy | 1930s–1940s | $20–$45 |
| T. Cohn | 1950s | $10–$30 |
| Unmarked reproductions | Modern | $5–$12 |
8. Replace Modern Plastic Skulls With Papier-Mâché Versions
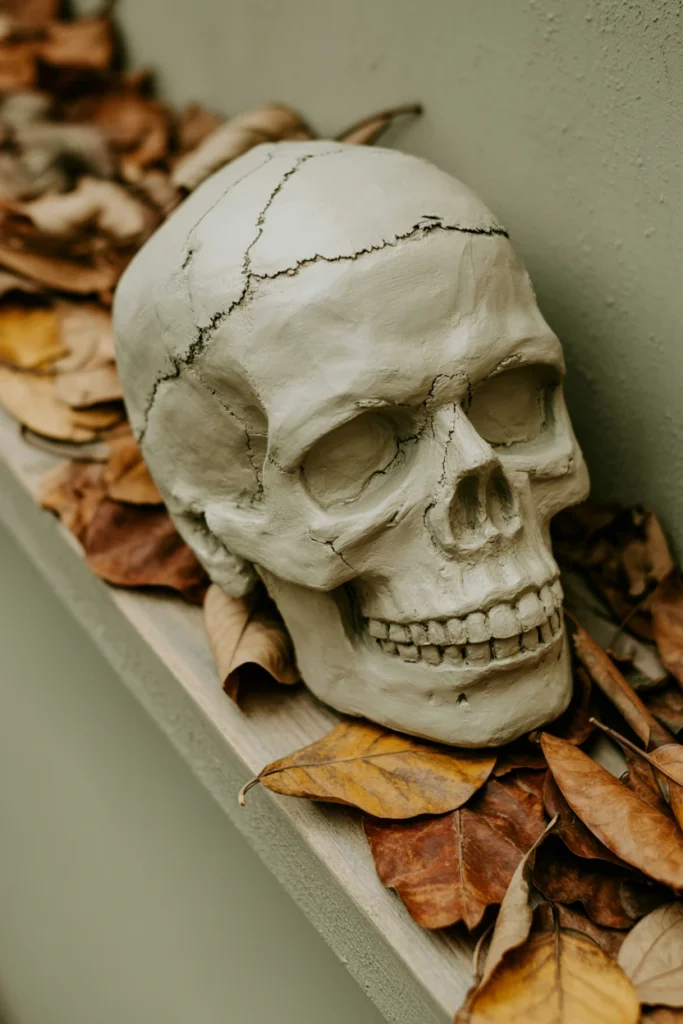
Glossy plastic skulls break a vintage Halloween mood instantly. The smooth, uniform surface of injection-molded plastic reflects light in a way that reads as distinctly modern under any lighting. Papier-mâché skulls and figures absorb light instead, creating the matte, textured look that defines pre-1970s Halloween decor.
Start by swapping out any glossy plastic skull for a papier-mâché version in the 5–8 inch range. Papier-mâché pieces cost $20–$60 and often show visible layered texture along the seams, a detail worth leaving unpainted for authenticity. The lighter weight of papier-mâché also makes these pieces easier to hang or perch on narrow ledges.
| Material | Surface Finish | Vintage Accuracy |
| Papier-mâché | Matte, textured | High |
| Chalkware | Matte, slightly rough | High |
| Injection plastic | Glossy, smooth | Low |
| Resin | Semi-gloss | Low–Medium |
Styling Vintage Halloween Vignettes and Displays
Owning the right pieces means nothing without a styling system to arrange them. These five strategies turn a pile of collectibles into a cohesive vignette.
9. Group Collectibles in Odd-Numbered Vignettes
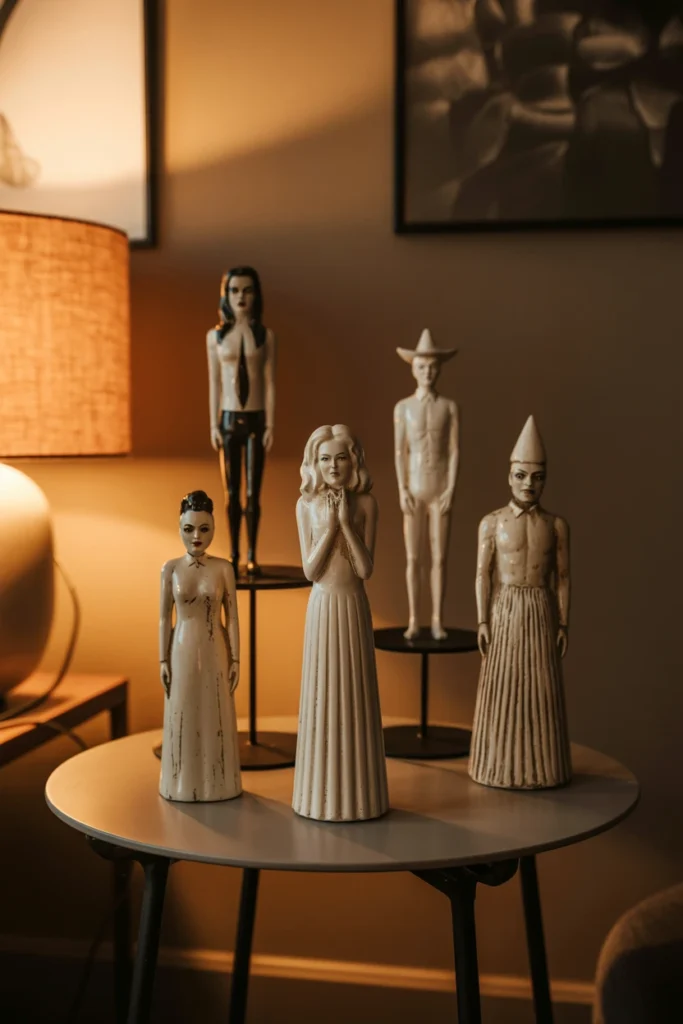
Even-numbered groupings read as staged rather than collected. Pairing two identical pumpkins side by side creates visual symmetry that looks arranged on purpose, undercutting the found-object feel of vintage decor. Grouping items in sets of three or five instead creates the asymmetry that reads as naturally accumulated over time.
Start by pulling three to five pieces of varying height and grouping them within a 12–18 inch footprint. Vary height by at least 2 inches between each piece so the grouping creates a visible zigzag line rather than a flat row. This odd-number rule also makes it easy to add one new piece later without breaking the arrangement.
| Group Size | Visual Effect | Best Use |
| 2 items | Symmetrical, staged | Avoid |
| 3 items | Balanced, intentional | Shelf or table vignette |
| 5 items | Layered, collected | Mantel or large surface |
| 7+ items | Dense, curated | Bookshelf or cabinet |
10. Build Layered Height on Your Vintage Halloween Mantel
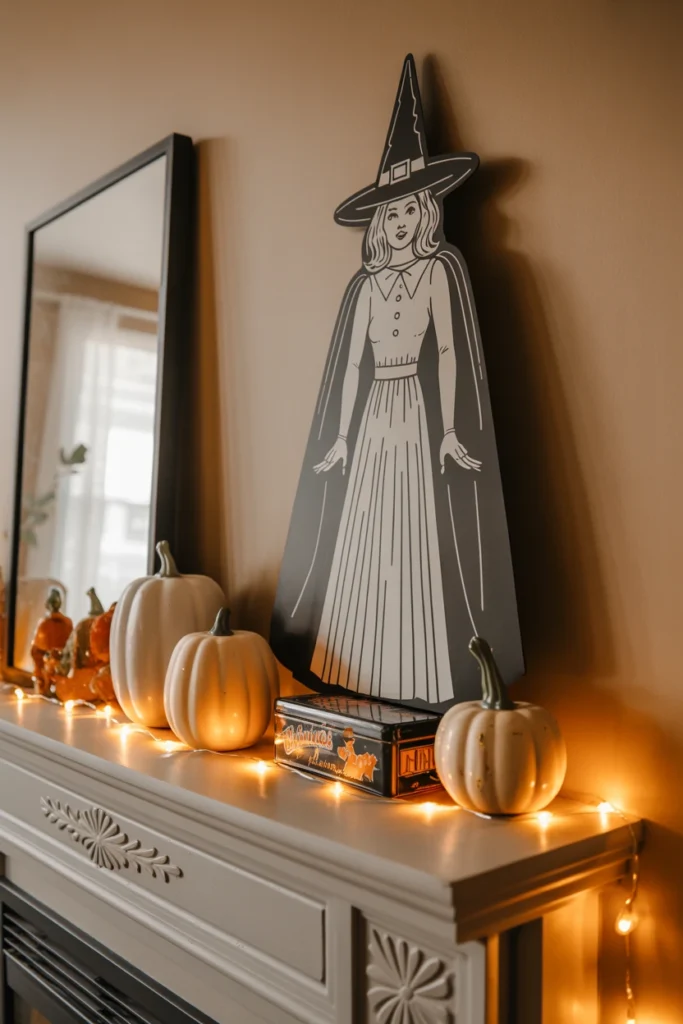
A flat mantel display lacks a focal point. Placing every piece at the same height forces the eye to scan side to side with nothing to land on. Layering three height tiers — tall, medium, short — creates a natural focal point at the tallest piece.
Start by placing your tallest piece, ideally 14–18 inches, slightly off-center rather than dead center. Add medium pieces at 8–12 inches on either side, then fill remaining gaps with items under 6 inches. This tiered structure also photographs better, since the height variation reads clearly even in a flat image.
| Height Tier | Size Range | Placement |
| Tall/anchor | 14–18 inches | Off-center focal point |
| Medium | 8–12 inches | Flanking the anchor |
| Short | 3–6 inches | Filling remaining gaps |
| Flat/lying | Under 3 inches | Foreground layer |
11. Arrange a Black Cat Motif Corner Display
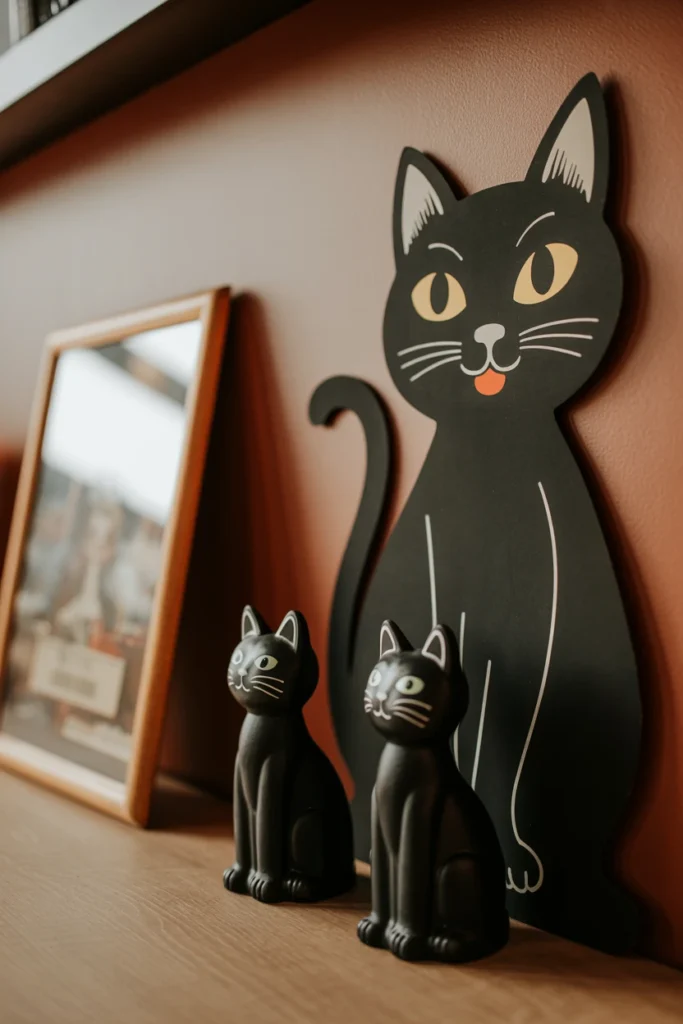
Black cat imagery dominated Halloween decor from the 1900s through the 1950s. Skipping this motif removes one of the most recognizable visual anchors of the vintage Halloween aesthetic. Dedicating one corner to black cat pieces — die-cuts, figurines, and postcards — creates an instantly identifiable vintage focal point.
Start by clearing one 2×2 foot corner and placing a single large black cat die-cut as the backdrop. Layer in 2–3 smaller black cat figurines in front, mixing chalkware and tin for material contrast. This corner also works as a photo backdrop for parties, since the motif reads clearly in low light.
| Black Cat Piece | Material | Typical Price |
| Die-cut backdrop | Cardstock | $15–$40 |
| Figurine | Chalkware | $25–$70 |
| Postcard | Printed paper | $5–$20 |
| Noisemaker | Tin | $15–$35 |
12. Create a Folk Art Pumpkin Patch Tablescape
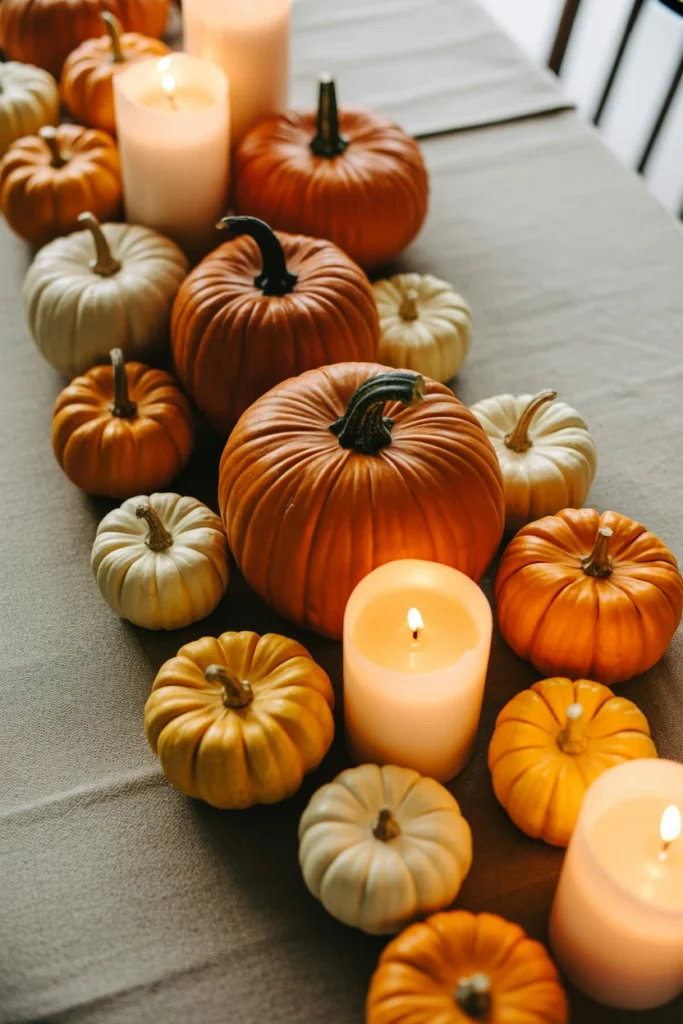
A single pumpkin on a table reads as an afterthought. One isolated piece lacks the density needed to register as a deliberate seasonal display from across the room. Clustering 5–7 pumpkins of varying material and size into a tablescape creates a full folk art pumpkin patch effect.
Start by placing your largest pumpkin — chalkware or papier-mâché, 8+ inches — at one end of the table runner. Fill toward the other end with progressively smaller pumpkins down to 3 inches, mixing orange and cream tones. This size gradient also disguises minor condition flaws, since smaller pieces draw less individual scrutiny.
| Pumpkin Size | Material Options | Table Position |
| 8–10 inches | Chalkware, papier-mâché | Anchor end |
| 5–7 inches | Ceramic, resin | Middle cluster |
| 3–4 inches | Die-cut, tin | Trailing edge |
| Under 3 inches | Miniature chalkware | Filler between pieces |
13. Place Your Anchor Piece at Eye Level First
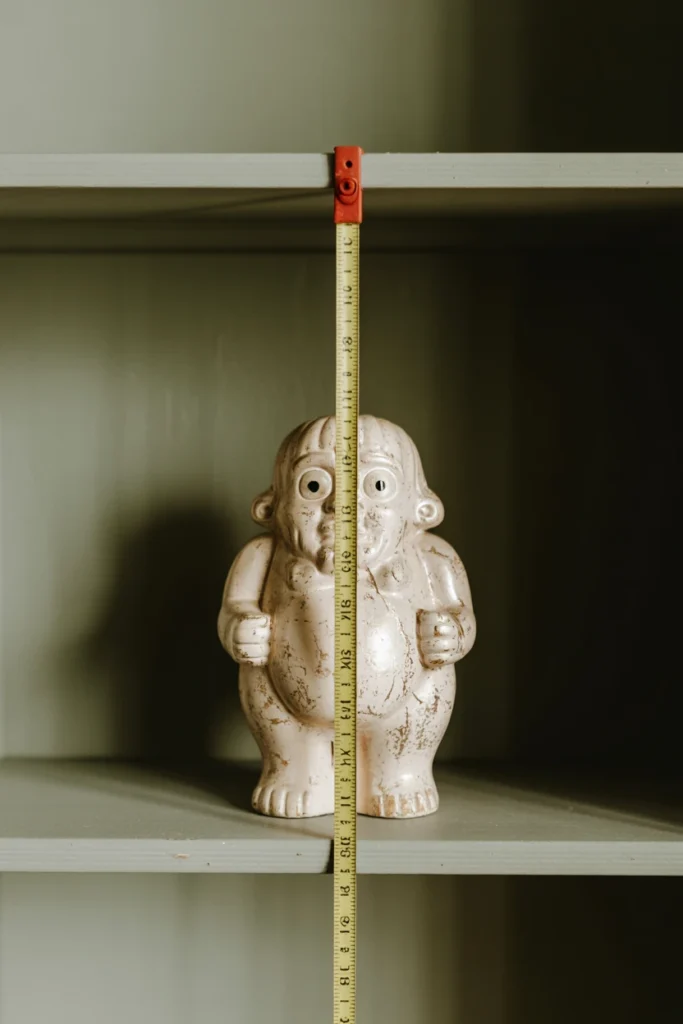
Placing decorations before choosing an anchor wastes wall and shelf space. Arranging smaller pieces first often leaves no logical spot for the one showpiece meant to draw the eye. Positioning your anchor piece at eye level — roughly 57–65 inches from the floor — before anything else guarantees the display has a clear starting point.
Start by measuring 60 inches up from the floor and marking that height on your display surface or wall. Place your single most valuable or largest piece at that exact mark before adding any supporting decorations. This eye-level placement also means guests notice the anchor piece within the first two seconds of entering the room.
| Display Surface | Anchor Height | Supporting Height |
| Mantel | 57–65 inches | 45–56 inches |
| Bookshelf | Eye-level shelf | Shelves above/below |
| Entry table | 40–48 inches | 30–39 inches |
| Wall display | 60 inches (center) | Surrounding 12 inches |
Vintage Halloween Color Palette and Materials
Color and material choices carry as much weight as the individual pieces you select. These five strategies lock in the palette and textures that read as genuinely retro.
14. Limit Your Palette to Orange, Black, and Cream
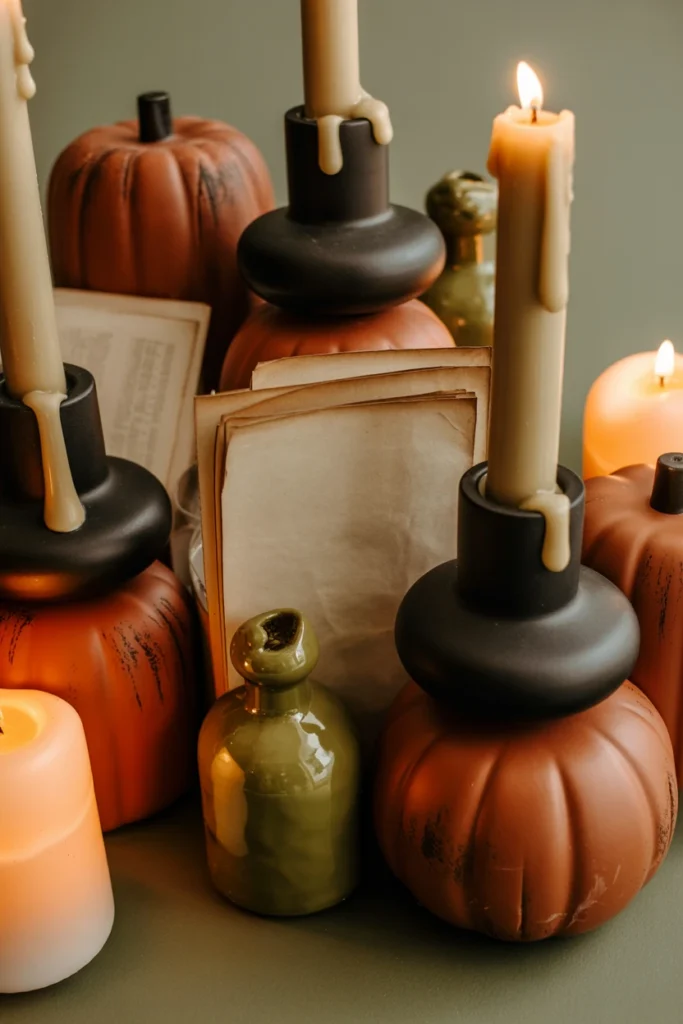
A display with more than three main colors looks unfocused. Adding purple, green, and red on top of orange and black scatters visual attention across too many competing tones. Limiting your palette to burnt orange, matte black, and aged cream keeps every piece feeling part of one cohesive collection.
Start by removing any piece in your current display that falls outside these three core colors. Allow one accent color — olive green or mustard yellow — at no more than 10% of total visible surface area. This restraint also makes new purchases easier to evaluate, since you can reject anything off-palette on sight.
| Color Role | Color | Approx. Share of Display |
| Primary | Burnt orange | 40% |
| Primary | Matte black | 35% |
| Secondary | Aged cream | 20% |
| Accent | Olive/mustard | 5–10% |
15. Mix Crepe Paper Garlands With Mercury Glass Accents
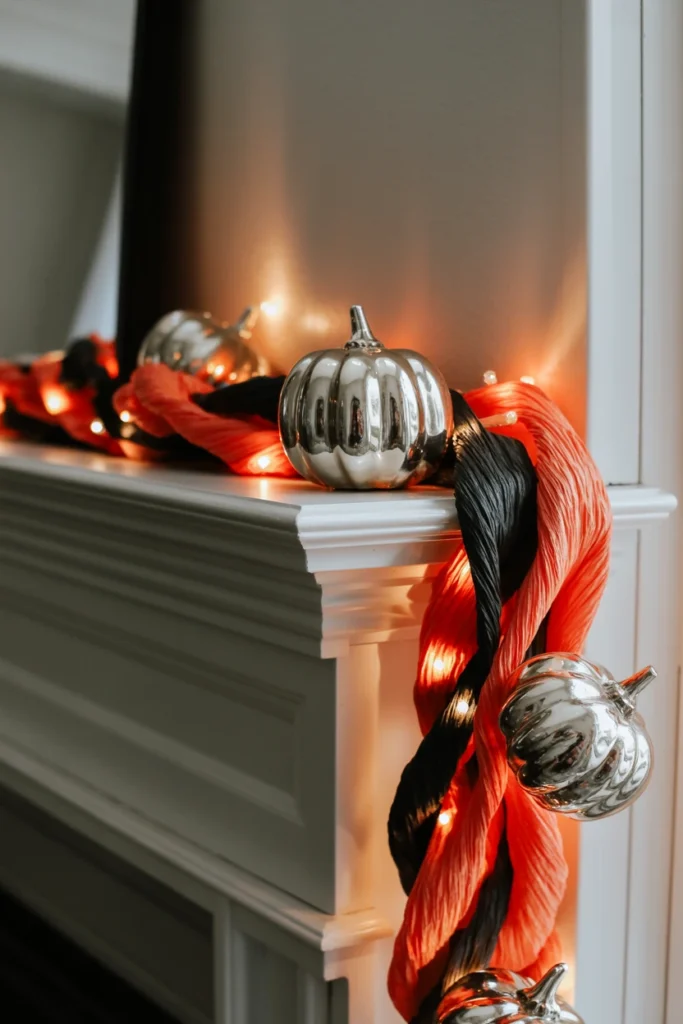
A display with only one texture type reads as flat. Relying solely on paper decorations skips the reflective quality that gives a vintage display visual depth under indoor lighting. Mixing crepe paper garlands with mercury glass ornaments adds a matte-versus-reflective contrast that reads as intentionally layered.
Start by draping a single 6–9 foot crepe paper garland along the mantel or table edge. Add 3–5 mercury glass pumpkins or spheres, 2–4 inches each, nestled directly into the garland’s folds. The reflective glass also amplifies candlelight, creating a warmer glow than paper alone provides.
| Material | Texture | Light Behavior |
| Crepe paper | Matte, twisted | Absorbs light |
| Mercury glass | Silvered, reflective | Scatters light |
| Chalkware | Matte, rough | Absorbs light |
| Tin | Painted, semi-gloss | Mild reflection |
16. Use Mid-Century Barkcloth Fabric for Table Runners
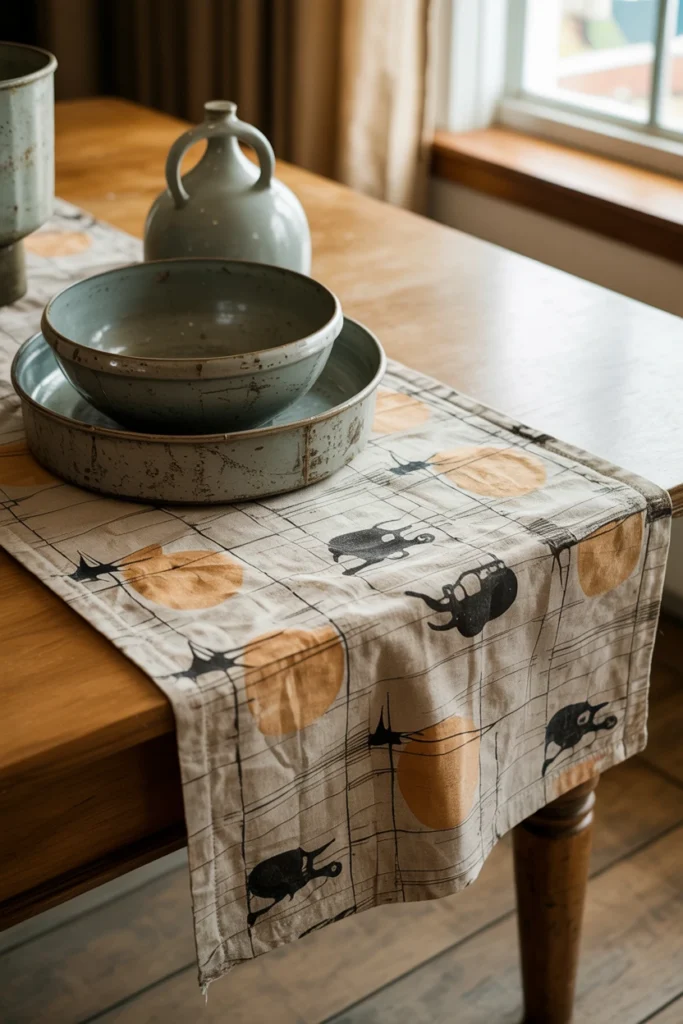
A plastic tablecloth undercuts an otherwise authentic display instantly. Vinyl and plastic table coverings carry a texture and sheen that did not exist in pre-1970s household fabrics. A mid-century barkcloth runner in a Halloween print adds period-correct texture beneath every piece you display.
Start by measuring your table length and adding 12 inches of overhang on each side for the runner. Original 1950s barkcloth runs $30–$80 per yard, while reproduction prints cost $8–$15 per yard and replicate the original’s nubby weave. This fabric texture also softens the look of hard chalkware and tin pieces resting on top of it.
| Runner Type | Cost per Yard | Texture |
| Original 1950s barkcloth | $30–$80 | Nubby, textured weave |
| Reproduction barkcloth | $8–$15 | Similar textured weave |
| Cotton canvas | $5–$10 | Smooth, flat |
| Vinyl/plastic | $3–$8 | Smooth, glossy |
17. Switch Modern LED Lights for Warm Amber Bulbs
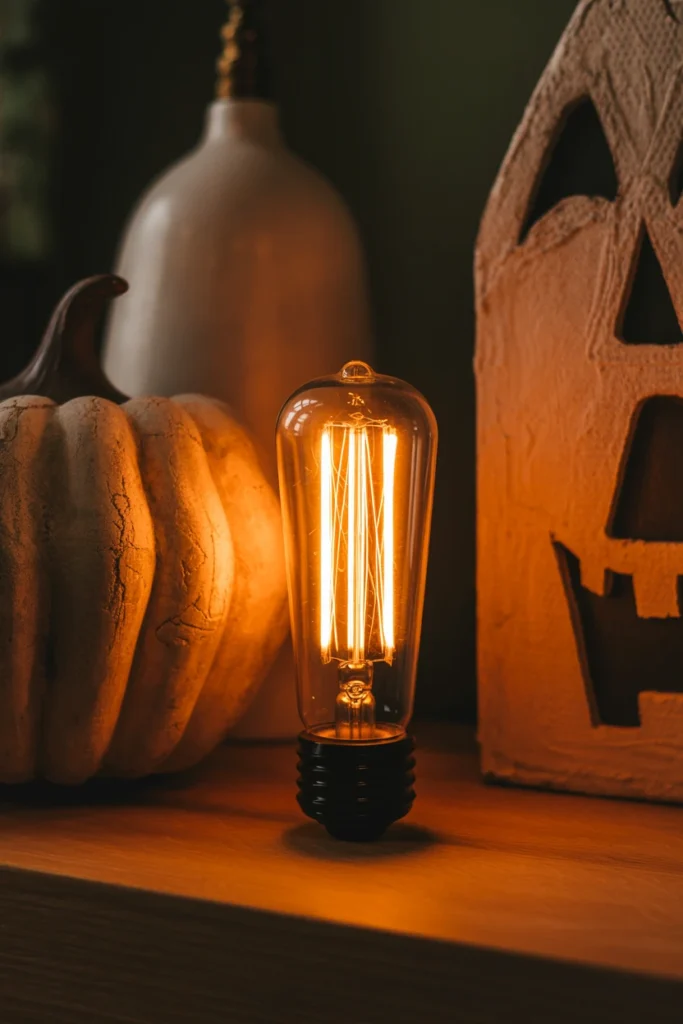
Cool white LED lighting flattens a vintage Halloween display. Bluish-white light exaggerates any modern materials in the room and drains warmth from orange and cream tones. Switching to warm amber bulbs, rated 2200K–2700K, restores the golden cast that period lighting naturally produced.
Start by replacing any bulb rated above 3000K in your display area with a 2200K–2700K amber-toned bulb. Choose vintage-style Edison bulbs with visible filaments for pieces displayed without a shade, since the filament itself reads as period-appropriate. This warmer light temperature also makes chalkware and papier-mâché texture more visible after dark.
| Bulb Type | Color Temperature | Vintage Effect |
| Cool white LED | 5000K–6500K | Flattens, modern |
| Standard warm LED | 2700K–3000K | Neutral, acceptable |
| Amber/Edison filament | 2200K–2700K | Golden, authentic |
| Candlelight (real/faux) | ~1800K | Warmest, most authentic |
18. Apply a Patina Wash to New Reproduction Pieces
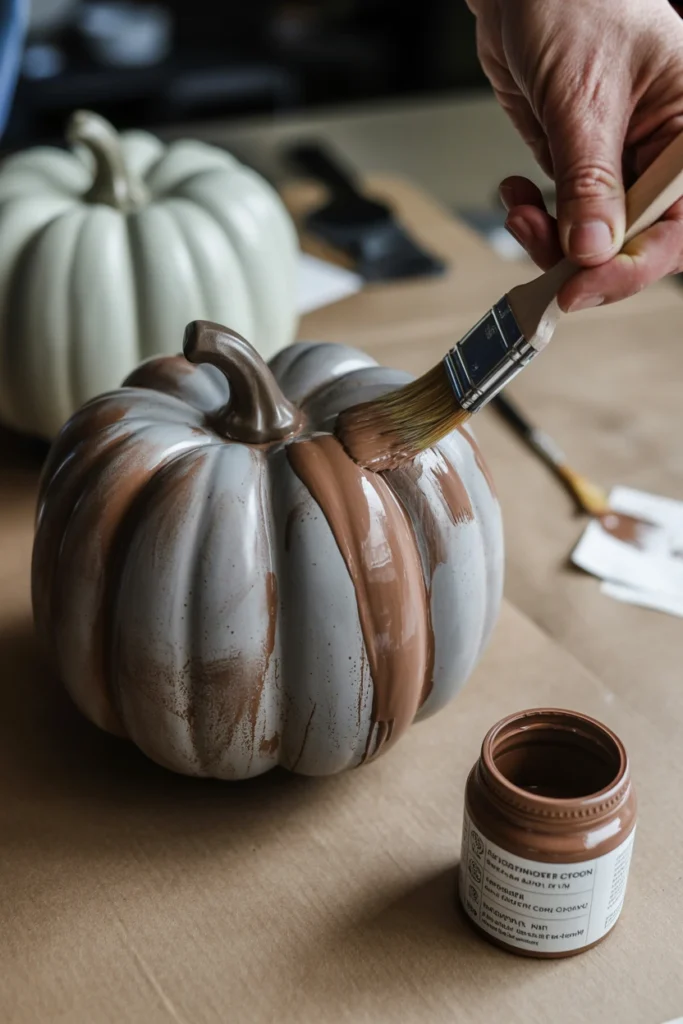
Brand-new reproduction pieces look conspicuously modern next to genuine antiques. Fresh paint and unblemished surfaces stand out immediately when placed beside items with 60+ years of natural wear. Applying a thinned brown or black patina wash over new reproductions blends them visually into an authentic-looking collection.
Start by mixing craft acrylic paint with water at a 1:4 ratio to create a thin, translucent wash. Brush the wash into recessed details and wipe the raised surfaces clean within 60 seconds, mimicking decades of dust settling into crevices. This technique also lets you buy cheaper new reproductions instead of pricier originals without sacrificing the display’s overall look.
| Wash Ratio | Paint Color | Best For |
| 1:4 paint to water | Burnt umber | Chalkware reproductions |
| 1:5 paint to water | Black | Tin and metal pieces |
| 1:3 paint to water | Raw sienna | Papier-mâché |
| 1:6 paint to water | Gray | Ceramic figurines |
Vintage Halloween Styling and Finishing Touches
The final layer of styling separates a good display from a fully finished one. These three strategies handle placement details most displays skip.
19. Style Open Shelves With Rotating Vintage Pieces
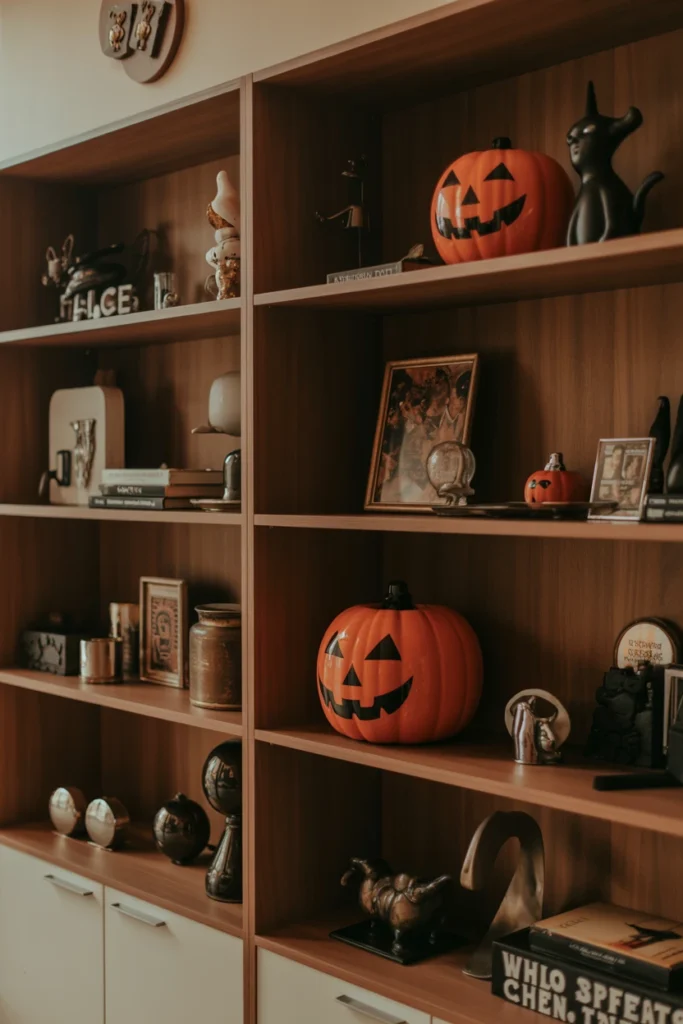
A static shelf display loses visual interest by week two. Leaving the same arrangement untouched for the full season gives household members nothing new to notice. Rotating 2–3 pieces on your open shelves every 7–10 days keeps the display feeling active and curated rather than set-and-forgotten.
Start by storing half your collection out of sight and displaying only 60% of your pieces at any given time. Swap 2–3 items every week, moving stored pieces to the front and displayed pieces to storage. This rotation also extends the life of fragile chalkware, since less handling frequency reduces accidental chipping.
| Rotation Frequency | Items Swapped | Display Freshness |
| Every 3–4 days | 1 item | High maintenance |
| Every 7–10 days | 2–3 items | Balanced |
| Every 2 weeks | 3–4 items | Low maintenance |
| No rotation | 0 items | Static, less engaging |
20. Hang Beistle-Style Die-Cuts in Doorways and Windows
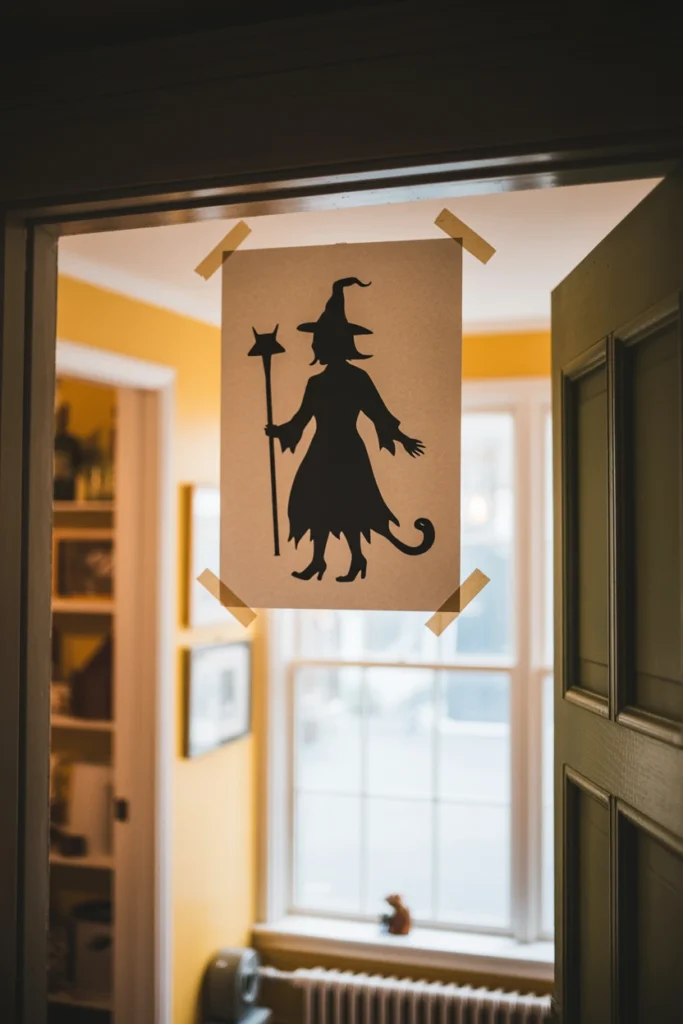
Wall and shelf space alone leaves doorways and windows undecorated. Skipping vertical surfaces wastes the most visible sightlines guests encounter when entering a room. Hanging Beistle-style die-cuts in doorway frames and window corners extends the vintage look into every sightline of the space.
Start by taping or hanging one large die-cut, 12–18 inches, in the top corner of each doorway. Use painter’s tape rather than adhesive hooks, since original die-cut cardstock tears easily under stronger adhesives. This vertical placement also creates a layered effect when viewed alongside horizontal shelf and table displays.
| Placement | Die-Cut Size | Attachment Method |
| Doorway corner | 12–18 inches | Painter’s tape |
| Window corner | 8–12 inches | Removable clips |
| Ceiling hang | 6–10 inches | Fishing line |
| Wall center | 14–20 inches | Command strips |
21. Anchor the Entry With a Vintage Halloween Wreath
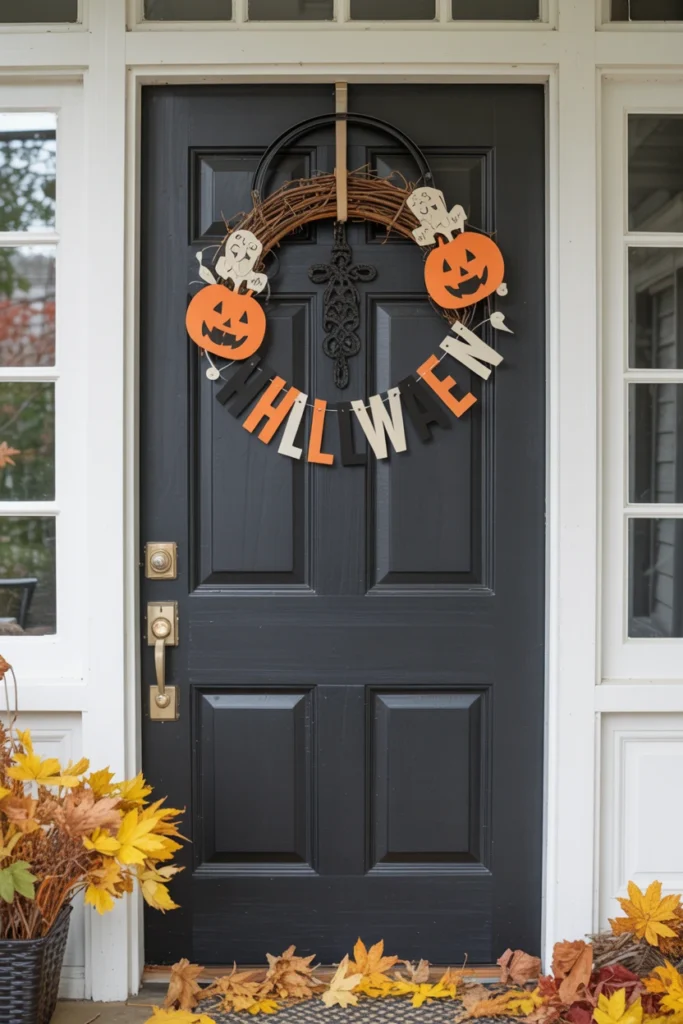
An undecorated front door breaks the vintage theme before guests even step inside. Skipping the entry point means the first visual impression of your display comes from an ordinary front door. Anchoring the entry with a vintage-style Halloween wreath extends the retro theme to the very first thing visitors see.
Start with a straw or grapevine base wreath, 16–18 inches in diameter, rather than a foam base. Attach 3–5 die-cut or chalkware accents directly to the wreath using floral wire, keeping the same three-color palette as your indoor display. This entry piece also signals your theme before guests step inside, setting expectations for the display ahead.
| Wreath Base | Diameter | Best Accent Type |
| Grapevine | 16–18 inches | Die-cut, chalkware |
| Straw | 14–16 inches | Fabric, tin |
| Foam (avoid) | Any | Looks modern regardless of accents |
| Wire frame | 18–20 inches | Mixed material |
Vintage Halloween Decor Maintenance and Long-Term Habits
Vintage pieces require different upkeep than mass-market decorations. These two habits protect your collection between seasons.
22. Store Paper Decorations Flat in Acid-Free Sleeves
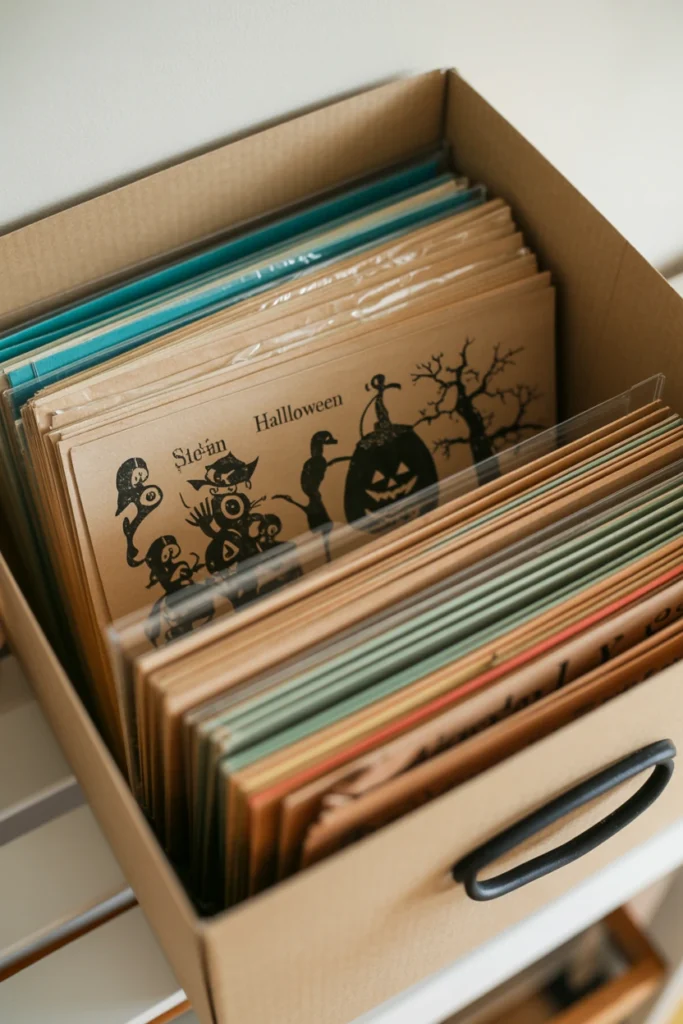
Improper storage destroys paper decorations faster than display use ever does. Folding or stacking die-cuts without protection causes creasing and acid burn that permanently damages the cardstock within a few seasons. Storing each piece flat in an acid-free sleeve prevents both physical damage and the yellowing caused by acidic storage materials.
Start by purchasing acid-free archival sleeves sized to fit your largest die-cut, typically 11×14 or 12×18 inches. Store sleeved pieces flat in a box away from direct sunlight and humidity above 50%, both of which accelerate paper degradation. This storage method also preserves resale value, since collectors pay a premium for pieces without crease lines or discoloration.
| Storage Method | Damage Risk | Recommended Use |
| Acid-free flat sleeve | Low | All paper die-cuts |
| Folded, unsleeved | High | Avoid entirely |
| Rolled tube | Medium | Large garlands only |
| Stacked, no dividers | High | Avoid entirely |
23. Rotate Your Vintage Halloween Collection Every Season
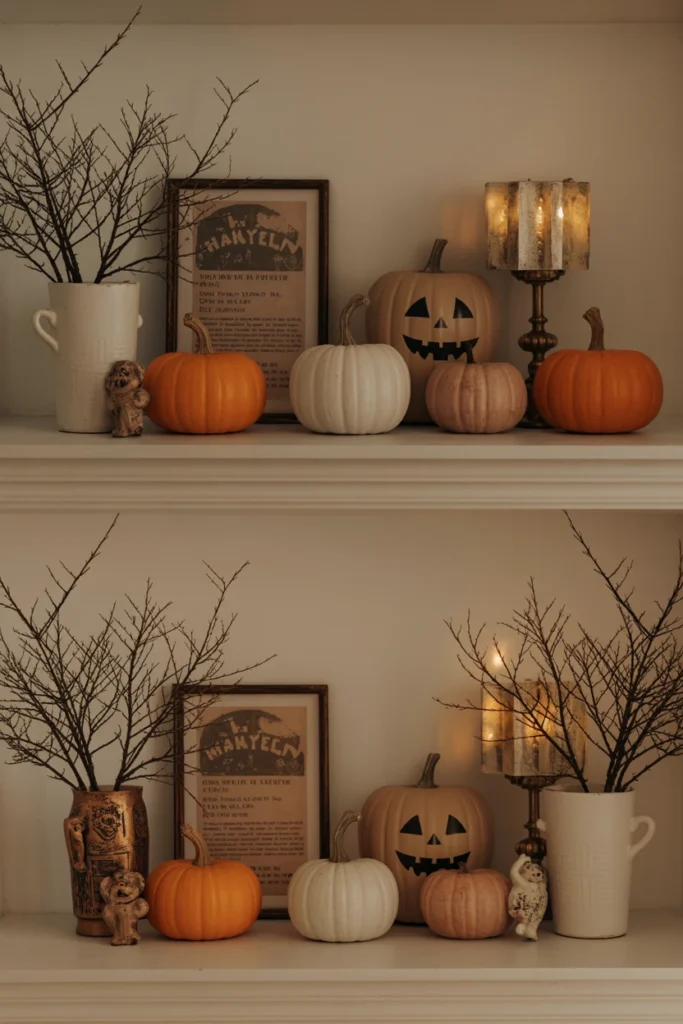
Displaying the exact same pieces every year dulls their visual impact. Repetition trains the eye to stop noticing details that once stood out, reducing the display’s overall effect over time. Rotating which pieces take center stage each season keeps your collection feeling fresh even without buying anything new.
Start by photographing this year’s full display before packing it away, creating a reference for next season’s rotation. Swap at least 30% of your anchor and supporting pieces with items pulled from storage each new season. This rotation habit also reveals gaps in your collection, showing exactly which pieces to prioritize at next year’s estate sales.
| Rotation Element | Percentage Changed | Purpose |
| Anchor piece | 0–20% | Maintains recognizable theme |
| Supporting pieces | 30–40% | Refreshes visual interest |
| Accents/finishing touches | 50–60% | Low-cost variety |
| Color palette | 0% | Maintains cohesion year to year |
Common Vintage Halloween Decor Mistakes That Ruin the Retro Look
Certain choices undo an otherwise authentic vintage Halloween display instantly. The table below identifies the eight most common mistakes and their fixes.
| Mistake | Why It Hurts the Space | Better Alternative |
| Using neon plastic decorations | Reads as costume-aisle, not retro | Die-cut paper or chalkware pieces |
| Mixing decades randomly | Creates visual confusion, no cohesion | Anchor display to one decade |
| Cool white LED lighting | Flattens warm vintage tones | Amber bulbs at 2200K–2700K |
| Overcrowding every surface | Eliminates breathing room between pieces | Odd-numbered groupings with gaps |
| Skipping a color palette | Scatters attention across too many tones | Limit to orange, black, cream |
| Folding paper decorations for storage | Causes permanent creasing and acid burn | Flat storage in acid-free sleeves |
| Using foam-base wreaths | Looks synthetic regardless of accents | Grapevine or straw base |
| Displaying pieces at random heights | Removes a clear focal point | Layered height with defined anchor |
Vintage Halloween Decor by Space and Situation
Small Apartment
Small apartments limit surface area for a full vintage Halloween display. The core constraint here is fitting authentic pieces into vertical space rather than horizontal spread.
Key strategies for small apartments:
- Hang die-cuts on walls instead of using tabletop space.
- Choose one bookshelf as the single dedicated display zone.
- Select miniature chalkware pieces under 4 inches to save room.
- Use a single tiered stand to triple your display surface without adding footprint.
- Skip floor-standing pieces entirely in favor of wall and shelf items.
Rental
Rental restrictions often prohibit nails, paint, and permanent fixtures. The core constraint here is achieving a vintage look without damaging walls or surfaces.
Key strategies for rentals:
- Use removable adhesive strips instead of nails for hanging die-cuts.
- Rely on freestanding pieces on existing furniture rather than wall-mounted decor.
- Choose a tension rod garland display instead of hooks in doorframes.
- Skip patina washes on landlord-owned furniture surfaces.
- Store all decorations in a single labeled bin for easy move-out removal.
Front Porch
Front porches face weather exposure that indoor displays never encounter. The core constraint here is protecting delicate vintage materials from moisture and wind.
Key strategies for front porches:
- Reserve chalkware and papier-mâché pieces for indoor or covered display only.
- Use weather-resistant reproduction die-cuts laminated for outdoor use.
- Anchor the wreath with fishing line rather than a single hook to prevent wind damage.
- Choose battery-powered amber string lights instead of paper lanterns near moisture.
- Bring fragile pieces inside overnight if dew or rain is expected.
Large Open-Plan Home
Open-plan homes create sightlines across multiple rooms at once. The core constraint here is maintaining one cohesive theme across a much larger visible area.
Key strategies for large open-plan homes:
- Repeat your three-color palette in at least three separate zones for visual continuity.
- Place one large anchor piece visible from the home’s main entry point.
- Use matching garland style across the kitchen, living, and dining zones.
- Scale up centerpiece sizes by 20–30% to read properly across greater distances.
- Add a secondary vignette in a transitional hallway to bridge two main display zones.
Frequently Asked Questions
What is vintage Halloween decor?
Vintage Halloween decor refers to decorations styled after pre-1970s manufacturing, including die-cut paper, chalkware figures, and tin litho pieces. The look relies on muted orange, black, and cream tones instead of neon modern colors. Authentic vintage Halloween decor comes from original pieces or licensed reproductions of period designs. Building this look starts with choosing a single decade to anchor your entire display.
What are common vintage Halloween decor mistakes?
The most common mistake is mixing decades randomly, which creates visual confusion instead of cohesion. Using neon plastic decorations and cool white LED lighting also breaks the retro effect immediately. Overcrowding surfaces without gaps removes the breathing room a curated display needs. Sticking to one decade and a limited color palette avoids these issues.
How do I start vintage Halloween decor on a budget?
Start with a $100–$150 budget split across one anchor piece, a few supporting items, and finishing touches like garland. Die-cut reproductions cost $5–$20 and deliver an authentic look without the price of original chalkware. Thrift stores and estate sales offer the lowest prices for genuine vintage pieces. Building the collection gradually over several seasons keeps costs manageable.
How do I do vintage Halloween decor in a small apartment or rental?
Use wall-mounted die-cuts and a single dedicated shelf instead of spreading pieces across multiple surfaces. Removable adhesive strips replace nails for rental-safe hanging. Freestanding pieces on existing furniture avoid any permanent changes to rental walls. This approach delivers the full vintage look without violating lease restrictions.
Should I buy original vintage pieces or reproductions?
Original pieces from the 1920s–1960s carry the highest authenticity but cost significantly more and show more wear. Reproductions cost $5–$20 and replicate period designs without the fragility of genuine antiques. A mixed collection — one or two original anchor pieces with reproduction supporting items — balances cost and authenticity. Applying a patina wash to reproductions helps blend the two types visually.
How often should I update my vintage Halloween decor?
Rotate 30–40% of your supporting pieces each season to keep the display visually fresh. Your anchor piece can stay the same year to year without losing impact. Storage rotation between seasons also reduces handling wear on fragile chalkware and paper pieces. A full collection refresh every 3–4 years keeps the display evolving without constant new purchases.
Does vintage Halloween decor work for a modern home?
Vintage Halloween decor works in modern homes when confined to a defined zone like a mantel, entry table, or single shelf. Limiting the display to one area prevents the retro aesthetic from clashing with contemporary furniture throughout the rest of the house. Warm amber lighting in that zone also helps the vintage pieces stand apart intentionally. This contained approach reads as a deliberate design choice rather than a mismatch.
How much does vintage Halloween decor cost?
A basic display costs $100–$250 using mostly reproduction die-cuts and honeycomb pieces. A display with original chalkware and tin litho accents typically runs $300–$600 depending on condition and rarity. Costs concentrate most heavily in the anchor piece, which can range from $40 to $150 alone. Building the collection across multiple seasons spreads this cost over time.
How do I maintain vintage Halloween decorations long-term?
Store paper decorations flat in acid-free sleeves to prevent creasing and acid-related yellowing. Keep chalkware and papier-mâché pieces away from humidity above 50%, which accelerates material breakdown. Handle fragile pieces only when necessary, since repeated handling causes the most chipping over time. Proper storage between seasons preserves both display quality and resale value.
Conclusion
Vintage Halloween decor rewards a curated approach over a purchased-in-bulk one. Start by anchoring your display to a single decade and a three-color palette before adding a single piece. Pick one chalkware or die-cut anchor piece today and build the rest of your collection around it.
A convincing vintage look comes from consistent sourcing and rotation habits, not a single seasonal purchase. Authentic vintage Halloween decor is built one estate sale at a time, not assembled in a single shopping trip.