
Halloween yard ideas transform a plain front lawn into the most talked-about house on the block. The right combination of lighting, props, and pathway styling creates a display that reads as intentional, not thrown together. This guide delivers 26 specific strategies covering foundation planning, lighting, entrances, props, DIY builds, styling, and upkeep. Start with your lighting plan before you buy a single decoration.
[INTERNAL LINK: outdoor holiday lighting guide]
Before You Begin: 4 Foundation Steps for Halloween Yard Decorating
Every strong Halloween yard idea starts with planning, not shopping. These four foundation steps prevent the mismatched, cluttered look that undermines even expensive decor.
1. Choose One Cohesive Halloween Theme Before Buying Decor
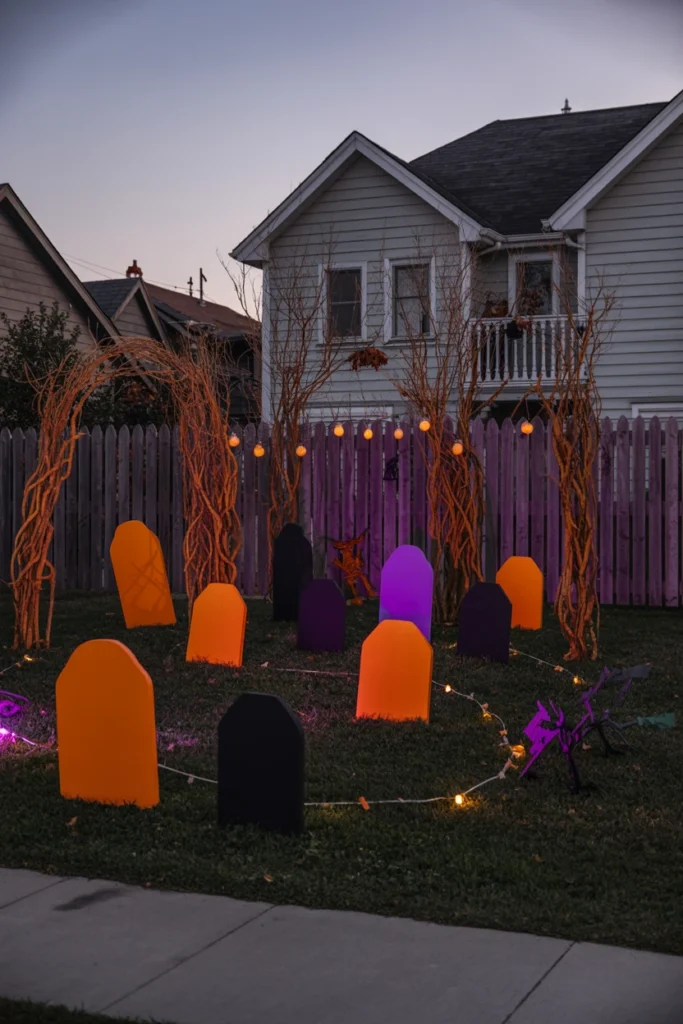
A yard with five competing themes reads as cluttered rather than spooky. Mixing a cute pumpkin-patch look with gory zombie props confuses the eye and dilutes the impact of every individual piece. Committing to one theme immediately makes every future purchase easier and the finished display cohesive.
Start by picking one of three broad categories: classic spooky, cute-family-friendly, or haunted-horror. Stick to a three-color palette within that theme — orange, black, and purple work for classic spooky, while teal, white, and black suit a cute pastel theme. This single decision eliminates the most common yard-decor mistake before you spend a dollar.
| Theme Type | Core Colors | Best Prop Style |
| Classic Spooky | Orange, black, purple | Pumpkins, bats, witches |
| Cute Family-Friendly | Teal, white, pastel orange | Friendly ghosts, smiling pumpkins |
| Haunted Horror | Black, blood red, gray | Tombstones, fog, animatronics |
| Nature Harvest | Amber, brown, deep green | Hay bales, cornstalks, gourds |
2. Measure Your Yard’s Key Focal Zones First
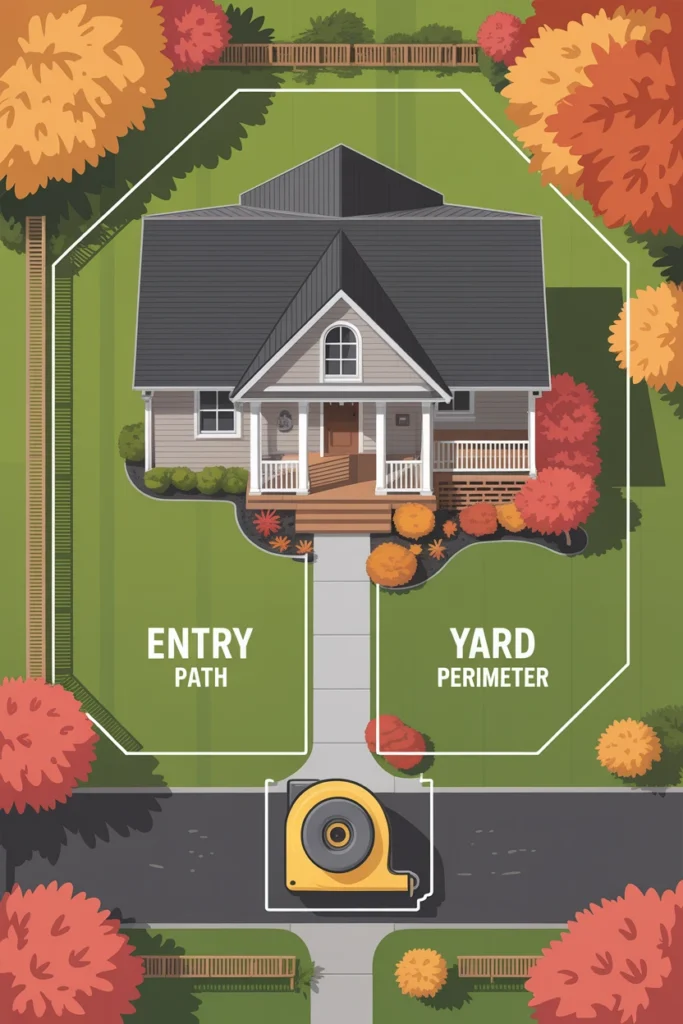
Buying props before measuring your space wastes money on pieces that never fit properly. An oversized 8-foot skeleton in a 10-foot-wide entry crowds the walkway and blocks foot traffic entirely. Measuring first means every prop you buy has an exact, pre-planned home.
Start by walking your property and identifying three zones: the entry path, the porch, and the yard perimeter. Measure each zone’s width in feet, since most large props list their footprint in the product description. This single step prevents the returns and re-shopping that eat up half of most decorating budgets.
| Zone | Typical Width | Recommended Prop Size |
| Entry path | 3–4 feet | Props under 2 feet wide |
| Porch | 6–10 feet | One 4–6 foot focal prop |
| Yard perimeter | 20+ feet | Multiple 3–5 foot props |
| Driveway edge | 8–12 feet | Stake-mounted silhouettes |
3. Build a Decoration Budget Before You Shop
Shopping without a set budget leads to overspending on impulse buys that don’t match your theme. A single animatronic prop can run $80–$150, which quickly consumes an entire decorating budget if bought first. Setting a number in advance forces smarter prioritization toward the pieces with the biggest visual impact.
Start by splitting your total budget into three categories: 40% lighting, 35% props, and 25% pathway and finishing touches. This split works because lighting affects visibility after dark, when most trick-or-treaters actually see your display. Sticking to this ratio consistently produces a more balanced display than spending everything on one large prop.
| Budget Tier | Total Spend | Lighting Allocation | Prop Allocation |
| Starter | $50–$100 | $20–$40 | $17–$35 |
| Standard | $150–$250 | $60–$100 | $52–$87 |
| Elevated | $300–$500 | $120–$200 | $105–$175 |
| Full Display | $600+ | $240+ | $210+ |
4. Map Your Power Source Locations Before Placing Lights
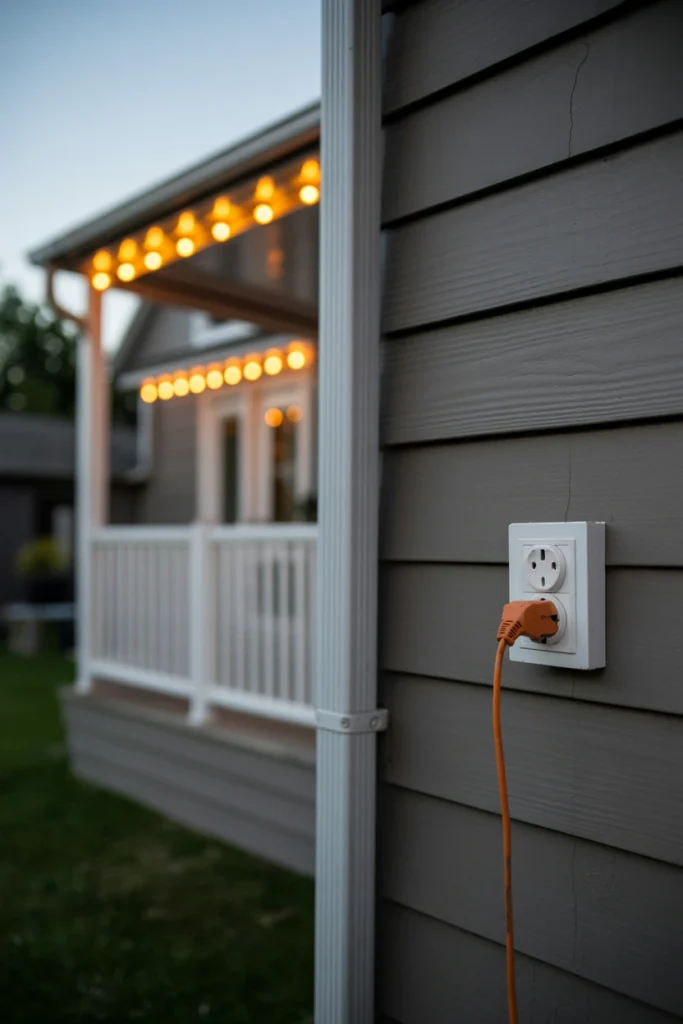
Discovering a lack of outdoor outlets after buying plug-in lights forces last-minute compromises. Extension cords running across walkways create a tripping hazard and a visibly messy setup. Mapping outlets first means every lighting decision accounts for real electrical limits.
Start by locating every exterior outlet and testing it with a lamp or phone charger. Note the exact distance in feet from each outlet to your planned prop and lighting zones, since most outdoor extension cords max out around 25 feet safely. This step alone prevents the scramble of running to the hardware store on October 30th.
| Outlet Location | Safe Cord Length | Best Use |
| Front porch outlet | Up to 15 feet | Porch lighting, small animatronics |
| Garage outlet | Up to 25 feet | Driveway and pathway lights |
| Side-yard outlet | Up to 15 feet | Perimeter uplighting |
| Solar (no outlet) | Unlimited | Pathway markers, distant zones |
Layer Outdoor Lighting for Maximum Spooky Ambiance
Lighting determines whether your Halloween yard ideas actually read as spooky after dark. Layering three light types — uplighting, string lights, and flame-effect bulbs — creates depth that a single porch light never achieves.
5. Install Orange and Purple Uplights Along the Foundation
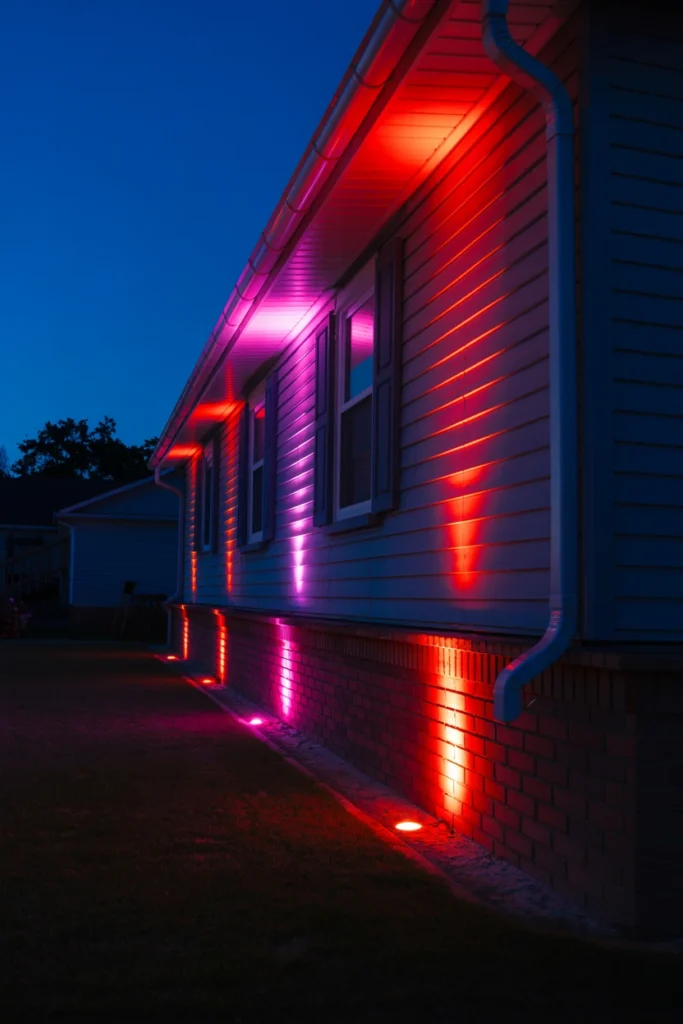
A yard lit only by a single white porch bulb looks flat and uninviting to trick-or-treaters. Standard white light also washes out props, making expensive decorations look cheap and undefined against the house. Colored uplighting instantly gives every prop dimension and a genuinely eerie glow.
Start by placing color-changing LED spotlights every 4–6 feet along your home’s foundation, angled upward. Set them to alternate orange and purple, since this specific combination reads as “Halloween” more reliably than red or green. The unexpected bonus is that these same lights double as year-round accent lighting for Christmas or spring displays.
| Light Placement | Spacing | Color Combo |
| Foundation line | Every 4–6 feet | Orange + purple |
| Tree trunks | 1 per tree | Purple only |
| Bush clusters | 1 per cluster | Orange only |
| Porch columns | 1 per column | Orange + green |
6. Hang String Lights Behind Silhouette Cutouts
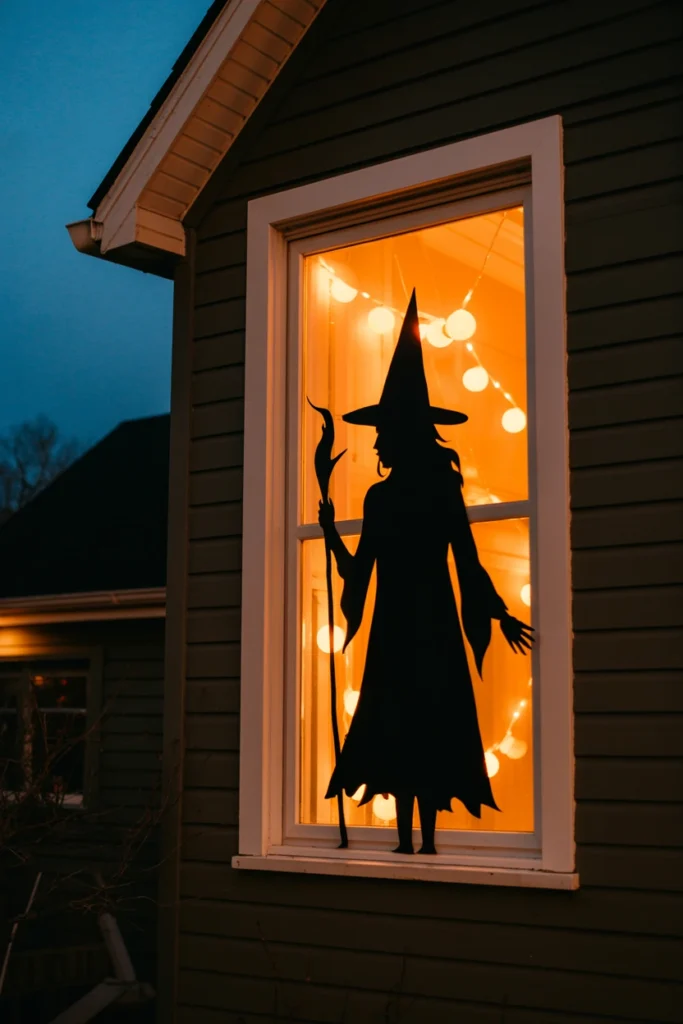
Flat cardboard silhouettes look cheap and two-dimensional in direct daylight photos. Without backlighting, these same silhouettes disappear entirely once the sun sets, wasting the money spent on them. Backlighting with string lights transforms a flat cutout into a dramatic glowing shape visible from the street.
Start by mounting black silhouette cutouts — witches, cats, or bats — against a window or white fence panel. Hang orange string lights 6–8 inches directly behind the cutout, since that specific distance creates a defined glow without blowing out the shape entirely. This creates a striking contrast where the daytime prop disappears and an entirely new nighttime display emerges.
| Silhouette Type | Light Distance | Best Backdrop |
| Witch on broom | 6–8 inches | White curtain or sheet |
| Black cat arch | 4–6 inches | Window glass |
| Bat cluster | 8–10 inches | Fence panel |
| Flying ghost | 10–12 inches | Garage door |
7. Add Flickering Flame-Effect Bulbs to Porch Fixtures
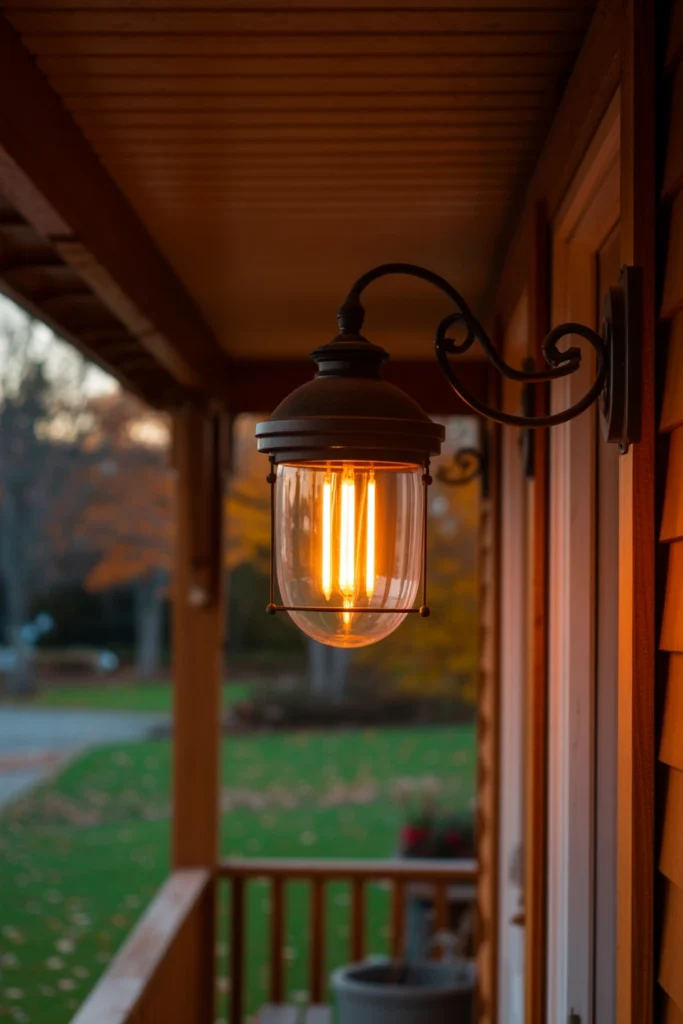
Standard steady-burning porch bulbs feel sterile and out of place next to spooky decor. A static light source undercuts the atmosphere that props and fog are working to create. Flame-effect bulbs immediately add movement and unpredictability that static lighting can never replicate.
Start by swapping your existing porch bulbs for flame-effect LED bulbs, which fit standard E26 sockets without any rewiring. Choose bulbs rated for outdoor use with at least IP44 water resistance, since exposed porch fixtures face direct weather. The unexpected bonus is that these bulbs use significantly less energy than the incandescent bulbs most people already have installed.
| Bulb Type | Socket Fit | Weather Rating |
| Flame-effect LED | Standard E26 | IP44 minimum |
| Flicker-flame torch | E26 or E12 | IP65 recommended |
| Color-changing flame | Standard E26 | IP44 minimum |
| Solar flame stake | No socket needed | IP65 |
8. Place Solar Pathway Lights Every 3 Feet
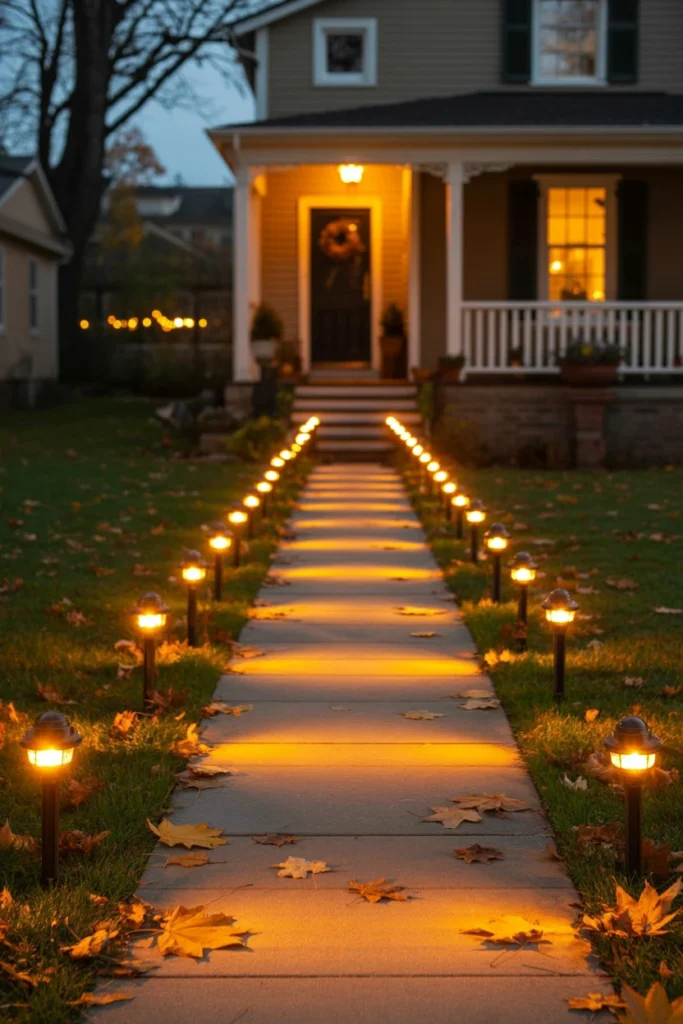
A dark, unlit walkway is both a safety hazard and a missed decorating opportunity. Trick-or-treaters walking a shadowed path move cautiously and often skip houses that feel unsafe to approach. Evenly spaced pathway lighting solves the safety issue while doubling as a decorative guide toward your door.
Start by placing solar stake lights every 3 feet along both sides of your front walkway. Choose orange or amber-toned solar lights over plain white, since the warmer tone matches the Halloween palette without requiring any wiring. This spacing creates a runway effect that pulls visitors’ eyes directly toward your porch display.
| Path Length | Lights Needed (3 ft spacing) | Recommended Color |
| 10 feet | 6–7 lights | Amber |
| 20 feet | 12–14 lights | Orange |
| 30 feet | 18–20 lights | Orange or purple |
| Curved path | Add 2 extra per curve | Amber |
Design an Entrance and Pathway Display That Draws Guests In
The entrance is the single most photographed and most scrutinized part of any Halloween yard idea. A strong pathway display builds anticipation before a visitor ever reaches the door.
9. Build a Graveyard Scene Along the Front Walkway
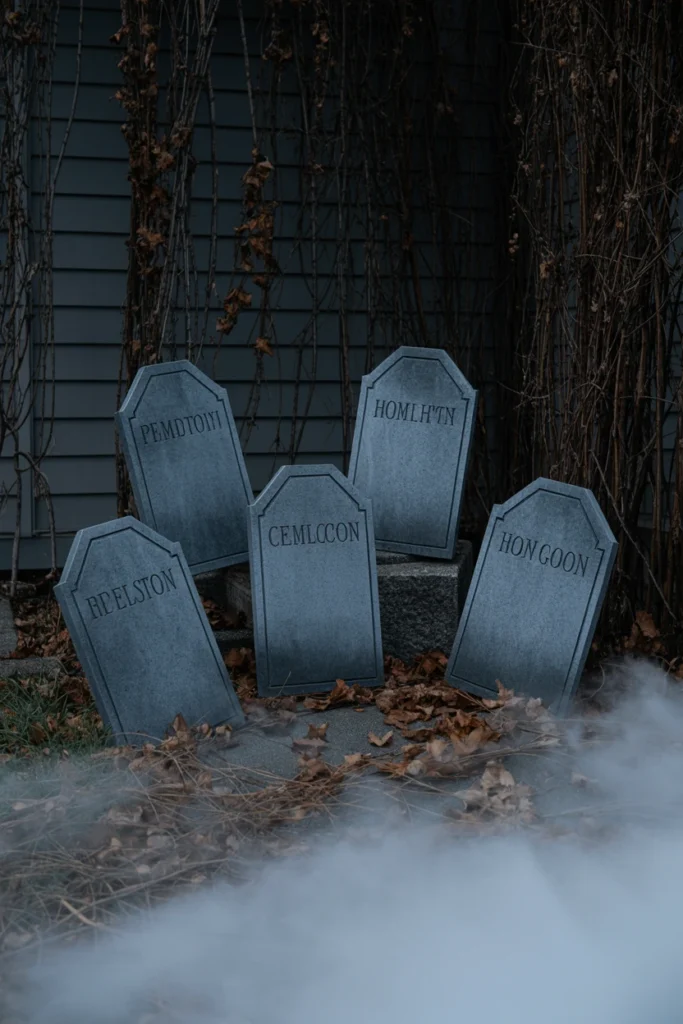
A single tombstone placed randomly on the lawn looks like an afterthought rather than a design choice. Isolated props without surrounding context read as sparse no matter how much they individually cost. A clustered graveyard scene turns the same props into an immersive, cohesive moment.
Start by placing 4–6 foam tombstones in a loose cluster 3–4 feet off the main walkway, angled at slightly different tilts. Add a few artificial vines or dry branches between the stones, since uniform upright placement looks staged rather than aged. The unexpected bonus is that this same cluster works as a photo backdrop that guests actively stop to use.
| Graveyard Size | Tombstone Count | Cluster Width |
| Small accent | 3–4 | 3 feet |
| Standard scene | 5–7 | 5 feet |
| Large display | 8–12 | 8–10 feet |
| Full-yard feature | 12+ | 15+ feet |
10. Frame Your Door With an Oversized Spider Web
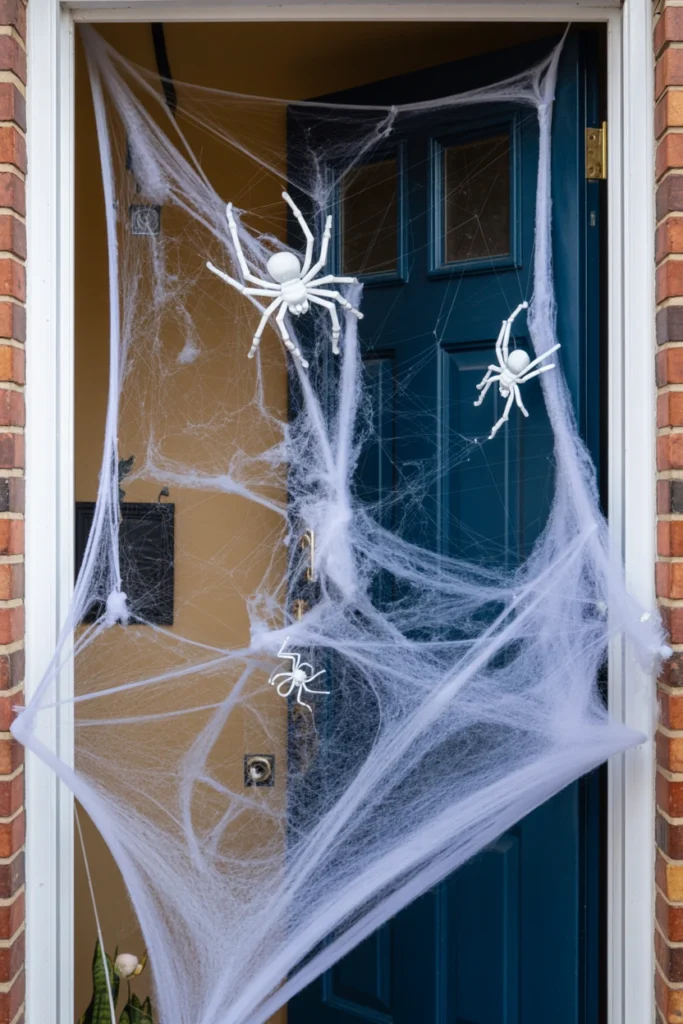
A front door with no framing element gets visually lost against the rest of the porch. Small, single-strand fake webs look flimsy and tear within the first week of wind exposure. An oversized web stretched across the doorframe immediately becomes the anchor point guests notice first.
Start by stretching a stretchable synthetic web material across the full width of your doorframe, securing corners with removable hooks. Add 2–3 plastic spiders of varying sizes across the web, since uniform spider sizing looks less realistic than a mix. This single addition creates the strongest first impression of the entire entrance sequence.
| Web Size | Doorframe Width | Spider Count |
| Small door | 3 feet | 2 spiders |
| Standard door | 4 feet | 3 spiders |
| Double door | 6–7 feet | 4–5 spiders |
| Porch overhang | 8+ feet | 6+ spiders |
11. Line the Path With Glowing Jack-o’-Lanterns
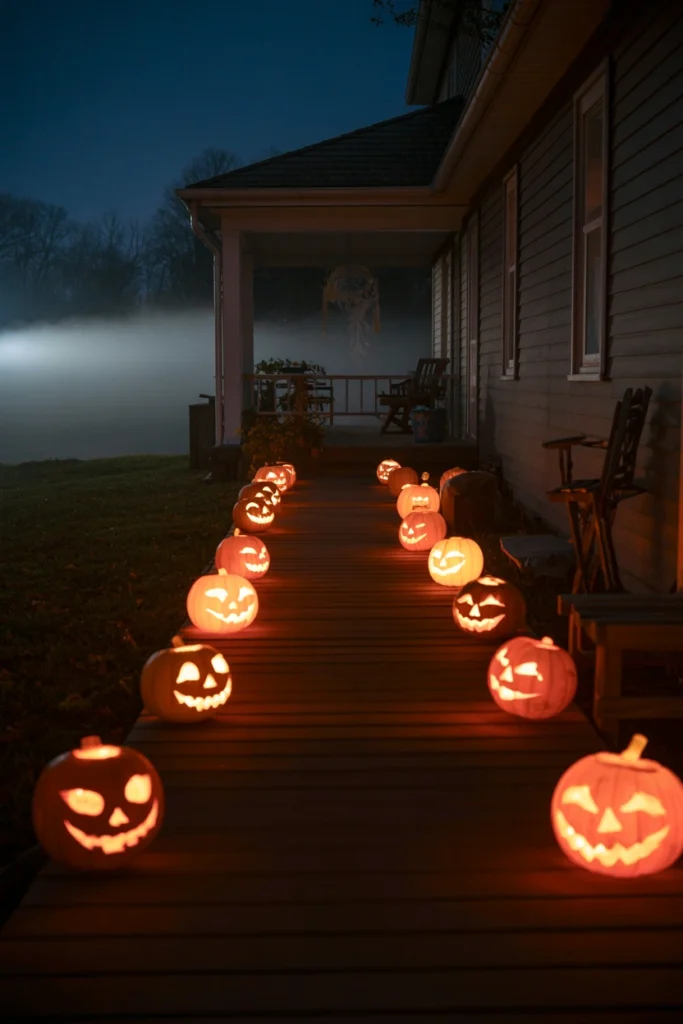
An unlit pumpkin on a porch step disappears into shadow within an hour of sunset. Real carved pumpkins without a light source also rot faster once condensation builds inside the hollow shell. LED-lit jack-o’-lanterns solve both problems while extending visibility down the entire path.
Start by placing battery-powered LED pumpkin lights inside real or artificial pumpkins spaced every 4 feet along the walkway. Use flickering-orange LED inserts rather than steady white bulbs, since the flicker effect reads as candlelight from the street. This spacing creates a continuous glowing line that guides visitors from the sidewalk directly to your door.
| Path Style | Pumpkin Spacing | Light Type |
| Short path | Every 3 feet | Flicker LED |
| Standard path | Every 4 feet | Flicker LED |
| Curved path | Every 3–4 feet, inside curve | Color-changing LED |
| Steps only | 1 per step edge | Steady warm LED |
12. Anchor the Porch With a Large Focal Prop
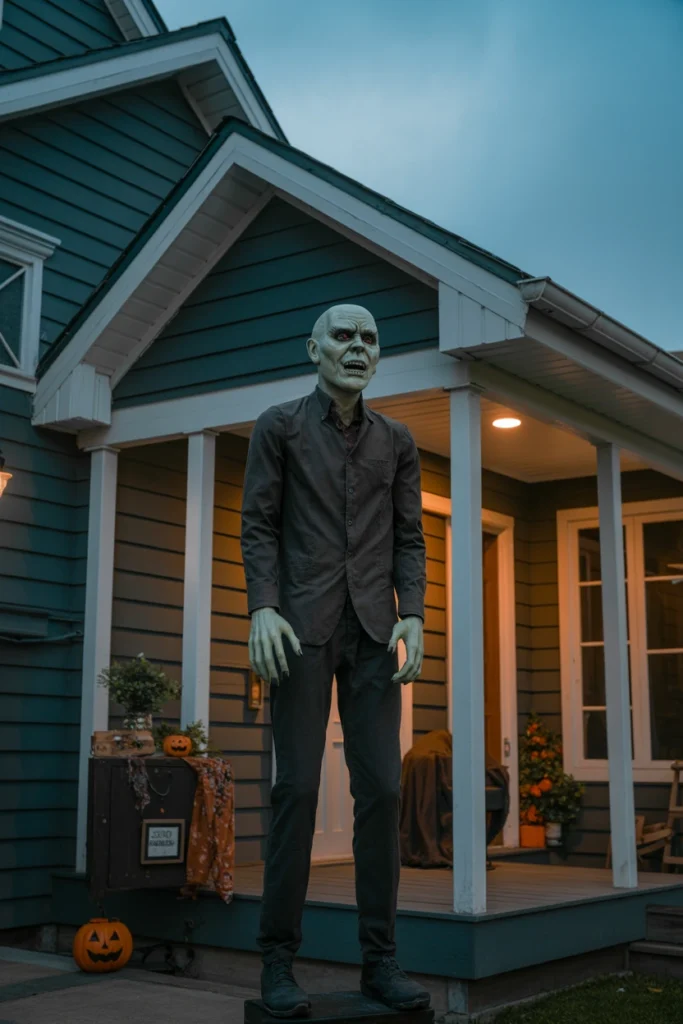
A porch filled with many small props but no clear centerpiece looks busy without looking intentional. Visitors’ eyes need one dominant element to land on before scanning the smaller details. A single large focal prop — 5 feet or taller — gives the entire porch a visual anchor point.
Start by placing one animatronic or oversized prop directly centered on the porch, at least 3 feet from any doorway traffic path. Choose a prop with movement or sound, since static large props lose impact faster than ones with built-in motion. The unexpected bonus is that a strong focal prop reduces the need to buy as many smaller filler pieces.
| Porch Width | Focal Prop Height | Placement |
| 6–8 feet | 4–5 feet | Off-center, away from door |
| 8–10 feet | 5–6 feet | Centered |
| 10–14 feet | 6–7 feet | Centered, elevated on step |
| 14+ feet | 7+ feet | Two focal props, symmetrical |
Add Spooky Characters and Props Without Looking Cluttered
Props carry most of the visual weight in any Halloween yard idea, but poor placement turns a strong collection into visual noise. These strategies keep character props looking curated rather than crowded.
13. Group Props in Odd-Numbered Clusters for Visual Impact
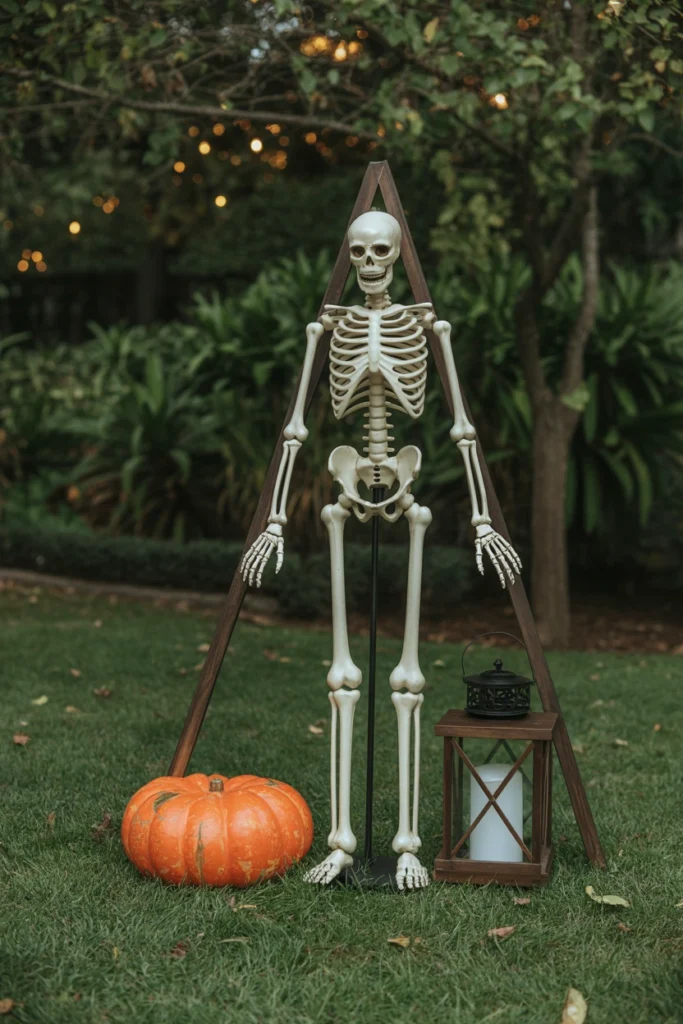
Props placed in pairs or evenly spaced rows read as staged and mechanical. Even-numbered groupings create a symmetry that feels artificial rather than naturally collected. Odd-numbered clusters of three or five immediately read as more organic and intentional.
Start by regrouping any existing pairs of props into clusters of three, adding one small filler item like a lantern or skull if needed. Vary the height within each cluster of three, since uniform height flattens the visual interest odd grouping is meant to create. This single rearrangement makes an existing prop collection look more expensive without spending anything new.
| Cluster Size | Height Variation | Best Use |
| 3 props | Low-medium-high | Small yard corner |
| 5 props | 2 low, 2 medium, 1 high | Larger lawn feature |
| 7 props | Staggered, no repeats | Full-yard centerpiece |
| Single statement | N/A | Porch focal point only |
14. Position Animatronics at Eye Level for Maximum Scare Factor
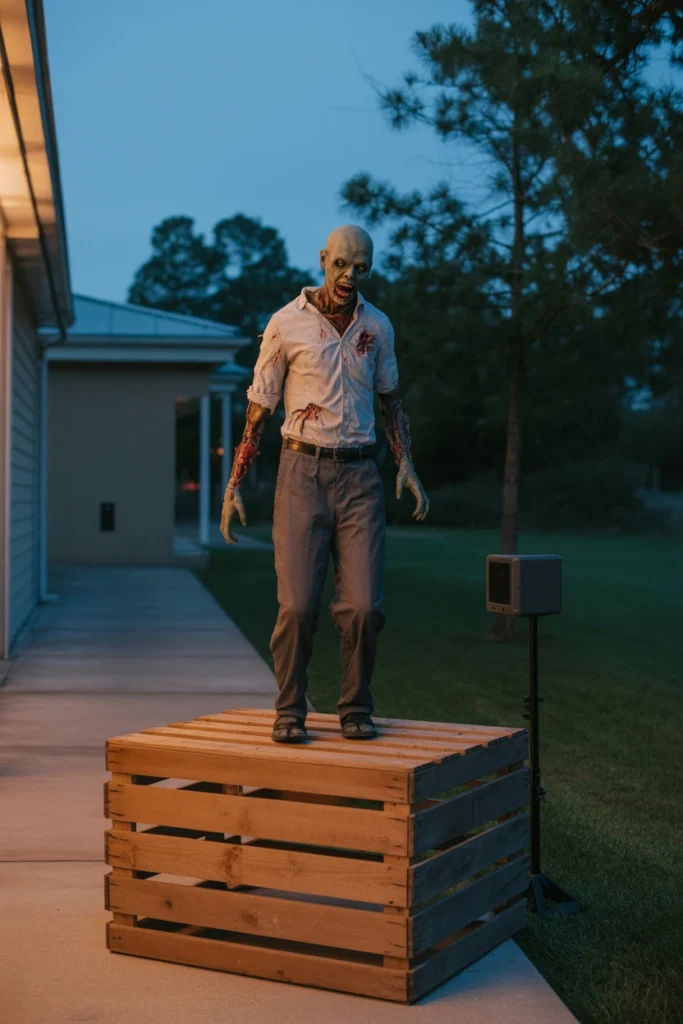
Animatronic props placed on the ground lose most of their scare impact on adult visitors. A prop positioned below hip height reads as decorative rather than genuinely startling. Raising animatronics to eye level dramatically increases the reaction they get from every visitor.
Start by placing motion-activated animatronics on a stand, crate, or step that brings the head to roughly 5 feet off the ground. Position the motion sensor to trigger within 3–4 feet of the walkway, since a longer trigger range causes false activations from passing cars. The unexpected bonus is that eye-level placement also makes the prop easier to photograph for social media shares.
| Prop Height Goal | Stand Needed | Sensor Range |
| 5 feet (adult eye level) | 12–18 inch riser | 3–4 feet |
| 4 feet (child eye level) | 6–12 inch riser | 2–3 feet |
| Ground-level crawler | No riser | 2 feet |
| Hanging prop | Overhang mount | 4–5 feet |
15. Layer Props at Three Different Heights
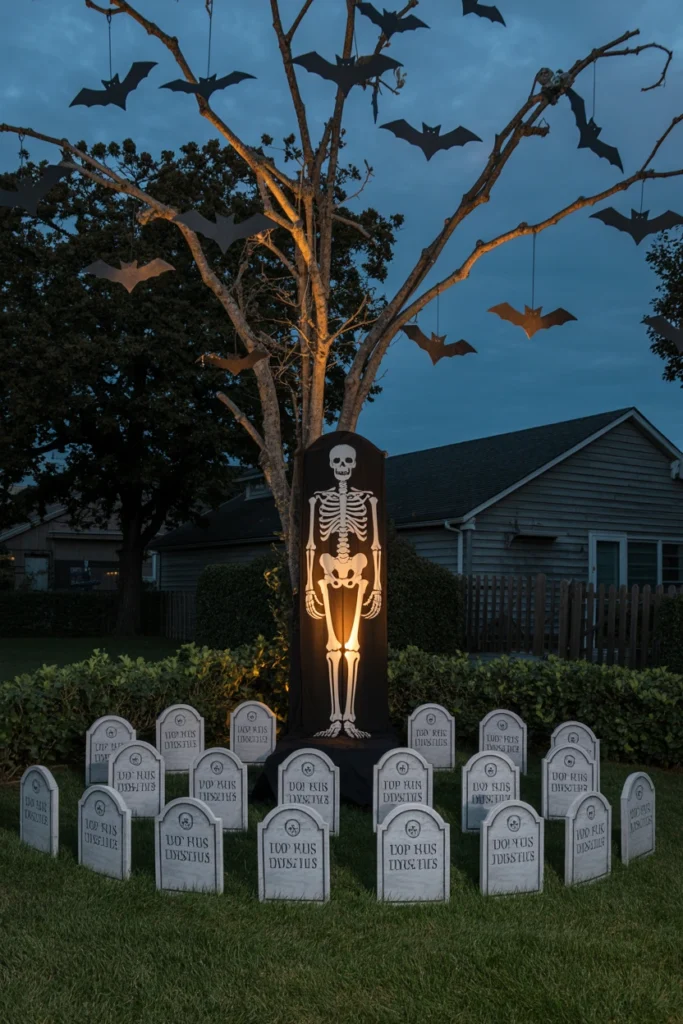
A yard with every prop sitting flat on the ground looks visually flat regardless of quality. Single-height displays fail to create the depth that makes a photograph or drive-by view feel dimensional. Layering props across three heights — ground, mid, and elevated — builds a display with real visual depth.
Start by identifying your ground-level items (tombstones, pumpkins), mid-level items (2–3 foot statues), and elevated items (hanging bats, porch-mounted props). Use tree branches, shepherd’s hooks, or window ledges to create the elevated layer, since most yards lack a natural high point otherwise. This three-tier layering is the single most effective way to make a modest prop budget look like a much larger display.
| Height Tier | Range | Example Props |
| Ground | 0–2 feet | Tombstones, pumpkins, spiders |
| Mid | 2–4 feet | Standing skeletons, cauldrons |
| Elevated | 4–8 feet | Hanging bats, ghost silhouettes |
| Extreme height | 8+ feet | Inflatable towers, tree toppers |
16. Limit Your Prop Count to One Per 50 Square Feet
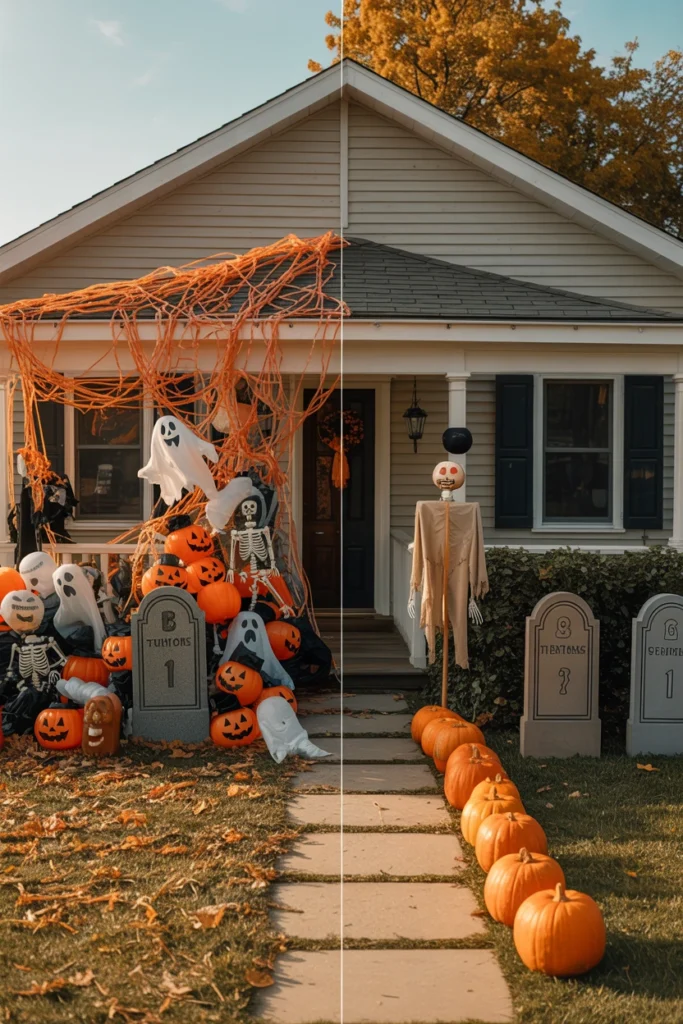
Overcrowding a yard with props creates visual chaos that hides your best individual pieces. Too many props packed into a small space also blocks clear walking paths for trick-or-treaters. Limiting density to roughly one prop per 50 square feet keeps the display readable and each piece visible.
Start by calculating your total yard display area in square feet, then dividing by 50 to get your target prop count. Remove or store any props beyond that number rather than squeezing them all in, since restraint consistently reads as more expensive than abundance. This feels counterintuitive until you see how the reduced clutter makes your remaining props stand out individually.
| Yard Size | Square Footage | Max Prop Count |
| Small (patio/porch) | 100 sq ft | 2 props |
| Medium yard | 300 sq ft | 6 props |
| Large yard | 600 sq ft | 12 props |
| Extra-large lot | 1,000+ sq ft | 20 props |
Create Budget-Friendly DIY Halloween Yard Decor
Store-bought props are not required to build an effective Halloween yard idea. These four DIY builds use inexpensive materials to produce display-quality results.
17. Cut Tombstone Shapes From Foam Insulation Board
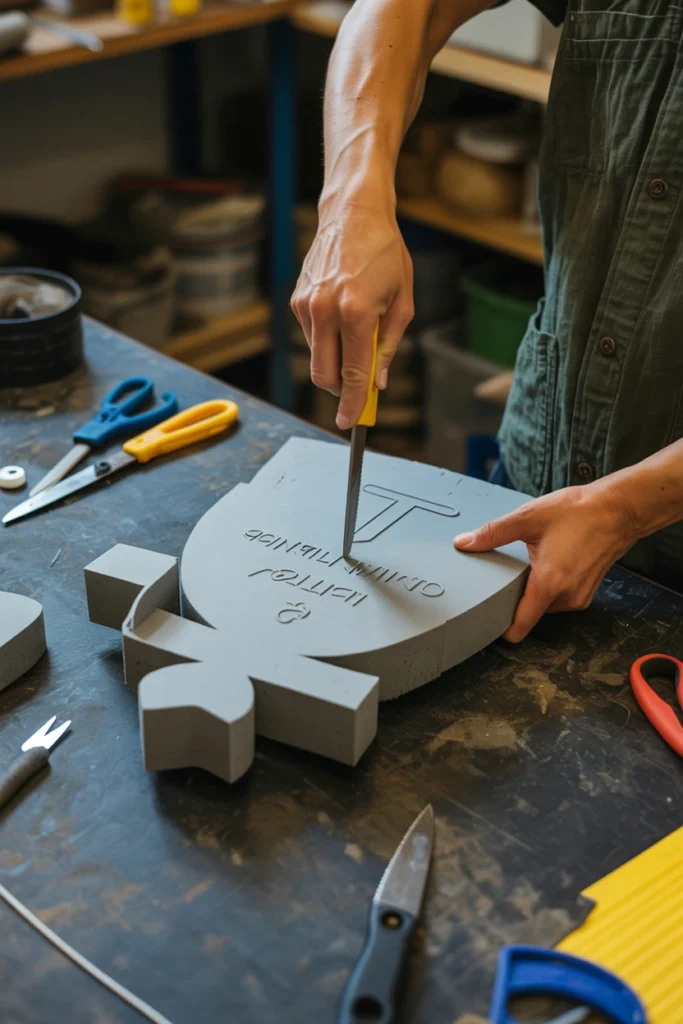
Store-bought foam tombstones often cost $15–$25 each, adding up fast for a full graveyard scene. Buying six or more pre-made tombstones can consume an entire decorating budget on one section of the yard. Cutting your own from insulation board reduces the per-piece cost to under $3.
Start by buying a 4×8 foot sheet of 1-inch rigid foam insulation board from any hardware store. Sketch tombstone outlines directly on the board and cut with a serrated kitchen knife or hot wire cutter, since a standard box cutter struggles with the thickness. The unexpected bonus is that one sheet typically yields 6–8 tombstones, dramatically undercutting the store-bought price per piece.
| Board Size | Cost | Tombstones Yielded |
| 2×2 feet | $5–$8 | 2 |
| 4×4 feet | $10–$12 | 4 |
| 4×8 feet | $18–$25 | 6–8 |
| 4×8 feet, thick 2-inch | $30–$35 | 6–8, more durable |
18. Reuse Cardboard Boxes as Weatherproof Prop Bases
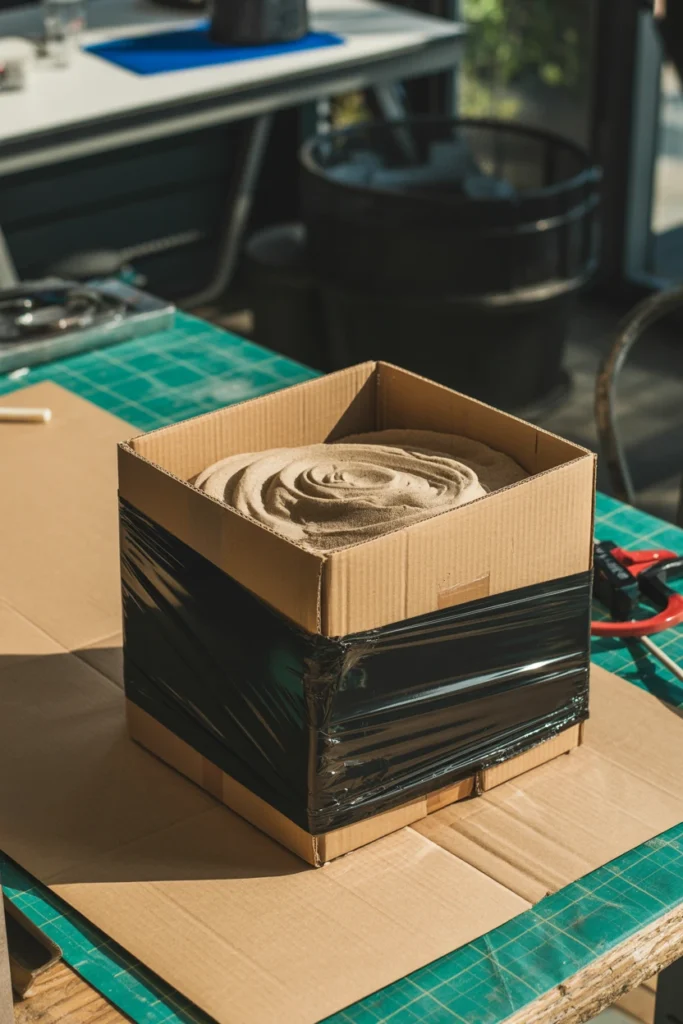
Small props often tip over in wind without a weighted, stable base underneath. Buying commercial prop bases adds $10–$20 per prop to an already stretched budget. Reused cardboard boxes filled with sand or rocks create a free, stable base for almost any lightweight prop.
Start by collecting cardboard boxes roughly 12×12×12 inches and filling each halfway with sand, gravel, or old newspaper. Seal the box completely with waterproof packing tape, then wrap it in black plastic sheeting before placing it outdoors. This creates a base sturdy enough to anchor a 4-foot prop through moderate wind without any cash spent on materials.
| Prop Weight | Box Size | Fill Material |
| Light (under 2 lbs) | 8×8×8 in | Newspaper |
| Medium (2–5 lbs) | 12×12×12 in | Sand |
| Heavy (5–10 lbs) | 16×16×16 in | Sand + gravel mix |
| Extra heavy (10+ lbs) | 18×18×18 in | Gravel + concrete mix |
19. Make Ghost Silhouettes From Black Trash Bags
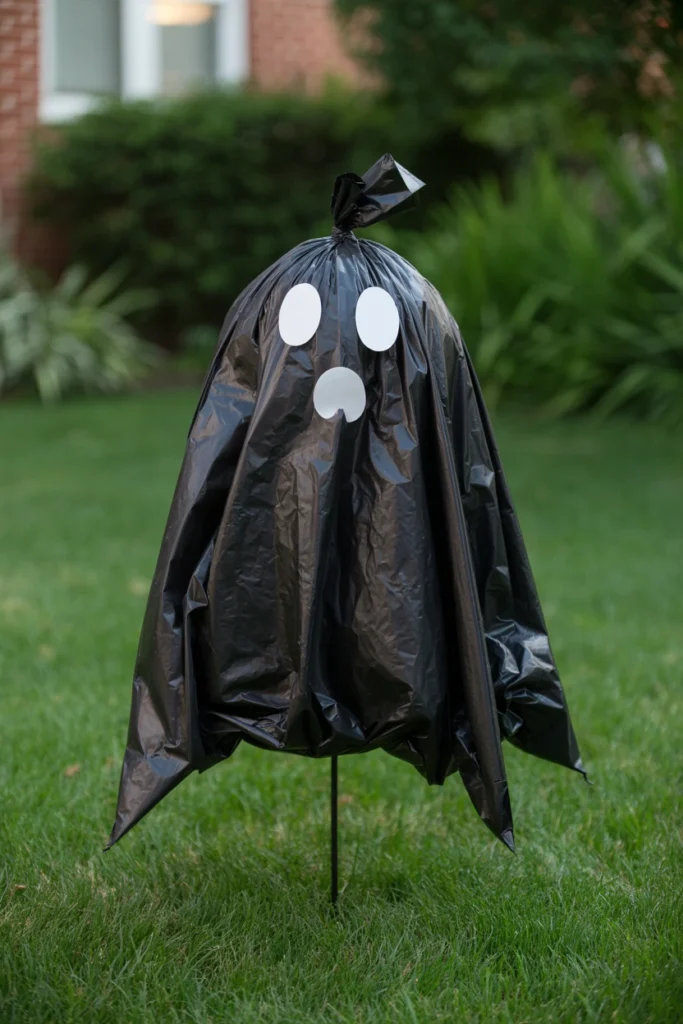
Fabric ghost silhouettes purchased online often cost $8–$15 per figure and require special ordering time. Waiting on shipping means these props frequently arrive after Halloween has already passed. Black trash bags stuffed and shaped into ghost forms produce a nearly identical silhouette for under $2 each.
Start by cutting a large black trash bag into a rounded ghost-head shape, then stuffing the top third loosely with plastic bags or newspaper for form. Attach the shaped head to a wooden dowel or garden stake pushed 6 inches into the ground, letting the unstuffed lower portion drape naturally. The unexpected bonus is that these silhouettes move realistically in wind, an effect that rigid store-bought props can’t replicate.
| Bag Size | Ghost Height | Cost per Ghost |
| 13-gallon bag | 2 feet | $0.50 |
| 30-gallon bag | 3–4 feet | $1.00 |
| 55-gallon bag | 5–6 feet | $2.00 |
| Two bags combined | 6–7 feet | $2.50 |
20. Stuff Old Clothes for Life-Sized Scarecrow Figures
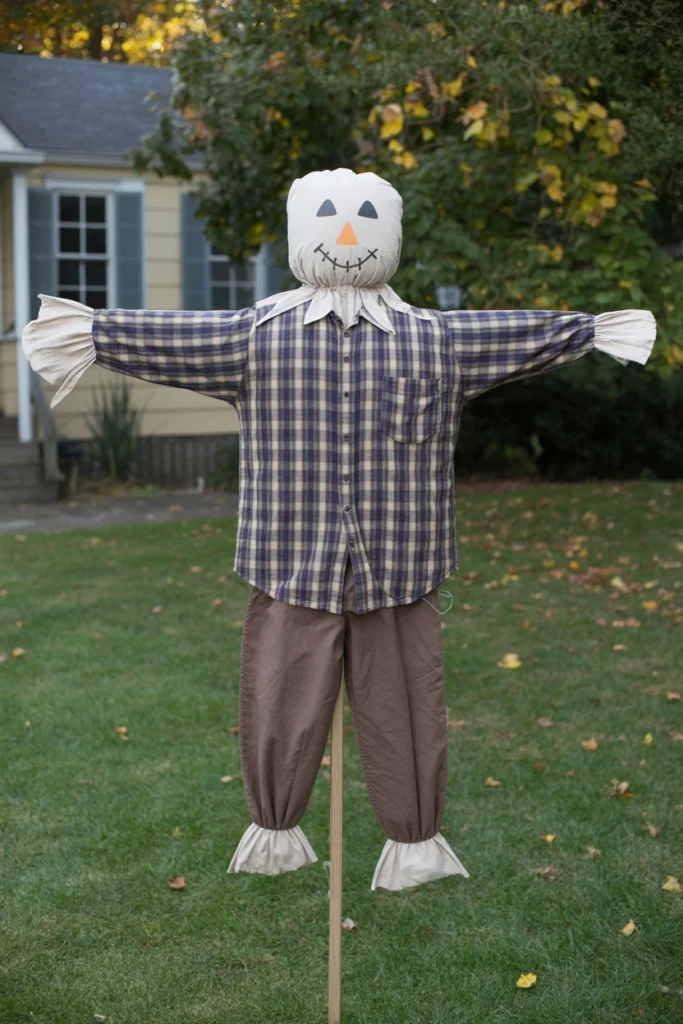
Life-sized props at retail cost $40–$100 for a single figure, often the largest single line item in a decorating budget. A scarecrow-style figure built from clothes you already own achieves a comparable visual scale for nearly free. This makes a large-scale display possible even on the tightest budget tier.
Start by stuffing an old long-sleeve shirt and pants with plastic grocery bags or straw, then joining them at the waist with safety pins. Mount the stuffed figure on a wooden stake driven into the ground, positioning a stuffed pillowcase or mask as the head. The unexpected bonus is that this same technique repurposes clothing you were already planning to donate or discard.
| Figure Height | Stuffing Material | Mounting Method |
| 4 feet (seated) | Grocery bags | Chair or bucket |
| 5 feet (standing) | Straw or hay | 6-foot garden stake |
| 6 feet (standing) | Straw + pool noodle frame | 7-foot wooden post |
| Multiple figures | Mixed materials | Staggered stakes, 3 feet apart |
Style and Finish Your Halloween Yard Display
The finishing layer separates a good Halloween yard idea from a genuinely memorable one. These three touches add texture and atmosphere on top of your core lighting and props.
21. Coordinate Your Color Palette to Three Shades Maximum
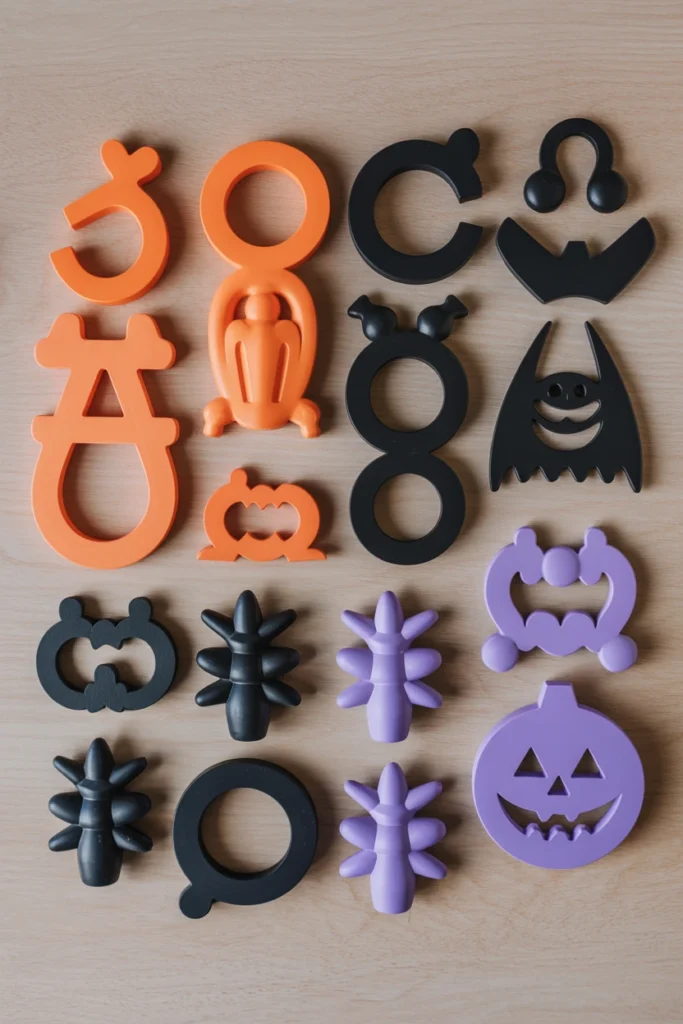
A yard using every available Halloween color at once looks chaotic instead of cohesive. Random color combinations distract from the props themselves rather than highlighting them. Limiting your palette to exactly three shades creates a display that photographs and reads as professionally designed.
Start by auditing every prop, light, and decoration you own and sorting them by dominant color. Remove or store items that fall outside your chosen three-color palette, even if they’re otherwise appealing pieces. This restraint consistently produces a more polished result than adding every colorful item you have available.
| Palette Name | Three Colors | Best Overall Theme |
| Classic | Orange, black, purple | Traditional spooky |
| Ghostly | White, gray, black | Haunted horror |
| Harvest | Amber, brown, deep green | Nature/rustic |
| Witchy | Purple, black, lime green | Fantasy/whimsical |
22. Add Fog Effects Near Ground-Level Props

Static ground-level props like tombstones and pumpkins lack the sense of movement that makes a display feel alive. Without atmospheric effects, even a well-designed graveyard scene reads as a flat photo rather than an immersive scene. Ground fog rolling around the base of props instantly creates depth and motion after dark.
Start by placing a fog machine or dry-ice-and-water setup at the center of your prop cluster, angled to spread fog low across the ground. Run the machine in short 30-second bursts every 5–10 minutes rather than continuously, since constant fog obscures the props it’s meant to enhance. The unexpected bonus is that fog also diffuses your colored lighting, spreading the orange and purple glow further across the yard.
| Fog Method | Coverage Area | Run Interval |
| Small fog machine | 5×5 feet | 30 sec every 10 min |
| Large fog machine | 10×10 feet | 30 sec every 5 min |
| Dry ice + water | 8×8 feet | Continuous, low output |
| Fog fluid + fan | 12×12 feet | 20 sec every 8 min |
23. Layer Natural Elements Like Hay Bales and Cornstalks
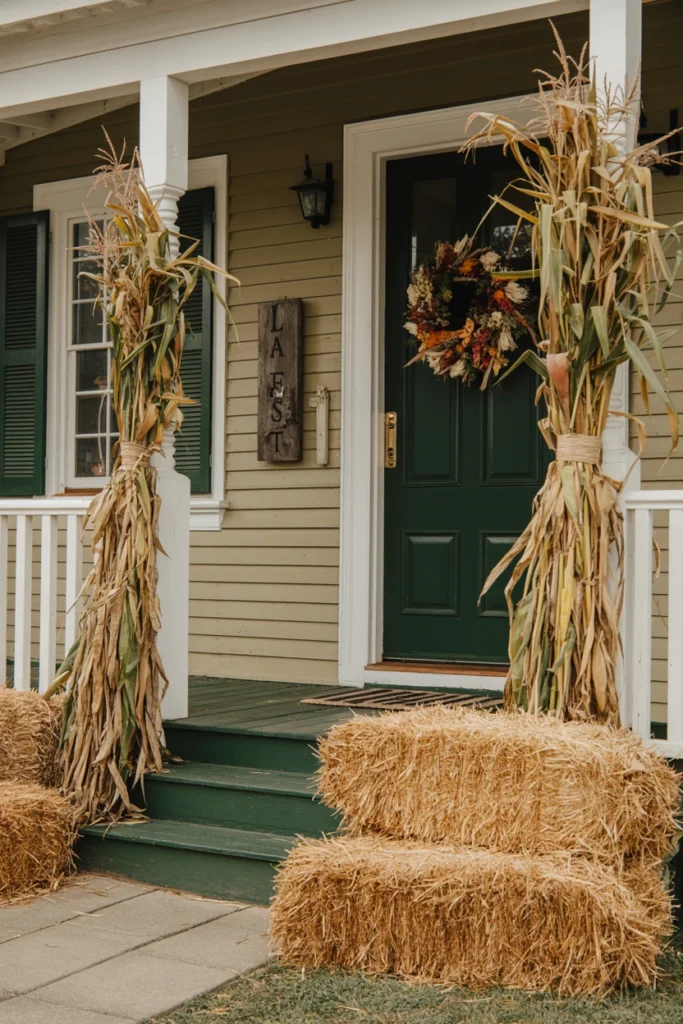
An all-plastic display of props and lights can feel artificial regardless of how well it’s arranged. Missing natural textures leaves a display looking one-dimensional compared to yards that mix organic materials in. Hay bales and cornstalks add texture and scale that manufactured props alone cannot replicate.
Start by placing 1–2 hay bales near your entryway as a seating or staging surface, then bundling 3–4 cornstalks upright beside your door using twine. Position these natural elements at the transition points of your display, such as the start of the walkway or the porch steps. This creates a visual and textural contrast where plastic props feel more grounded next to real organic material.
| Natural Element | Quantity | Placement |
| Hay bale | 1–2 | Entryway or porch step |
| Cornstalk bundle | 2–4 bundles | Flanking the front door |
| Mini pumpkins | 6–10 | Scattered along path edge |
| Dried branches | 3–5 | Woven into prop clusters |
Maintain Your Halloween Yard Display Through the Season
A Halloween yard idea that looks great on October 1st can deteriorate significantly by Halloween night without upkeep. These maintenance habits protect your investment across the full decorating season.
24. Check Battery-Powered Props Every 3 Days
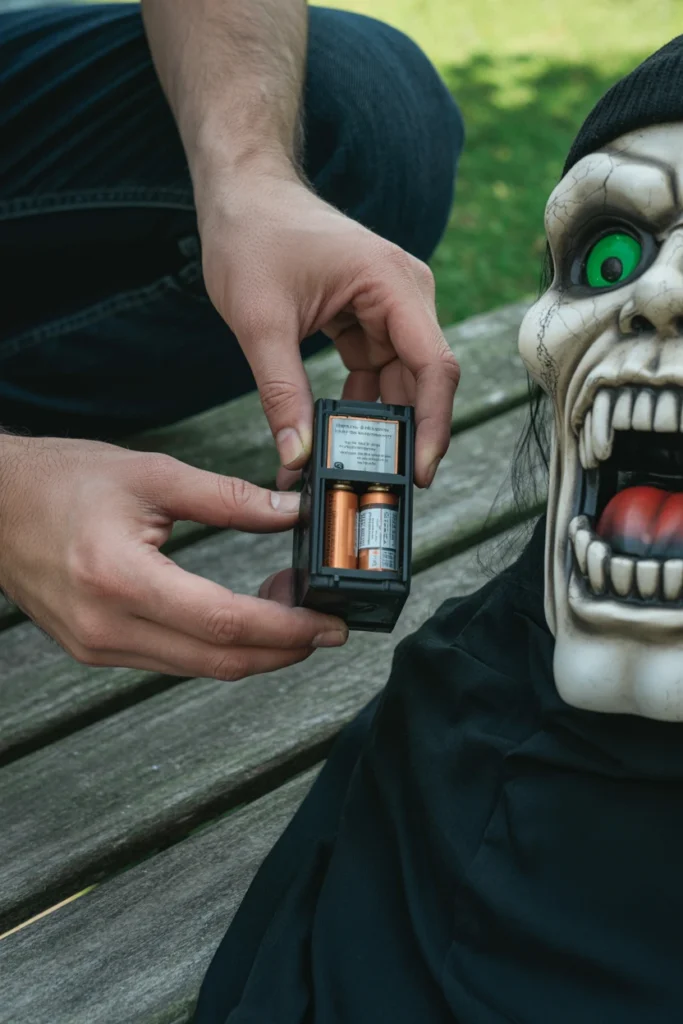
Battery-powered animatronics and lights silently die mid-display without any warning signal. A prop that stops moving or lighting up after the first week undermines the display for weeks without your notice. Checking batteries on a fixed schedule catches failures before they become visible to trick-or-treaters.
Start by setting a recurring reminder every 3 days to test each battery-powered prop for full function. Replace batteries proactively at the 3-day mark for high-use items rather than waiting for total failure, since partial battery life often causes flickering or slow movement first. This habit ensures every prop performs at full strength specifically on Halloween night itself.
| Prop Type | Check Frequency | Typical Battery Life |
| String lights | Every 3 days | 5–7 days |
| Small animatronics | Every 3 days | 4–6 days |
| Motion sensors | Every 5 days | 7–10 days |
| Sound-effect props | Every 2 days | 3–5 days |
25. Replace Weather-Damaged Decor Within 24 Hours
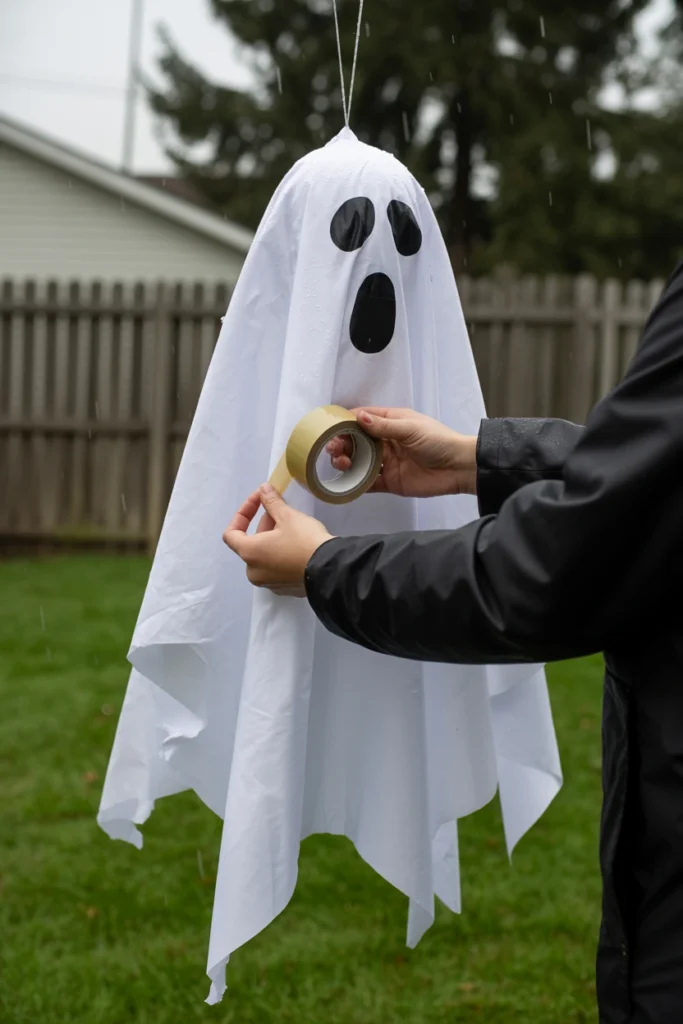
A single rain-soaked or wind-toppled prop left in place signals neglect across the entire display. Leaving damaged decor visible for multiple days undermines the impression built by every other well-maintained element. Replacing or repairing damage within 24 hours keeps the display consistently presentable.
Start by doing a quick visual walk-through each morning after overnight wind or rain to spot toppled, torn, or faded items. Keep backup tape, stakes, and spare small props on hand specifically for same-day fixes rather than waiting for a shopping trip. The unexpected bonus is that this daily check also catches loose wiring or tripping hazards before they become a safety issue.
| Damage Type | Fix Timeline | Quick Fix Method |
| Toppled prop | Same day | Re-stake with extra weight |
| Torn silhouette | Within 24 hours | Tape patch or replace |
| Faded color | Within 3 days | Repaint or swap panel |
| Water-damaged electronics | Same day | Move indoors, dry, retest |
26. Store Props Off the Ground Between Uses
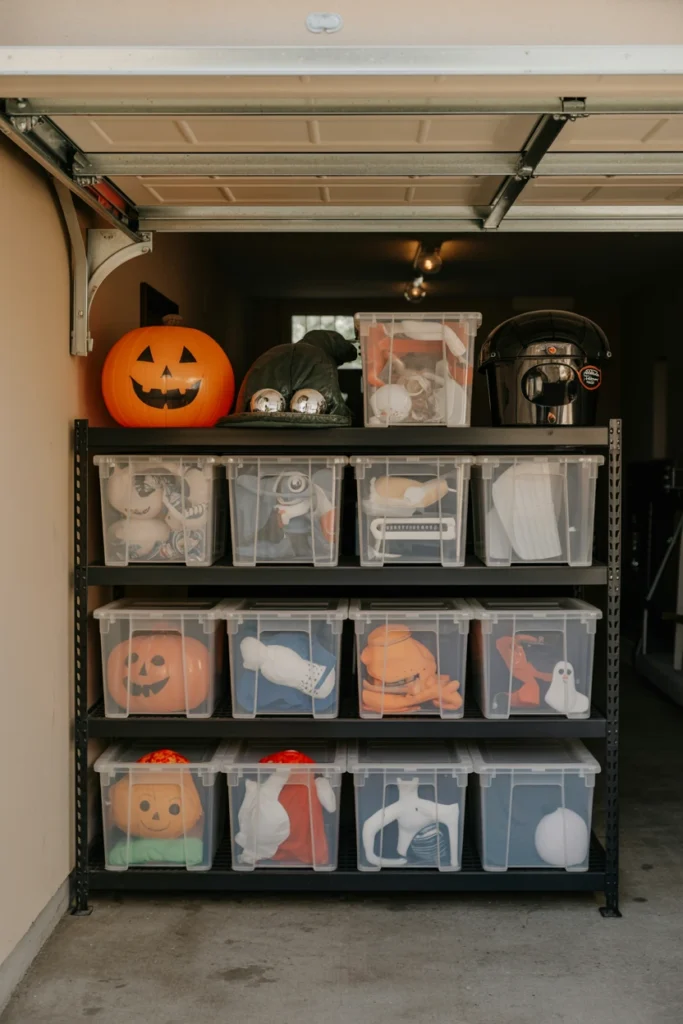
Props left directly on damp grass or soil overnight absorb moisture that shortens their usable lifespan. Ground contact also invites pests and mildew that can permanently damage foam and fabric props between decorating sessions. Elevating storage even a few inches off the ground significantly extends how many seasons a prop survives.
Start by placing a tarp, pallet, or plastic sheet under any prop that sits overnight before final placement. Store unused props in stackable bins raised on a shelf rather than directly on a garage or shed floor. This single habit is the most effective way to make a decorating budget last across multiple Halloween seasons instead of one.
| Storage Method | Ground Clearance | Best For |
| Tarp only | 0 inches (barrier) | Short-term overnight |
| Wooden pallet | 4–6 inches | Larger props, weekly storage |
| Plastic storage bin | 6–12 inches (shelved) | Small props, off-season |
| Garage shelving unit | 12+ inches | Full collection, year-round |
Common Halloween Yard Decorating Mistakes That Ruin Curb Appeal
These eight mistakes appear consistently across underwhelming Halloween displays. Correcting them costs little beyond a few minutes of rearranging.
| Mistake | Why It Hurts the Space | Better Alternative |
| Mixing more than one theme | Creates visual confusion, no cohesive story | Commit to one theme and three-color palette |
| Using only white lighting | Washes out props, feels sterile | Layer orange and purple uplighting |
| Placing props in even pairs | Reads as staged and artificial | Group props in odd-numbered clusters |
| Blocking the walkway with decor | Creates a safety and access hazard | Keep a 3-foot clear path at all times |
| Leaving extension cords exposed | Trip hazard, looks messy in daylight | Route cords along edges, secure with stakes |
| Overcrowding the yard with props | Hides your best individual pieces | Limit to one prop per 50 square feet |
| Ignoring daytime appearance | Display looks bare or messy before dark | Add natural elements for daytime texture |
| Skipping maintenance checks | Damaged props signal neglect | Check props every 3 days, fix damage in 24 hours |
Halloween Yard Ideas by Situation
Small Yard or Apartment Porch
Small yards and apartment porches face a hard space constraint that rules out large freestanding props. The core strategy here is vertical layering and door-focused decor rather than ground coverage.
Key strategies for small yard or apartment porch:
- Hang a single oversized spider web across the doorframe as the main statement piece.
- Use a hanging planter hook to suspend one small animatronic bat or ghost overhead.
- Choose battery-powered string lights over plug-in versions to avoid extension cord clutter.
- Place two to three mini pumpkins directly on the doormat instead of a full pathway line.
- Mount a flat silhouette cutout on the door itself rather than freestanding in limited floor space.
Large Yard With Multiple Zones
Large yards can support distinct decorated zones rather than one central cluster. The strategy shifts toward creating separate scenes that guests discover while walking the full property.
Key strategies for large yard with multiple zones:
- Divide the yard into three distinct scenes: entry, mid-yard graveyard, and porch focal point.
- Run a dedicated fog machine at the mid-yard zone to separate it visually from the entry.
- Use taller inflatable props, 8 feet or more, at the property’s outer edge for street visibility.
- Install a secondary lighting circuit for the back zone so it activates independently after dusk.
- Space major focal props at least 15 feet apart so each zone reads as its own scene.
Rental-Friendly Decorating
Rental properties come with restrictions on drilling, painting, or permanent yard changes. The strategy focuses entirely on freestanding and removable decor options.
Key strategies for rental-friendly decorating:
- Use garden stakes pushed into soil instead of any wall- or door-mounted hardware.
- Choose adhesive hooks rated for outdoor use for any hanging decor near entryways.
- Rely on solar-powered lights to avoid running cords through rented exterior walls.
- Keep all props in movable containers so the full display packs up within an hour.
- Photograph the original yard condition before decorating to document its baseline state.
Yards With Kids or Pets
Yards frequented by young children or pets need decor that avoids choking hazards and toxic materials. The strategy prioritizes safety without sacrificing visual impact.
Key strategies for yards with kids or pets:
- Skip fog machines at ground level, since the vapor can startle small pets unexpectedly.
- Choose battery-operated candles over open flame in every jack-o’-lantern.
- Secure all stakes and wiring at least 3 feet from any area used for play.
- Avoid small detachable prop parts that a pet or toddler could swallow.
- Select non-toxic, water-based paint for any DIY tombstones or props within reach.
Frequently Asked Questions
How to decorate a yard for Halloween on a budget?
Focus your money on lighting first, since it has the biggest visual impact after dark for the lowest cost. Build tombstones from foam insulation board and ghosts from trash bags instead of buying pre-made versions. A full display is achievable for $50–$100 using these DIY methods alongside a handful of solar lights.
What not to do when decorating for Halloween outside?
Avoid mixing multiple themes, since it creates visual confusion instead of a cohesive spooky look. Don’t block your walkway with props, and never leave extension cords exposed across foot traffic areas. Skipping maintenance checks is another common mistake that lets damaged decor sit visible for days.
How to start Halloween yard decorating from scratch?
Start by choosing one theme and a three-color palette before buying anything. Measure your entry, porch, and perimeter zones so every prop purchase fits its intended spot. Build your lighting layer first, since it forms the foundation every other decoration is judged against after dark.
How to decorate a small yard for Halloween?
Prioritize vertical elements like hanging props and door-mounted webs over ground-based decor. Use battery-powered lights to skip extension cord clutter on a compact porch. A single focal prop combined with layered lighting typically outperforms several small scattered items in tight spaces.
Fog machine or dry ice for Halloween yard?
A fog machine gives more consistent, repeatable output and works well for larger areas up to 10×10 feet. Dry ice produces a heavier, ground-hugging fog that looks more dramatic but requires careful handling with gloves. Choose a fog machine for convenience and dry ice for a more premium, low-lying effect.
How often should you update Halloween yard decorations?
Check battery-powered props every 3 days and fix any weather damage within 24 hours of noticing it. Beyond maintenance, most displays benefit from a mid-season refresh around 2 weeks before Halloween to replace faded items. This keeps the display looking fresh rather than worn down by the final week of October.
Does Halloween yard decor work for rentals?
Yes, using garden stakes, adhesive hooks, and solar lighting avoids any permanent changes to a rental property. Freestanding props and battery-powered lights let you build a full display without drilling or wiring. Document the yard’s original condition with photos before setup as an extra precaution.
How much does it cost to decorate a yard for Halloween?
A starter budget of $50–$100 covers basic lighting and a few DIY props for a small display. A standard display with animatronics and a full pathway typically runs $150–$250. Elevated displays with multiple focal props and professional lighting can reach $300–$500 or more.
How to keep Halloween decorations from getting ruined?
Store props off the ground on pallets or shelving between uses to prevent moisture damage. Bring battery-powered electronics indoors during heavy rain rather than leaving them exposed overnight. Checking the yard daily after wind or rain catches toppled or torn props before the damage becomes permanent.
Conclusion
A cohesive Halloween yard idea starts with one theme, a measured plan, and layered lighting rather than a pile of unrelated props. Begin tonight by walking your yard with a tape measure and marking your entry, porch, and perimeter zones. Install your first set of orange and purple uplights this weekend to establish the foundation every other decoration will build on.
The strongest Halloween displays come from consistent upkeep across the full season, not a single day of setup. A yard maintained with 3-day battery checks and same-day damage repairs will outperform a more expensive display left unattended.