
An 80s bedroom aesthetic transforms a flat, generic room into a space with genuine personality and visual energy. Bold color blocking, Memphis-style pattern, and chrome accents create a room that feels curated instead of accidental. This guide delivers 20 specific, actionable steps that take your bedroom from blank to authentically retro. Start with your color palette before you buy a single decor piece.
Before You Begin: 4 Foundation Steps for an Authentic 80s Bedroom
These four steps determine whether your 80s bedroom decor reads as intentional or as a random collection of neon objects. Skipping any one of them creates a room that feels themed rather than designed. Complete all four before you purchase furniture or textiles.
1. Choose Your 80s Sub-Style Before Buying Anything
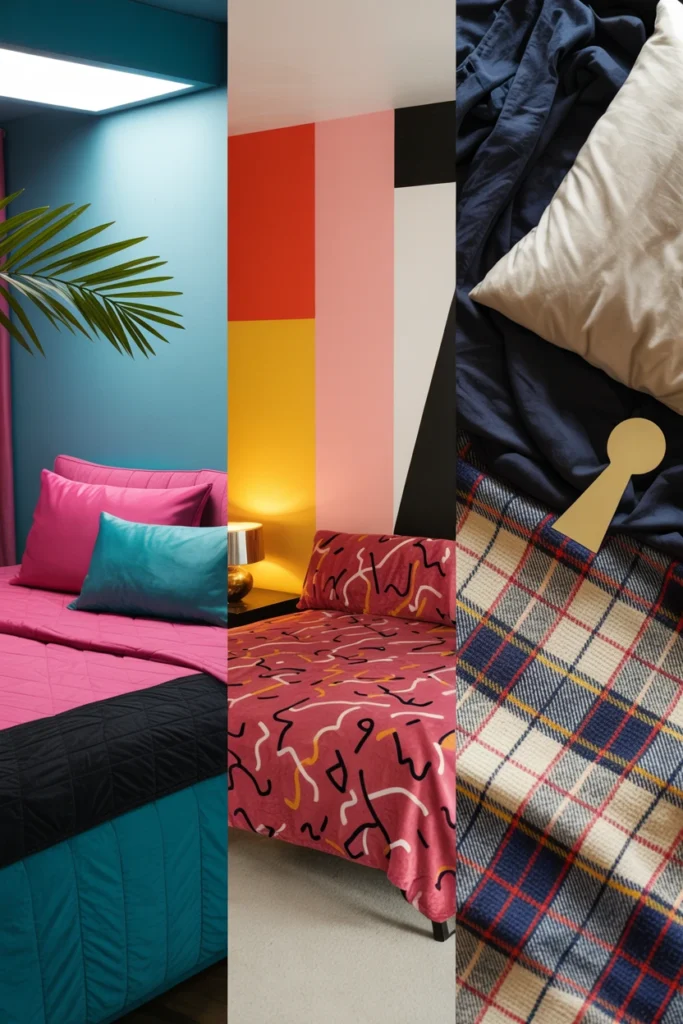
The 80s produced three distinct design movements, and mixing them without a plan creates visual chaos. Miami Vice pastel, Memphis Milano geometric, and preppy brass-and-plaid each pull the room in a different direction. Picking one sub-style first prevents you from buying pieces that fight each other later.
Start by picking one of the three sub-styles based on your existing furniture undertones. Memphis Milano uses primary colors and squiggle patterns; Miami Vice uses teal, pink, and black; preppy uses navy, brass, and stripe. Committing to one sub-style early also cuts your shopping list by roughly 40% because you stop buying pieces you’ll return.
| Sub-Style | Core Colors |
| Memphis Milano | Red, yellow, black, white |
| Miami Vice | Teal, hot pink, black |
| Preppy 80s | Navy, brass, cream, red |
| Neon Pop | Purple, lime, hot pink, black |
2. Pick a Three-Color Palette as Your Anchor
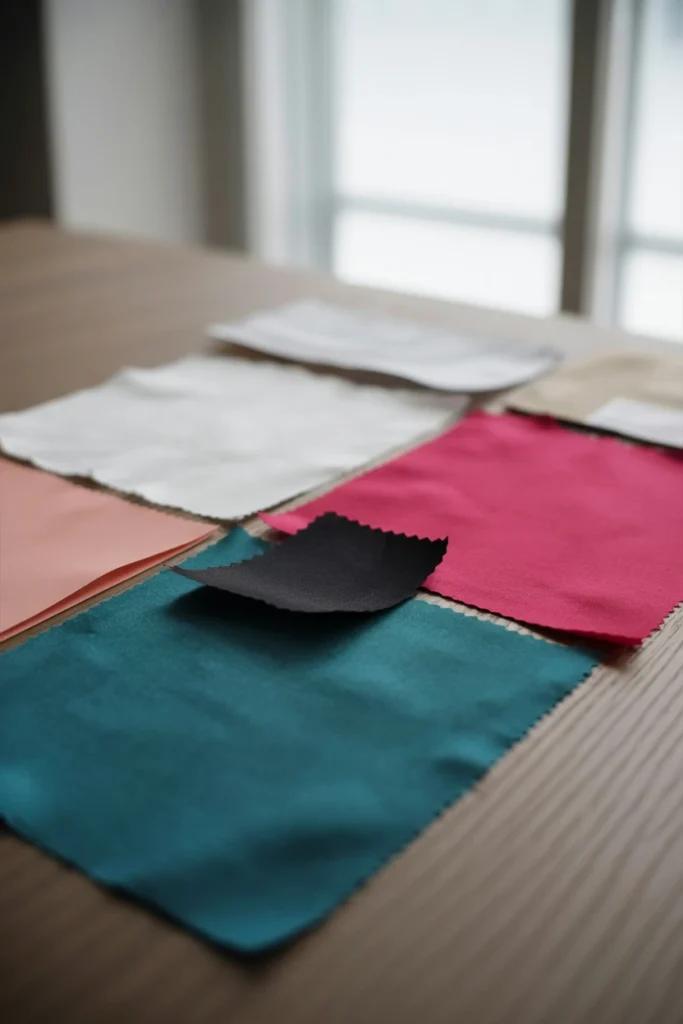
A room with more than three primary colors reads as cluttered rather than retro. This single mistake costs more homeowners an authentic 80s look than any other decor choice. Limiting your palette to three colors creates a cohesive scheme that photographs and lives well.
Choose one dominant color for 60% of the room, one secondary color for 30%, and one accent for the remaining 10%. Use the 60-30-10 rule: walls or bedding as the 60%, furniture or rugs as the 30%, and accessories as the 10% accent. This ratio prevents any single neon tone from overwhelming the eye, which keeps the room feeling energetic instead of chaotic.
| Role in Room | Percentage | Example Application |
| Dominant color | 60% | Walls, main bedding |
| Secondary color | 30% | Rug, curtains, furniture |
| Accent color | 10% | Throw pillows, art, lamp |
| Neutral base | 0-10% optional | White trim, black frames |
3. Anchor the Room With a Statement Wall
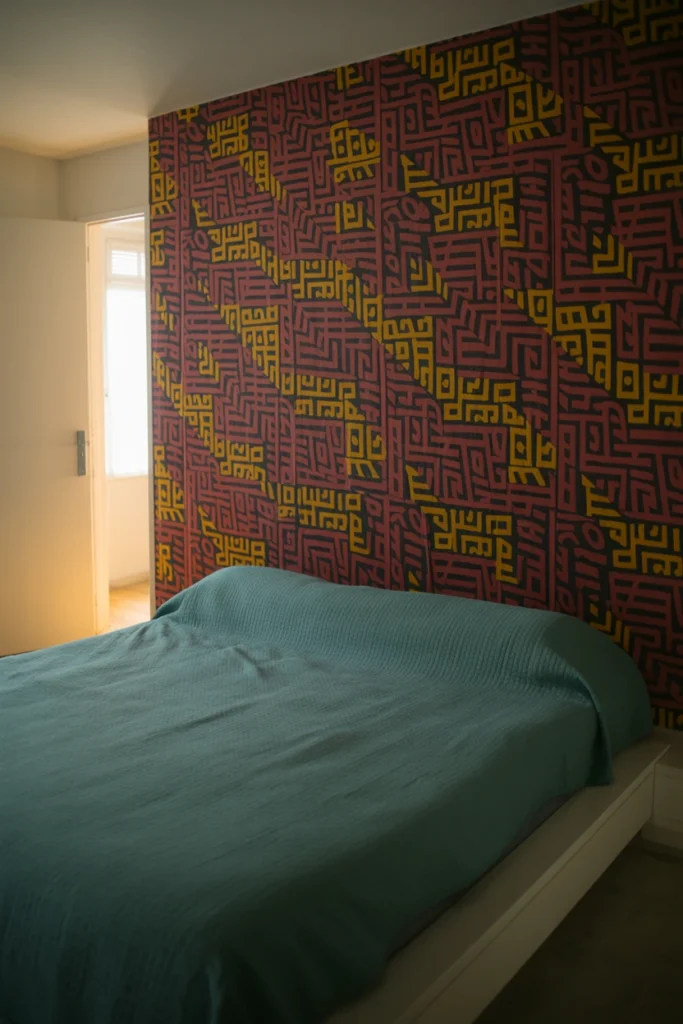
A room without a single focal point forces the eye to wander and never land. This visual restlessness is why generic 80s-themed rooms often feel busy instead of bold. One anchored statement wall gives the eye a clear place to rest and immediately elevates the entire room.
Start by identifying the wall directly behind your headboard as your statement wall — this is the wall guests see first when they walk in. Apply either a bold geometric wallpaper, a color-blocked paint pattern, or a mirrored panel section covering at least 60% of that single wall. Keeping every other wall neutral or white makes this one wall do all the visual work, which also makes the whole room easier to repaint later.
| Statement Wall Option | Cost Range (per wall) | Difficulty |
| Geometric wallpaper | $80-$220 | Medium |
| Color-blocked paint | $30-$60 | Low |
| Mirrored panels | $150-$400 | Medium-High |
| Neon accent stripe | $20-$40 | Low |
4. Build the Room Around One Iconic Piece
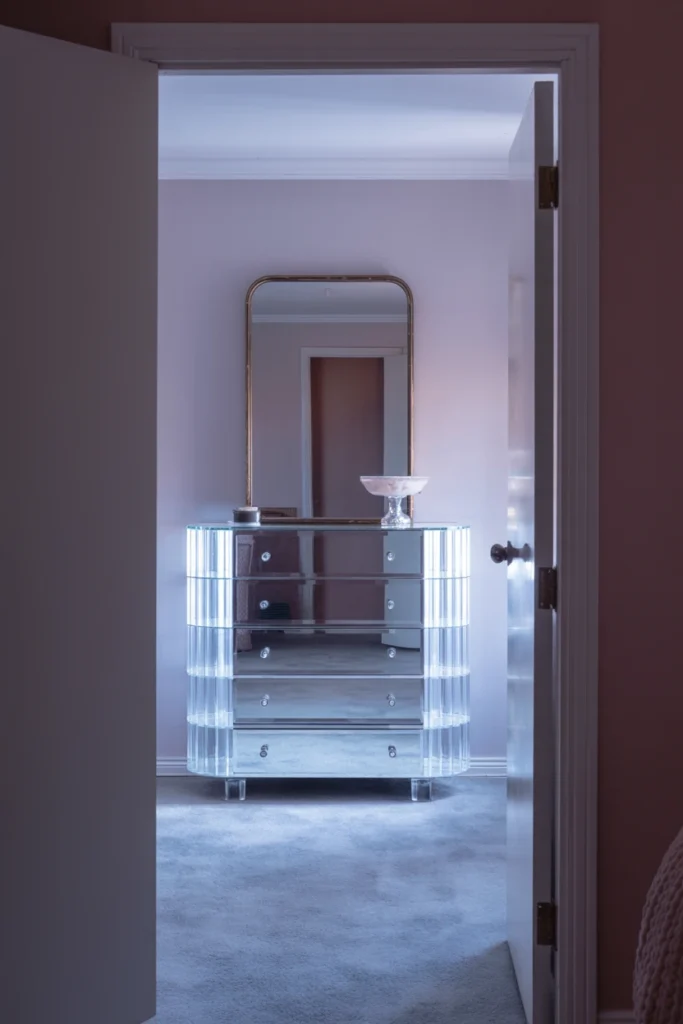
A room without a hero piece has nothing for the eye to anchor to, and every other item competes for attention equally. This lack of hierarchy is the single most common reason 80s bedroom ideas fail to feel finished. One genuinely iconic piece — chosen first — instantly organizes every other decision you make afterward.
Choose your hero piece before shopping for anything else — a lucite waterfall dresser, a boombox-style speaker unit, or a brass sunburst mirror all work as strong anchors. Position this piece directly in the sightline from the doorway so it becomes the first thing anyone notices entering the room. Building outward from this one piece means every additional purchase gets measured against it, which eliminates decision fatigue for the rest of the project.
| Hero Piece Type | Typical Price Range | Placement |
| Lucite dresser | $200-$600 | Opposite doorway |
| Brass sunburst mirror | $60-$180 | Above dresser or bed |
| Vintage boombox unit | $40-$150 | Shelf or nightstand |
| Postmodern lamp | $50-$140 | Nightstand |
Bold Color Palettes and Wall Treatments
This section covers the specific techniques that turn a plain wall into the backbone of your 80s bedroom decor. Color blocking and pattern placement do more visual work than any single furniture piece. Each technique below builds directly on the three-color palette you chose in the foundation steps.
5. Use Color Blocking Instead of a Single Accent Wall
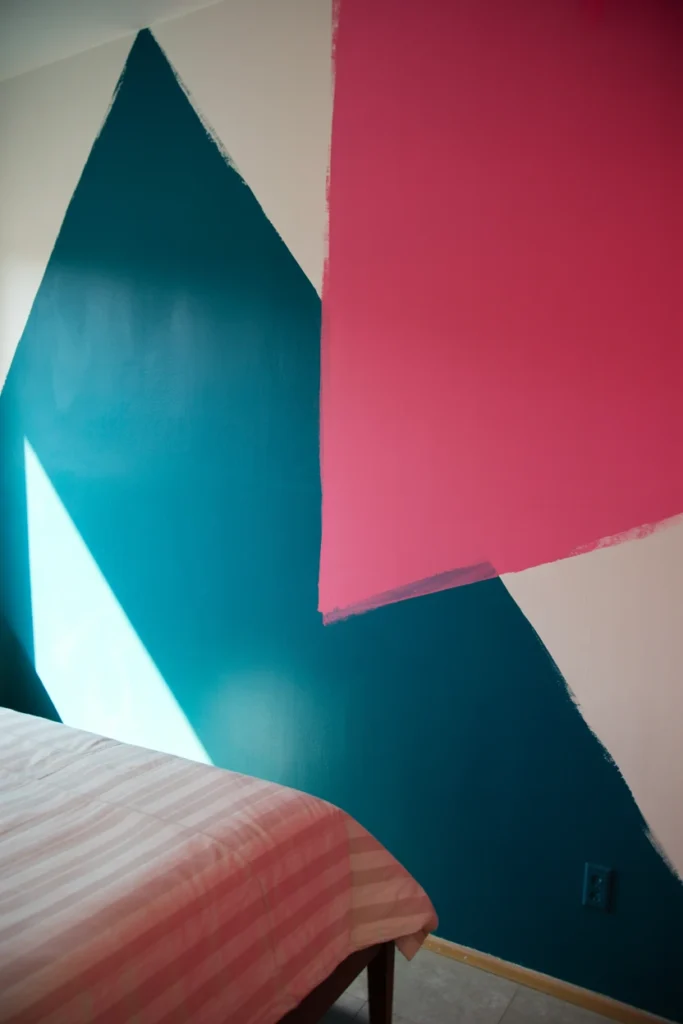
A single flat accent wall reads as 2010s minimalism, not 1980s energy. This mismatch is why many attempts at 80s bedroom decor still feel generic despite the right color choices. Color blocking two or three geometric shapes across one wall instantly signals the correct decade.
Start by taping off two or three large geometric shapes — triangles, arcs, or rectangles — covering roughly 30-50% of the wall’s total surface area. Use painter’s tape and a level to keep every edge crisp, since a soft or bleeding line reads as sloppy rather than intentional. This technique also costs under $50 in paint and tape, which makes it the cheapest high-impact change on this entire list.
| Shape Style | Best Wall Size | Recommended Angle |
| Large triangle | 10+ feet wide | 45-degree diagonal |
| Arc/half-circle | Any wall size | Centered behind headboard |
| Offset rectangles | 8+ feet wide | Staggered, uneven spacing |
| Diagonal split | Narrow walls | Corner to corner |
6. Install a Geometric Wallpaper Panel
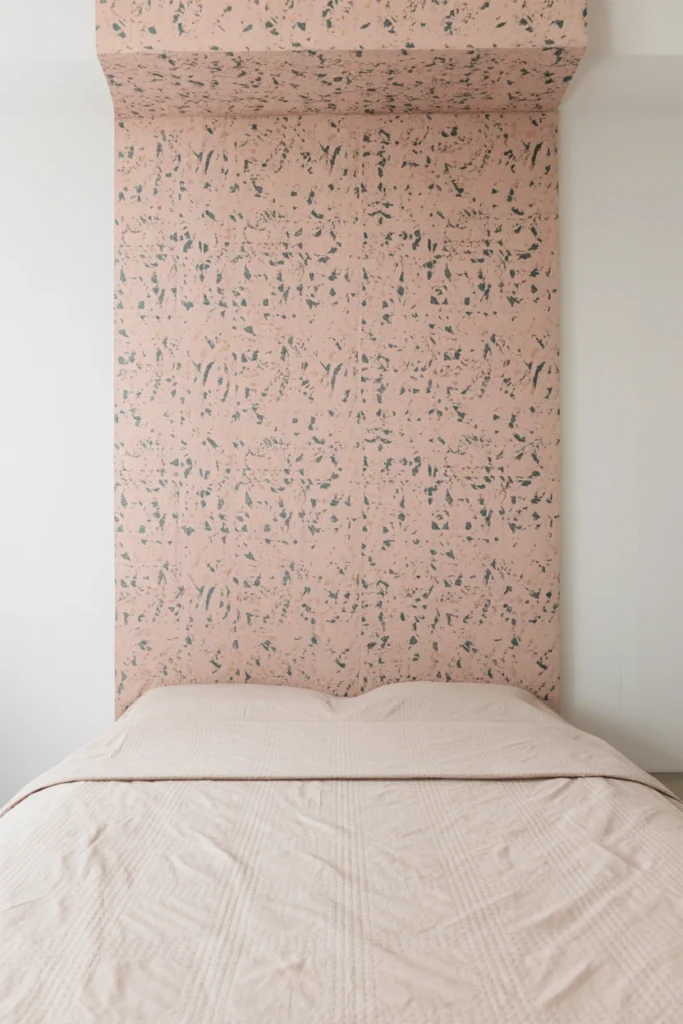
Full-room wallpaper overwhelms a small bedroom and often exceeds most decor budgets. This is why homeowners frequently skip pattern entirely and default to plain walls. A single wallpaper panel behind the headboard delivers the same visual punch at a fraction of the material cost.
Measure the width directly behind your headboard and order a removable, peel-and-stick panel sized 2-4 feet wider than the bed frame on each side. Choose a squiggle, confetti, or terrazzo print in your secondary or accent color rather than your dominant one, since a large pattern in the dominant color overwhelms the room. This approach also protects your security deposit in a rental, since peel-and-stick panels remove cleanly without damaging drywall.
| Panel Width | Best For | Approx. Cost |
| 4 feet | Twin/single bed | $35-$60 |
| 6 feet | Full/queen bed | $55-$90 |
| 8 feet | King bed | $75-$130 |
| Full wall | Statement wall coverage | $120-$250 |
7. Layer Neon Accents Against a Neutral Base
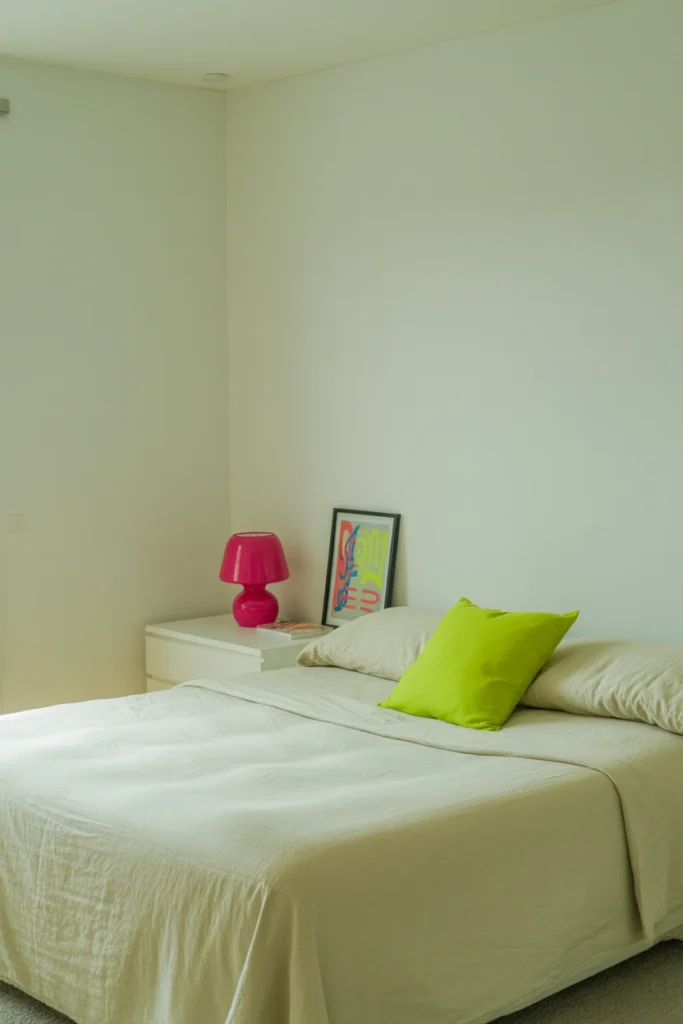
Neon color used across an entire room within hours becomes visually exhausting and difficult to sleep in. This is the most common overcorrection when homeowners chase an authentic 80s bedroom aesthetic. Layering neon only as accents against a neutral 60% base solves this problem completely.
Keep your walls, bedding base, and largest furniture piece in white, cream, or grey, then introduce neon strictly through pillows, a lamp, and one small rug. Limit neon items to no more than five objects total in the room, since six or more starts to compete rather than accent. This restraint also makes the neon pieces easier and cheaper to swap out when you want to refresh the room in a year or two.
| Neon Item Count | Visual Result |
| 1-2 items | Subtle retro nod |
| 3-5 items | Balanced 80s accent |
| 6-8 items | Busy, competing |
| 9+ items | Overwhelming, hard to rest in |
8. Apply Vertical Blinds for an Authentic 80s Window Line
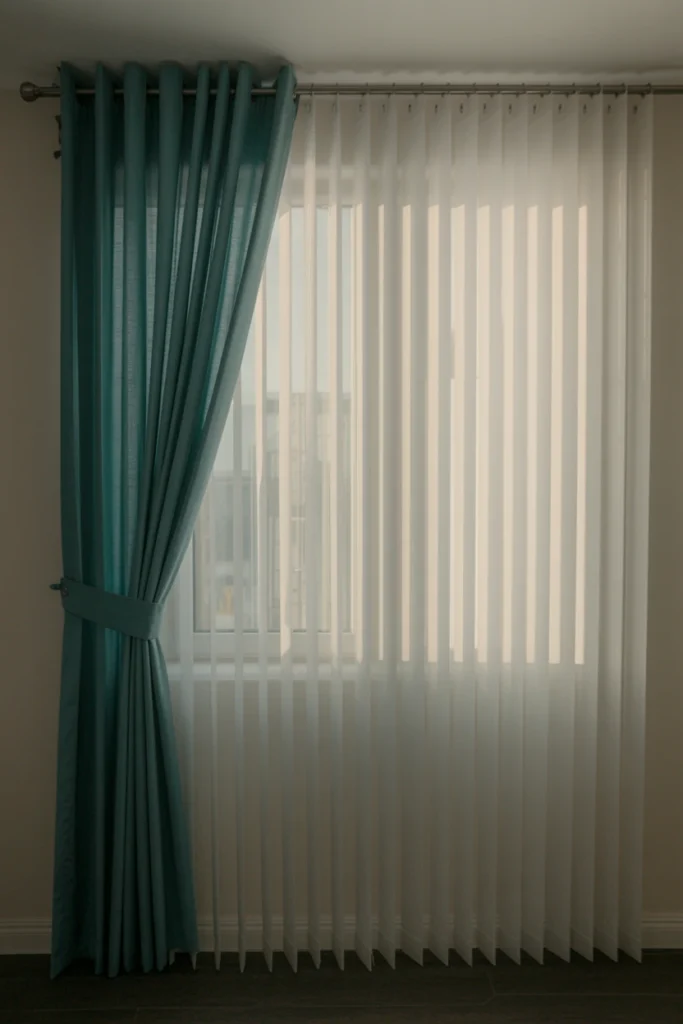
Modern roman shades or curtain panels instantly date a room to the 2010s rather than the 1980s. This single window treatment mismatch undoes an otherwise accurate retro bedroom design. Vertical blinds in a neutral or metallic tone correct this immediately and cost less than most curtain sets.
Install PVC or aluminum vertical blinds in white, grey, or a soft metallic finish as your base window layer. Add one panel of solid-color curtain in your accent shade pulled to one side rather than centered, which mimics the asymmetrical draping common in 80s interiors. This layered approach also gives you better light control than curtains alone, since you can angle the blinds without removing the curtain panel.
| Blind Material | Cost per Window | Best Finish |
| PVC vertical | $25-$45 | Matte white |
| Aluminum vertical | $35-$65 | Brushed metallic |
| Faux-wood vertical | $50-$90 | Cream or grey |
| Vinyl vertical | $20-$35 | Solid white |
Pattern, Texture, and Iconic 80s Decor Pieces
Pattern and texture separate a room that merely uses 80s colors from one that genuinely reads as period-accurate. This section covers the specific prints, materials, and objects that signal authentic retro bedroom design. Each item below should be layered, not scattered randomly across the room.
9. Mix Memphis-Style Geometric Patterns in Textiles
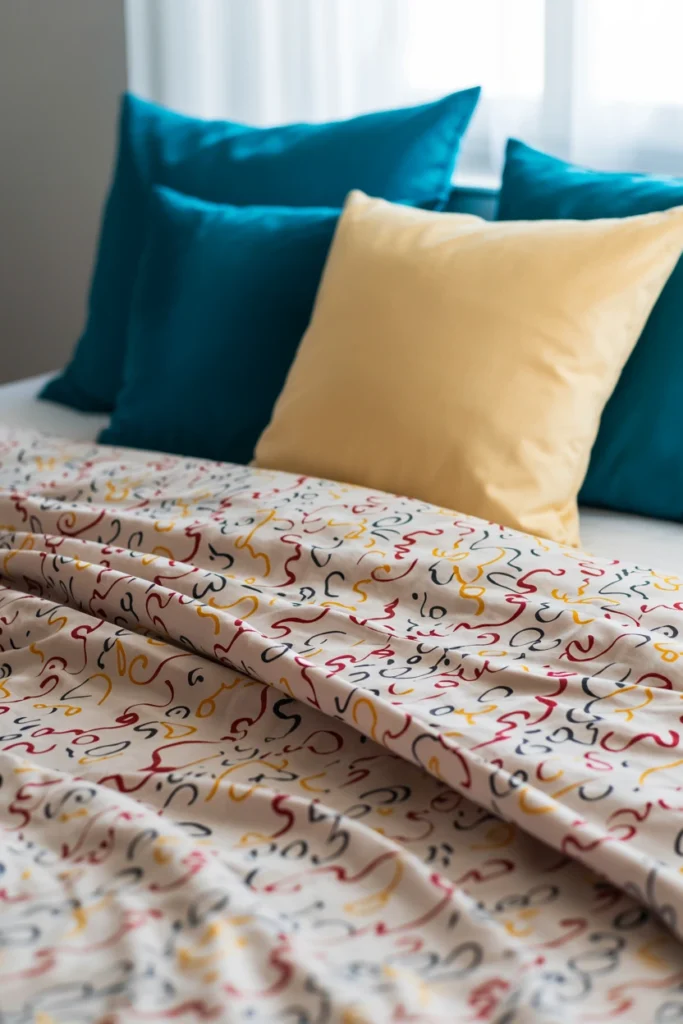
A room using only solid-color textiles feels flat and misses the defining texture of Memphis design bedroom decor. This gap is why some 80s-inspired rooms feel like a color scheme rather than a genuine style. Mixing two or three Memphis-pattern textiles adds the squiggle-and-confetti energy that defines the era.
Choose one patterned duvet cover or two patterned throw pillows featuring squiggles, confetti dots, or zigzag lines in your palette’s secondary color. Pair every patterned textile with at least one solid-color textile of equal or larger size to prevent pattern overload. This 1:1 ratio between pattern and solid keeps the bed looking curated rather than mismatched.
| Textile Item | Pattern or Solid | Placement |
| Duvet cover | Pattern | Main bed surface |
| Fitted sheet | Solid | Base layer |
| 2 throw pillows | Pattern | Front of bed |
| 2 euro shams | Solid | Back of bed |
10. Add a Terrazzo-Print Rug as a Grounding Layer
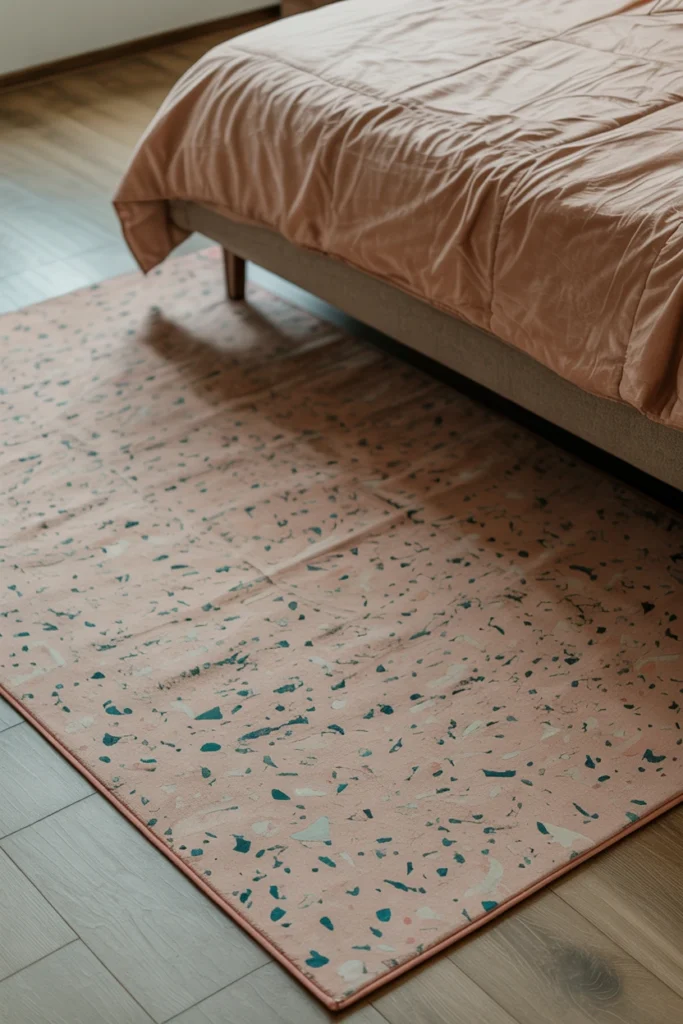
A room with pattern only above knee height leaves the floor feeling like an afterthought. This gap breaks the visual continuity that makes retro bedroom design feel complete. A terrazzo or confetti-print rug grounds the room and ties the wall pattern to the floor.
Choose a rug sized at least 2 feet wider than your bed frame on each side, which keeps the rug from looking undersized once furniture sits on it. Select a terrazzo, confetti, or speckled print in your dominant or neutral color rather than a bold accent, since a busy rug pattern underfoot competes with wall pattern above eye level. This grounding layer also hides scuffs and wear better than a solid-color rug, extending its usable life.
| Bed Size | Minimum Rug Size |
| Twin | 5×7 feet |
| Full | 6×9 feet |
| Queen | 8×10 feet |
| King | 9×12 feet |
11. Hang a Gallery of Pop Art and Cassette-Era Prints
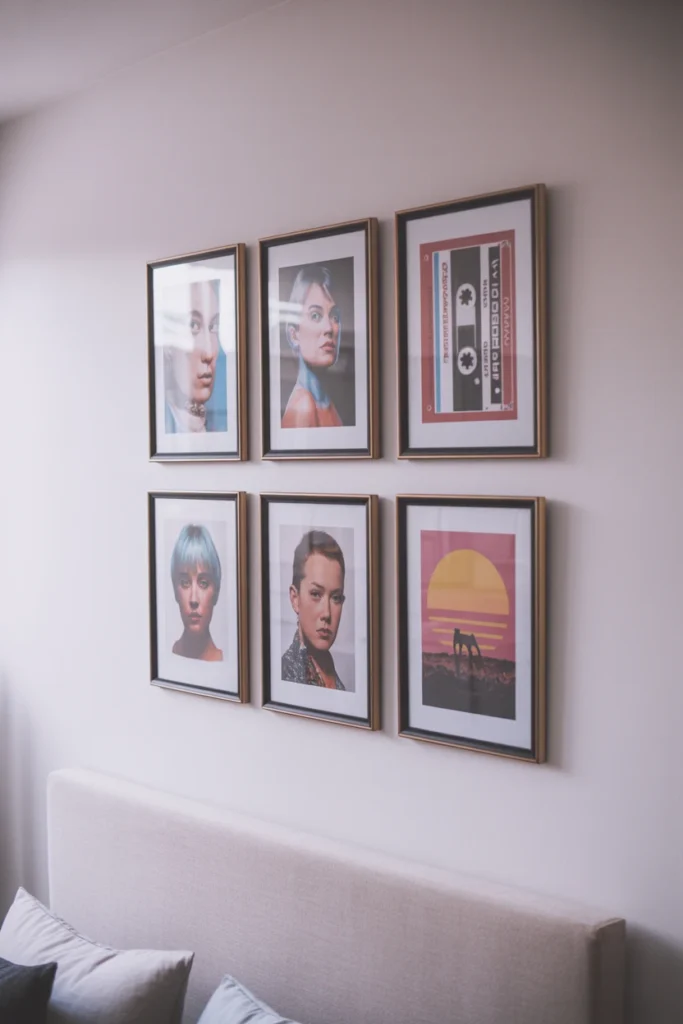
Bare walls above the bed leave a retro 80s wall decor scheme feeling incomplete, no matter how strong the color and pattern below. This visual gap draws attention to what’s missing rather than what’s there. A gallery wall of pop art and cassette-era prints fills this space with genuine period character.
Frame 4-6 prints in matching or coordinating frames — pop art portraits, cassette tape graphics, or synthwave sunset prints all work — and arrange them in a grid with 2-3 inches of spacing between each frame. Center the entire grid roughly 6-8 inches above the headboard so it reads as one cohesive unit rather than scattered art. This spacing consistency is what separates an intentional gallery wall from a cluttered one.
| Print Count | Grid Layout | Frame Spacing |
| 4 prints | 2×2 grid | 2-3 inches |
| 6 prints | 2×3 grid | 2-3 inches |
| 3 prints | Horizontal row | 3-4 inches |
| 5 prints | Asymmetric cluster | 2-4 inches |
12. Mount a Boombox or Cassette Display Shelf
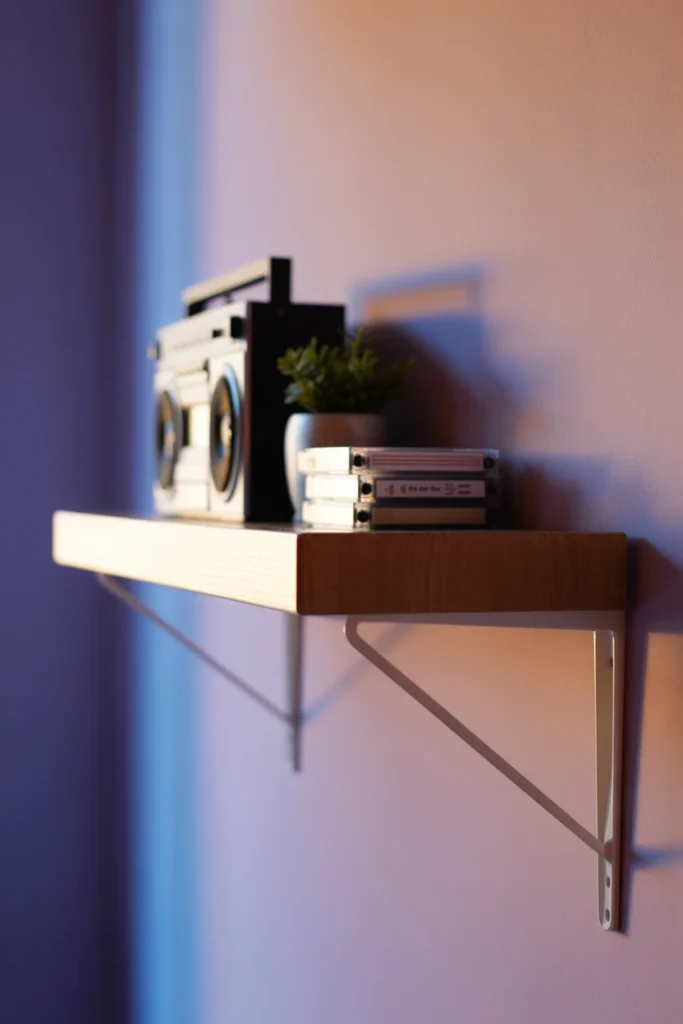
A generic floating shelf with modern decor objects breaks the retro illusion the rest of the room worked hard to build. Even one wrong object on an otherwise perfect shelf pulls attention away from everything else. A dedicated boombox or cassette display shelf solves this with one focused, unmistakably 80s object.
Mount a single floating shelf at eye level, roughly 54-58 inches from the floor, sized 24-36 inches wide. Style it with one vintage or reproduction boombox, a small stack of cassette tapes, and one small plant to keep the display from feeling like a museum case. This shelf also works as a functional charging or storage spot, giving the retro object practical daily use.
| Shelf Width | Object Count | Height From Floor |
| 24 inches | 2-3 objects | 54-58 inches |
| 30 inches | 3-4 objects | 54-58 inches |
| 36 inches | 4-5 objects | 54-58 inches |
| 18 inches | 1-2 objects | 50-54 inches |
Furniture, Lighting, and Finishing Touches
Furniture and lighting choices finish the room and determine whether the 1980s bedroom style feels complete or half-committed. These finishing touches require the smallest number of items but carry disproportionate visual weight. Each item below should be chosen after your color and pattern decisions are locked in.
13. Choose Lucite or Mirrored Furniture for One Key Piece
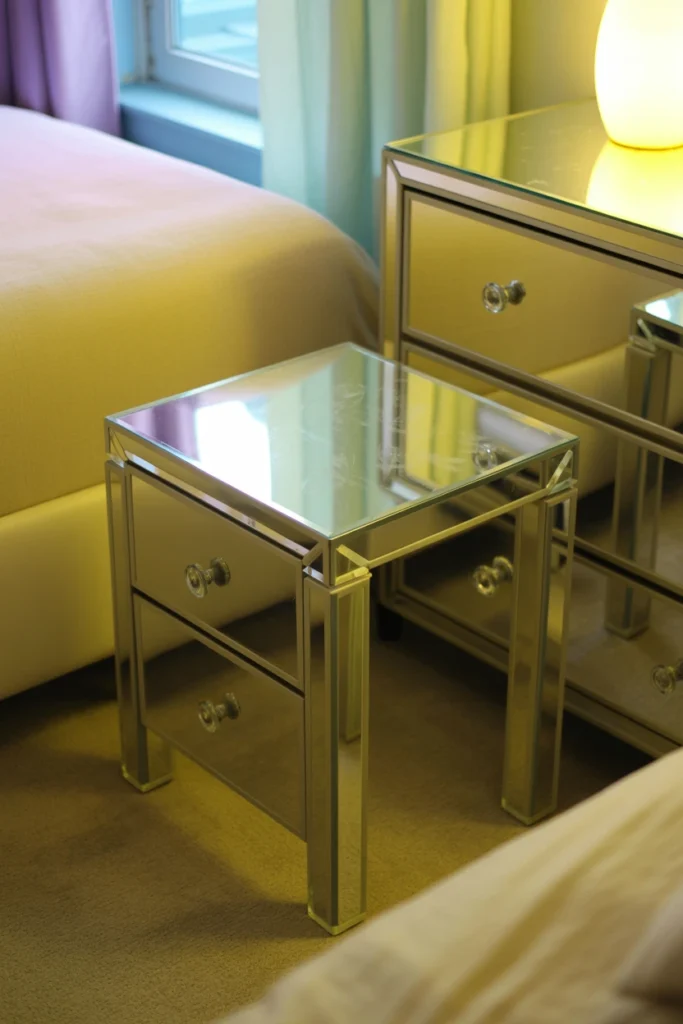
Wood furniture across every surface anchors the room too heavily in an earthy palette that fights against neon and pastel tones. This mismatch is one of the most common reasons a room reads as generic vintage rather than specifically 80s. One lucite or mirrored piece introduces the reflective, futuristic material that defines the decade.
Replace one existing wood piece — typically a nightstand or dresser — with a clear lucite or mirrored equivalent in the same footprint size. Keep every other furniture piece in a solid neutral tone so the lucite or mirrored item stands out as the intentional exception rather than blending in. This single swap also makes a small bedroom feel larger, since clear and reflective surfaces visually recede instead of adding bulk.
| Furniture Piece | Material Swap | Approx. Cost |
| Nightstand | Lucite | $60-$150 |
| Dresser | Mirrored panel | $200-$500 |
| Desk chair | Clear acrylic | $50-$120 |
| Shelf unit | Smoked lucite | $80-$180 |
14. Switch Standard Hardware for Brass or Chrome Pulls

Standard brushed-nickel or black hardware on existing furniture quietly undercuts an otherwise accurate 80s bedroom aesthetic. This small mismatch is easy to overlook but noticeable once the rest of the room is finished. Swapping to brass or chrome pulls corrects this in under an hour with basic tools.
Remove existing drawer and cabinet pulls and replace them with brass pulls for a preppy or Miami Vice sub-style, or chrome pulls for a Memphis Milano sub-style. Match the pull spacing to your existing drilled holes — measure center to center before ordering — to avoid drilling new holes into furniture you plan to keep. This finishing detail costs under $40 for an average dresser but changes how expensive the entire piece looks.
| Sub-Style | Hardware Finish | Cost per Dresser |
| Preppy | Brass | $25-$45 |
| Miami Vice | Chrome | $20-$40 |
| Memphis Milano | Chrome or black | $20-$40 |
| Neon Pop | Brass | $25-$45 |
15. Layer Neon Tube Lighting Along One Wall
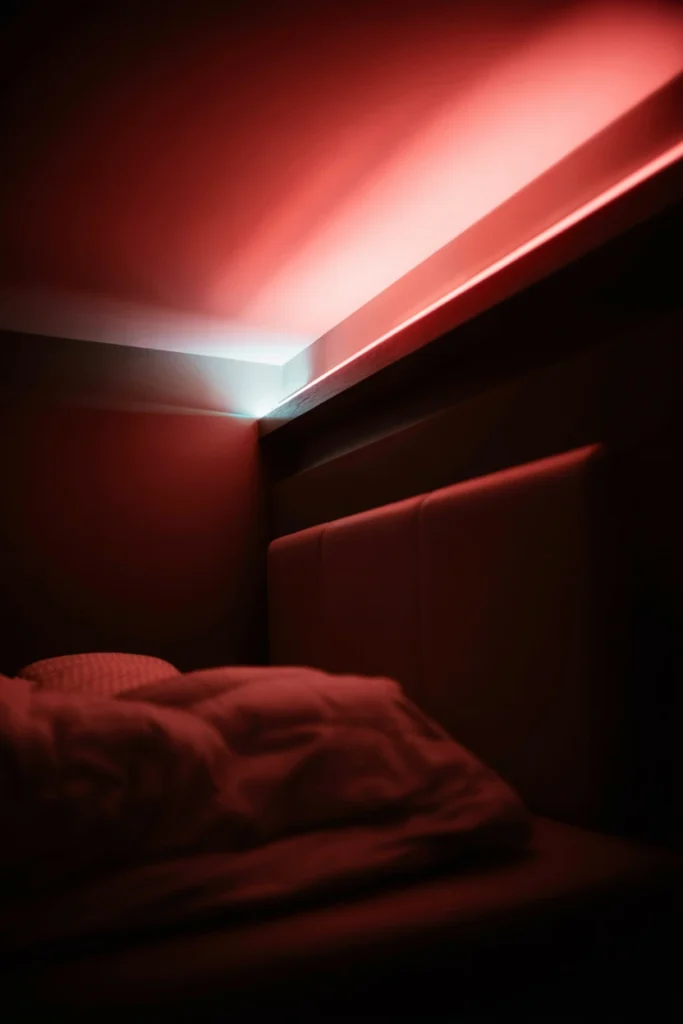
A room lit only by an overhead fixture loses the warm, colored glow that defines 80s bedroom decor after dark. Overhead-only lighting also flattens all the color and pattern work done earlier in the day. Adding one strip of neon or LED tube lighting along a single wall restores that signature nighttime glow.
Install a single LED strip or neon-style tube light along the ceiling edge of your statement wall, choosing a warm pink, purple, or blue tone that matches your accent color. Set the strip on its own switch or remote so it functions as ambient lighting separate from your main overhead fixture. This separation lets you shift the entire mood of the room from bright and functional to dim and retro within seconds.
| Light Placement | Color Temp | Approx. Cost |
| Ceiling edge, statement wall | Pink/purple | $15-$35 |
| Behind headboard | Blue/teal | $12-$25 |
| Under floating shelf | Any accent | $10-$20 |
| Around mirror frame | White/pink | $15-$30 |
16. Style the Bed With Color-Blocked Bedding
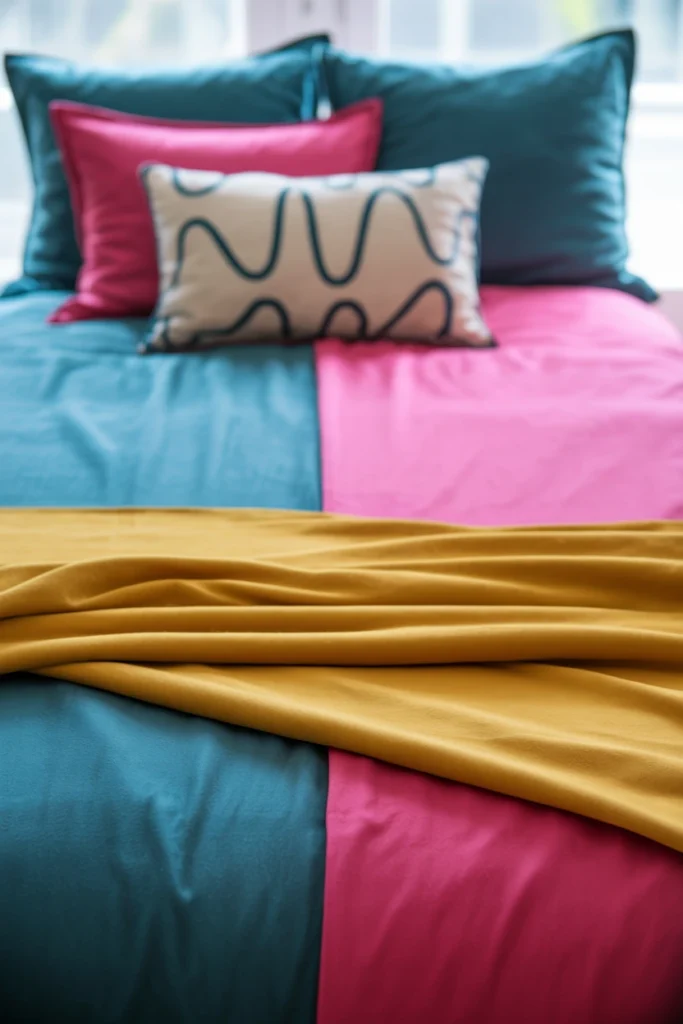
A bed layered with only one solid color loses the visual hierarchy that makes the rest of the room’s color blocking feel connected. This mismatch is subtle but noticeable, since the bed is the largest surface in the room. Color-blocked bedding ties the bed directly to the statement wall behind it.
Choose a duvet cover with two or three color blocks matching your room’s dominant and secondary colors, then layer 3-4 pillows in a mix of those same colors plus one patterned accent pillow. Fold a throw blanket in your third accent color across the foot of the bed at a diagonal angle rather than straight, which echoes the diagonal lines used elsewhere in 80s design. This layered approach also makes the bed the visual centerpiece the rest of the room’s color blocking supports.
| Bedding Layer | Color Role | Item Count |
| Duvet cover | Dominant + secondary | 1 |
| Standard pillows | Dominant/secondary mix | 3-4 |
| Accent pillow | Pattern | 1 |
| Throw blanket | Accent color | 1 |
Keeping Your 80s Bedroom Looking Sharp Long-Term
An 80s bedroom aesthetic degrades faster than a neutral room because bold color and reflective material show wear more visibly. These maintenance habits protect the investment you made in color, lighting, and furniture. Building them into a routine keeps the room looking as sharp in year two as it did on install day.
17. Rotate Accent Textiles Every Season
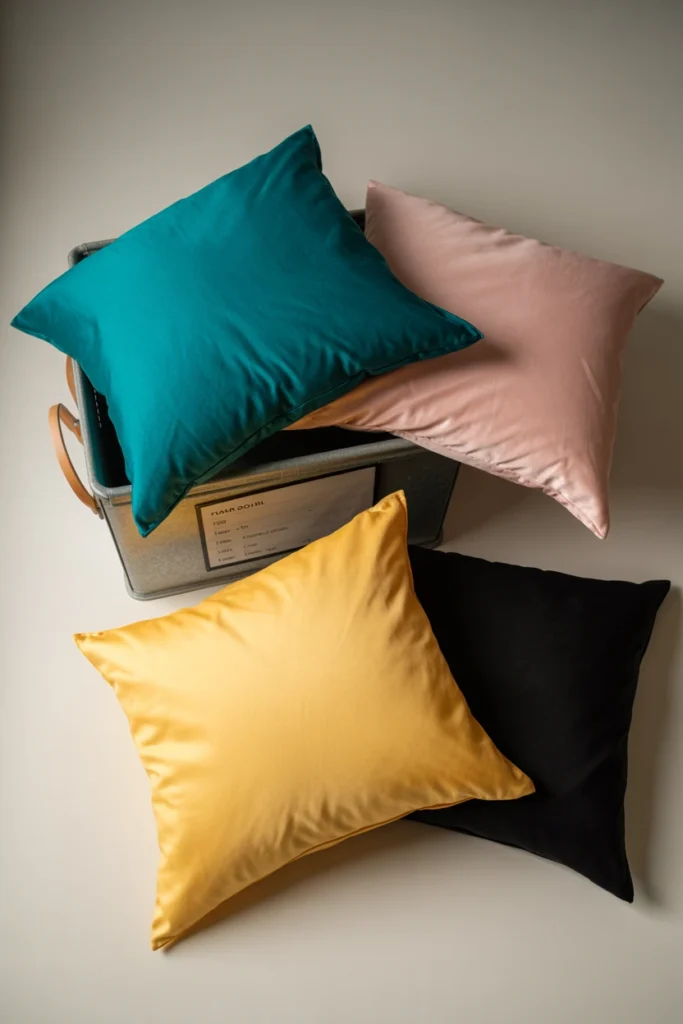
Accent pillows and throws left in place year-round fade unevenly under direct sunlight, especially neon and pastel dyes. This uneven fading is one of the fastest ways a vintage 80s bedroom starts to look tired rather than intentional. Rotating textiles seasonally prevents this and keeps the room feeling fresh.
Buy a second set of throw pillow covers in a complementary colorway and swap them every 3-4 months, storing the unused set flat in a drawer or bin away from direct light. Rotate your accent rug or throw blanket on the same schedule if it sits in a sunlit area of the room. This rotation also doubles as a low-cost way to refresh the room’s look without buying entirely new furniture.
| Item | Rotation Frequency | Storage Method |
| Throw pillow covers | Every 3-4 months | Flat, drawer or bin |
| Accent rug | Every 6 months | Rolled, dry location |
| Wall art prints | Every 12 months | Flat, portfolio sleeve |
| Duvet cover | Every 4-6 months | Folded, closet shelf |
18. Clean Lucite and Mirrored Surfaces Weekly
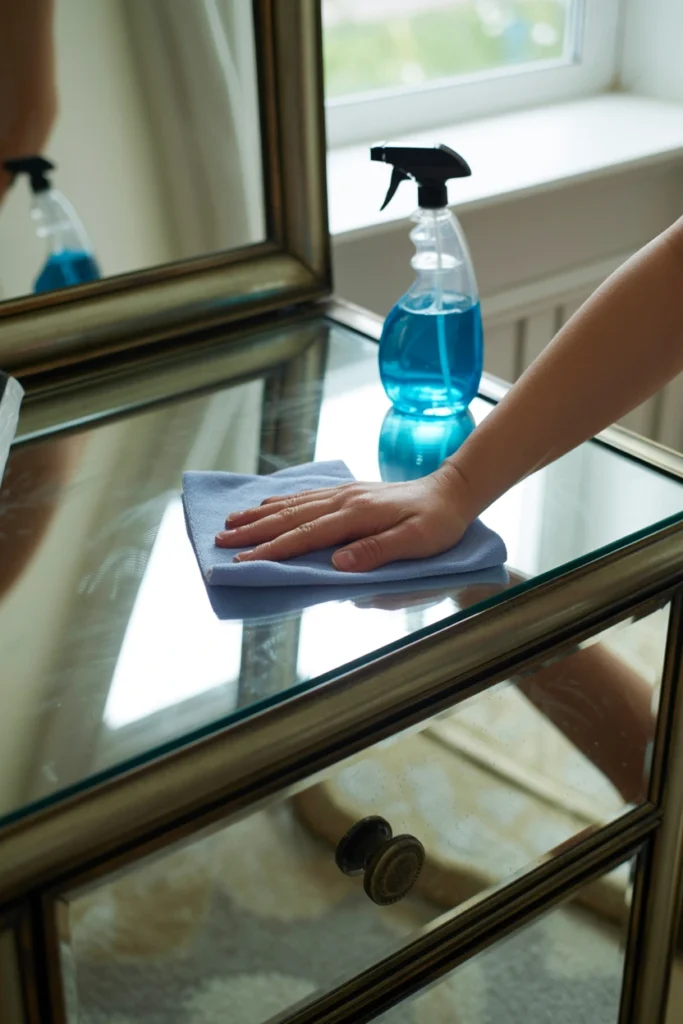
Dust and fingerprints show far more visibly on lucite and mirrored furniture than on wood, since reflective surfaces highlight every mark under direct light. Left uncleaned for more than a week, these surfaces start to look neglected rather than sleek. A short weekly cleaning routine keeps the reflective quality that makes these pieces work.
Wipe lucite and mirrored surfaces weekly using a microfiber cloth and a streak-free glass cleaner, working in straight lines rather than circles to avoid visible swirl marks. Avoid ammonia-based cleaners on tinted or colored lucite specifically, since ammonia can cause yellowing over repeated use. This five-minute weekly habit keeps your hero furniture piece looking as sharp as the day it arrived.
| Surface Type | Cleaner Type | Frequency |
| Clear lucite | Streak-free glass cleaner | Weekly |
| Tinted lucite | Ammonia-free cleaner | Weekly |
| Mirrored panels | Glass cleaner + microfiber | Weekly |
| Chrome hardware | Mild soap + soft cloth | Bi-weekly |
19. Replace Neon Bulbs Before They Dim and Yellow
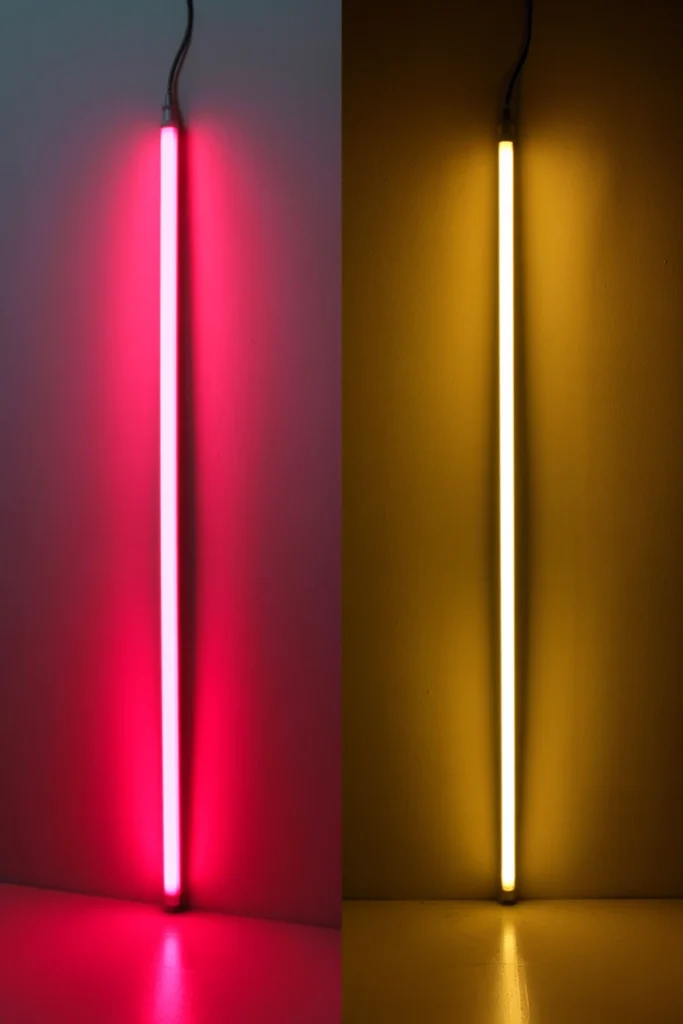
LED neon strips and tube lights lose brightness and shift color gradually over 12-18 months of regular use. This slow fade is easy to miss day-to-day but becomes obvious once you compare the light to a fresh replacement side by side. Replacing bulbs proactively keeps the nighttime ambiance consistent instead of gradually dulling.
Mark a replacement date on your calendar 12 months from installation and swap the strip or bulb at that point regardless of whether it looks visibly dimmer yet. Keep the packaging or model number on file so you can order the exact same color temperature and avoid a mismatched replacement segment. This proactive swap costs under $30 and prevents the slow, hard-to-notice decline that eventually makes the whole room feel dated.
| Light Type | Average Lifespan | Replacement Signal |
| LED neon strip | 12-18 months | Visible dimming |
| LED tube light | 15-20 months | Color shift toward yellow |
| Smart LED strip | 18-24 months | App brightness drop |
| Standard neon bulb | 8-12 months | Flickering |
20. Reassess Your Palette Every Two to Three Years
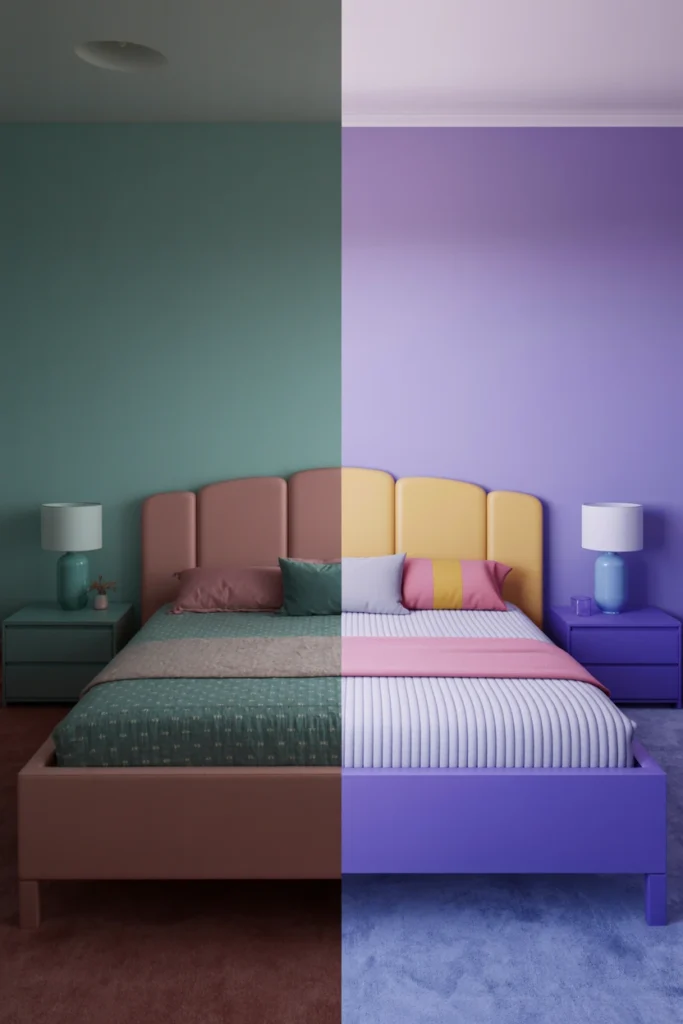
Even a well-executed three-color palette starts to feel stale after several years of daily exposure, regardless of how well it was chosen initially. This natural fatigue is normal and does not mean the original design failed. Reassessing your palette every 2-3 years keeps the room evolving instead of feeling frozen in time.
Set a calendar reminder at the two-year mark to evaluate whether your accent color still feels current, and swap only the 10% accent layer — pillows, art, and a lamp — rather than repainting walls or replacing furniture. Keep your dominant and secondary colors fixed since these are the most expensive to change, and rotate only the cheapest layer for maximum visual refresh per dollar spent. This targeted approach keeps the room feeling intentional rather than requiring a full redecoration every few years.
| Palette Layer | Change Frequency | Relative Cost |
| Accent (10%) | Every 2-3 years | Low |
| Secondary (30%) | Every 4-6 years | Medium |
| Dominant (60%) | Every 6-8 years | High |
| Hero furniture piece | Rarely, if ever | High |
80s Bedroom Mistakes That Kill the Retro Look
Certain mistakes consistently undo an otherwise well-planned 80s bedroom aesthetic, even when the color and furniture choices start out strong. Avoiding these eight specific errors protects the time and money already invested in the room.
| Mistake | Why It Hurts the Space | Better Alternative |
| Using more than three main colors | Reads as cluttered instead of curated | Stick to a strict 60-30-10 palette |
| Covering every wall in pattern | Overwhelms the eye, no visual rest | Limit pattern to one statement wall |
| Mixing Memphis and Miami Vice styles | Creates a chaotic, undefined look | Commit to one sub-style throughout |
| Using modern curtain panels alone | Breaks the period-accurate window line | Layer vertical blinds under curtains |
| Skipping a hero furniture piece | Room lacks a clear focal point | Choose one lucite or brass anchor piece |
| Using only overhead lighting | Loses the room’s nighttime ambiance | Add a neon or LED accent strip |
| Leaving hardware unchanged | Undercuts an otherwise accurate scheme | Swap to brass or chrome pulls |
| Buying neon in every accessory | Becomes visually exhausting fast | Cap neon items at five or fewer |
80s Bedroom Ideas by Room Type
The specific approach to an 80s bedroom aesthetic shifts depending on room size, occupant, and whether you rent or own. These four segments cover the most common constraints readers face when applying this style.
Small bedroom
A small bedroom has less wall space and floor area to work with, which means every color and pattern choice carries more visual weight. The core constraint here is avoiding a room that feels cramped once pattern and furniture are added.
Key strategies for small bedrooms:
- Choose a mirrored dresser instead of a solid wood one to visually expand the floor area
- Limit your statement wall to the headboard wall only, keeping the remaining three walls neutral
- Use a rug sized only slightly larger than the bed rather than covering the full floor
- Select wall-mounted floating shelves instead of freestanding furniture to preserve floor space
- Hang vertical blinds instead of heavy curtain panels to avoid visually shrinking the window
- Cap accent color items at three total rather than five to prevent visual crowding
Teen bedroom
A teen bedroom needs to balance bold retro style with a look that can evolve as the occupant’s taste changes over several years. The core constraint is durability and flexibility rather than long-term permanence.
Key strategies for teen bedrooms:
- Choose removable wallpaper panels over paint for the statement wall so the look can change easily
- Select budget-friendly neon LED strips over pricier smart lighting systems
- Use washable, machine-friendly bedding fabrics given higher daily wear
- Add a cassette or vinyl display shelf as a functional storage spot for a teen’s own collection
- Keep the hero furniture piece budget-conscious, such as an acrylic desk chair over a full dresser
- Rotate accent pillows more frequently, every 2-3 months, to match faster-changing preferences
Master bedroom
A master bedroom typically has more square footage and a higher furniture budget, which allows for a fuller expression of the 80s bedroom aesthetic. The core constraint is avoiding a room that feels like a themed set rather than a livable adult space.
Key strategies for master bedrooms:
- Invest in a full mirrored or lucite dresser as the hero piece rather than a single accent item
- Extend color blocking across two walls instead of one, given the larger square footage
- Add a matching pair of brass sunburst mirrors flanking the bed for symmetry
- Choose higher-quality Memphis-pattern textiles in silk or cotton blends over budget polyester
- Install dimmable neon lighting on a smart switch for adjustable evening ambiance
- Layer a larger 9×12 terrazzo rug to properly ground the increased floor area
Rental-friendly bedroom
A rental restricts paint, drilling, and permanent wallpaper, which means the entire 80s bedroom decor plan has to rely on removable and non-damaging methods. The core constraint is achieving the look without violating a lease agreement.
Key strategies for rental-friendly bedrooms:
- Use peel-and-stick wallpaper panels instead of paint for the statement wall
- Choose tension-rod curtain and blind hardware that requires no wall drilling
- Rely on command-strip-mounted floating shelves rated for at least 15 pounds
- Add battery-powered LED neon strips instead of hardwired lighting fixtures
- Bring all color through furniture, textiles, and rugs rather than any wall treatment
- Photograph the original hardware before swapping pulls so the unit can be restored at move-out
Frequently Asked Questions
How do I make my bedroom look 80s?
Start with a three-color palette using the 60-30-10 rule, then add one statement wall and one hero furniture piece. Layer in Memphis-pattern textiles, brass or chrome hardware, and neon accent lighting to complete the 80s bedroom aesthetic. Keep the total neon item count under five so the room stays balanced rather than overwhelming.
What not to do when decorating an 80s bedroom?
Avoid mixing Memphis Milano and Miami Vice sub-styles in the same room, since this creates a chaotic, undefined look. Skip covering every wall in pattern and skip using more than three main colors. These two mistakes are the most common reasons an attempted retro bedroom design ends up feeling generic instead of intentional.
How can I get the 80s look on a budget?
Focus your budget on the statement wall and one hero furniture piece, since these two elements carry the most visual weight. Use peel-and-stick wallpaper panels, budget LED neon strips, and thrifted brass hardware to keep total costs under $300. A color-blocked paint wall costs as little as $30-$60 and delivers nearly the same impact as full wallpaper.
How do I do an 80s bedroom in a small room?
Choose a mirrored dresser over a solid wood one to visually expand the floor area, and limit your statement wall to just the headboard wall. Use wall-mounted floating shelves instead of freestanding furniture to preserve floor space. Capping accent items at three instead of five also prevents a small 80s bedroom from feeling crowded.
Should I go neon or pastel for an 80s bedroom?
Choose neon for a Memphis Milano or bold Miami Vice sub-style, and choose pastel for a softer, more livable version of the same era. Neon works best layered as accents against a neutral 60% base rather than used across the entire room. Pastel palettes tend to age better in a primary bedroom used daily for sleep.
How often should I update 80s bedroom decor?
Reassess your accent color layer every 2-3 years, since this is the cheapest layer to refresh and the one that fatigues fastest. Keep your dominant and secondary wall colors fixed for 6-8 years, since repainting and replacing furniture carries a much higher cost. This staged approach keeps the vintage 80s bedroom feeling current without a full redecoration.
Does 80s bedroom style work for a teen room?
Yes, and it works especially well because removable wallpaper, budget LED strips, and washable bedding make the style easy to update as taste changes. Focus the budget on flexible, swappable elements rather than a single expensive hero furniture piece. This keeps the 80s teen bedroom ideas practical for a room that will change every few years.
How much does it cost to decorate an 80s bedroom?
A budget approach using paint, peel-and-stick panels, and thrifted hardware runs $150-$350 total. A fuller setup including a lucite or mirrored hero furniture piece, quality textiles, and dimmable neon lighting runs $600-$1,200. Most of this cost concentrates in the hero furniture piece and the statement wall treatment.
How do I keep 80s decor from looking dated in a bad way?
Rotate accent textiles every 3-4 months and clean lucite or mirrored surfaces weekly to prevent visible wear and fading. Replace neon bulbs before they dim and yellow, typically around the 12-month mark, to keep the nighttime glow consistent. Regular, small maintenance keeps a retro 80s wall decor scheme looking intentional rather than neglected.
Conclusion
An 80s bedroom aesthetic comes together through a three-color palette, one statement wall, and one hero furniture piece working together rather than through dozens of scattered neon objects. Start with the color palette and statement wall from the foundation steps before buying any furniture or accessories. Paint one color-blocked wall this weekend using painter’s tape and a $30 can of paint to see the immediate shift in the room’s energy.
Maintaining the look requires the same small, consistent habits as building it — rotating textiles, cleaning reflective surfaces, and replacing bulbs before they fade. A room built on these specific, repeatable choices holds its retro character for years rather than fading into a generic, undefined space.