
DIY Halloween decor turns a plain porch and entryway into the most talked-about house on the block without a single store-bought prop. Every project below uses materials you likely already own, so you save money while creating a cohesive, professional-looking display. This guide delivers 18 specific, tested projects organized from foundation to finishing touches. Start with a single color palette before you buy or build anything else.
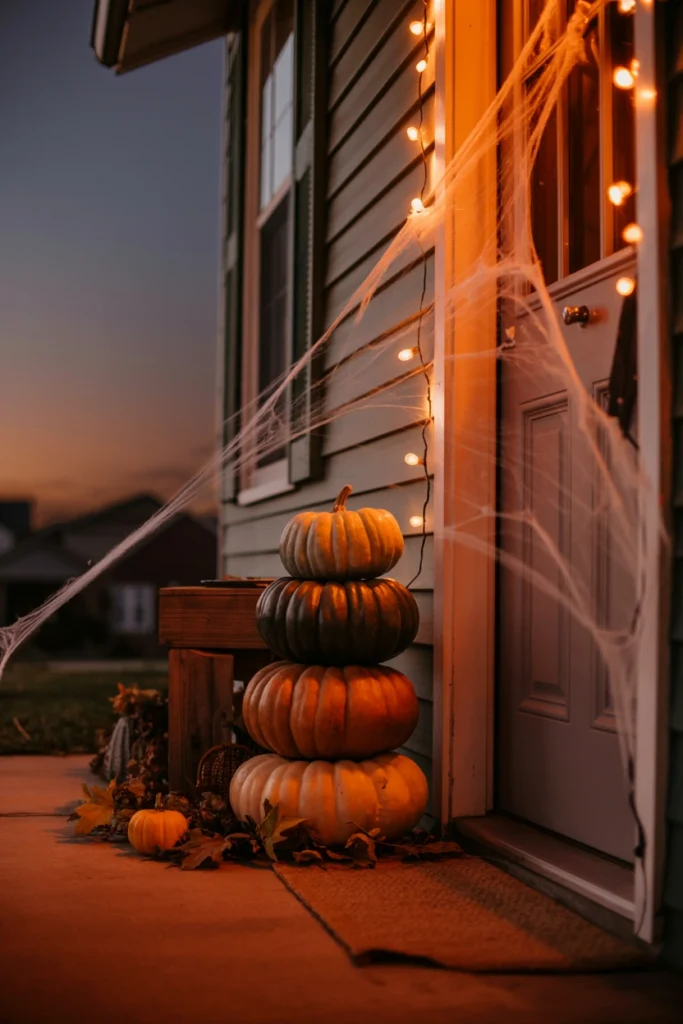
Before You Begin: 3 Foundation Steps for DIY Halloween Decor
These three steps prevent the single most common DIY Halloween decor mistake: a display that looks like scattered, mismatched props instead of one intentional scene. Complete all three before you touch glue, paint, or a single pumpkin.
1. Choose a Single Color Palette Before Buying Anything
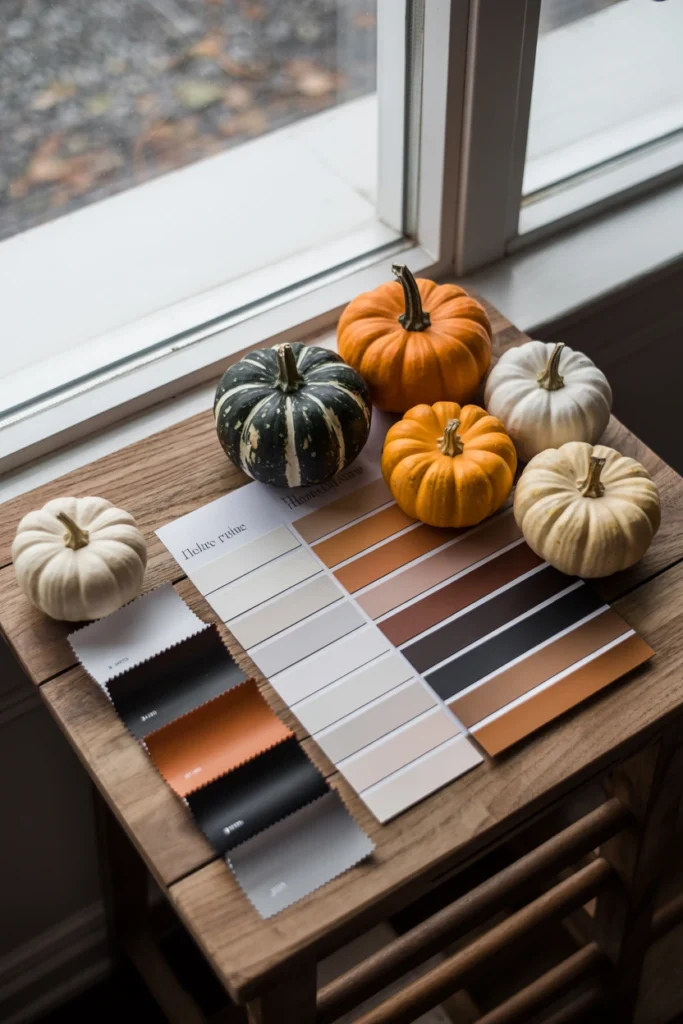
A mismatched color scheme is the fastest way to make DIY Halloween decor look cluttered instead of curated. Readers who skip this step end up combining orange, neon green, and stark white in the same three feet of porch space, and the eye has nowhere to rest. This single decision defines every material, paint color, and prop choice you make for the rest of the seas
Start by picking exactly three colors: one dominant, one accent, and one neutral. Use a ratio of 60% dominant, 30% accent, 10% neutral across your entire display — the same rule interior designers use for whole-room color schemes. This restriction feels limiting at first, but it forces every prop to visually belong together instead of competing for attention.
| Palette Style | Color Combination |
| Classic Spooky | Black (60%), orange (30%), bone white (10%) |
| Elegant Gothic | Deep purple (60%), black (30%), aged gold (10%) |
| Harvest Neutral | Cream (60%), burnt sienna (30%), sage green (10%) |
| Modern Minimal | Charcoal (60%), white (30%), matte black (10%) |
2. Map Out Your Focal Points Room by Room
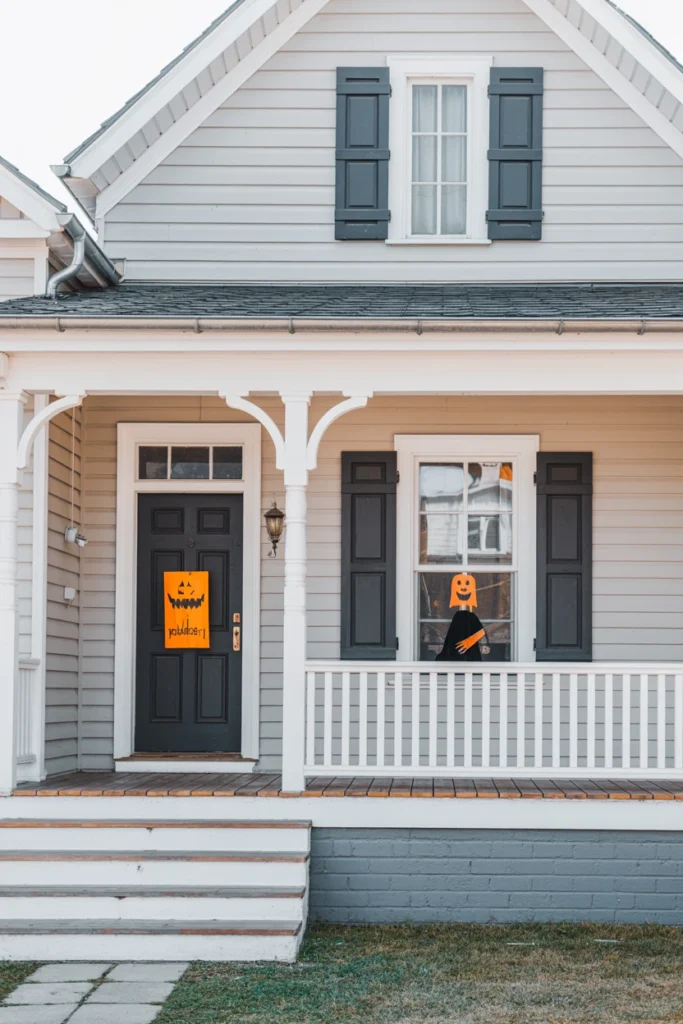
Decorating every surface equally spreads your effort so thin that no single area actually impresses anyone. This mistake costs you the “wow” moment guests remember, because attention scattered across ten small touches reads as clutter rather than intention. Mapping focal points first means every hour you spend building creates maximum visible impact.
Walk your home’s exterior and interior, and mark exactly three focal points — never more than four for an average single-family home. Assign each focal point one dominant prop at eye level, roughly 4 to 5 feet off the ground, since that’s where the human eye naturally lands first. Limiting focal points this way means even a small budget produces a display that photographs well from the street.
| Home Size | Recommended Focal Points |
| Apartment/condo | 1 entry, 1 window |
| Small single-family home | 2 exterior, 1 interior |
| Standard single-family home | 3 exterior, 1–2 interior |
| Large home/wraparound porch | 4 exterior, 2 interior |
3. Build a Reusable Base Layer of Neutral Props
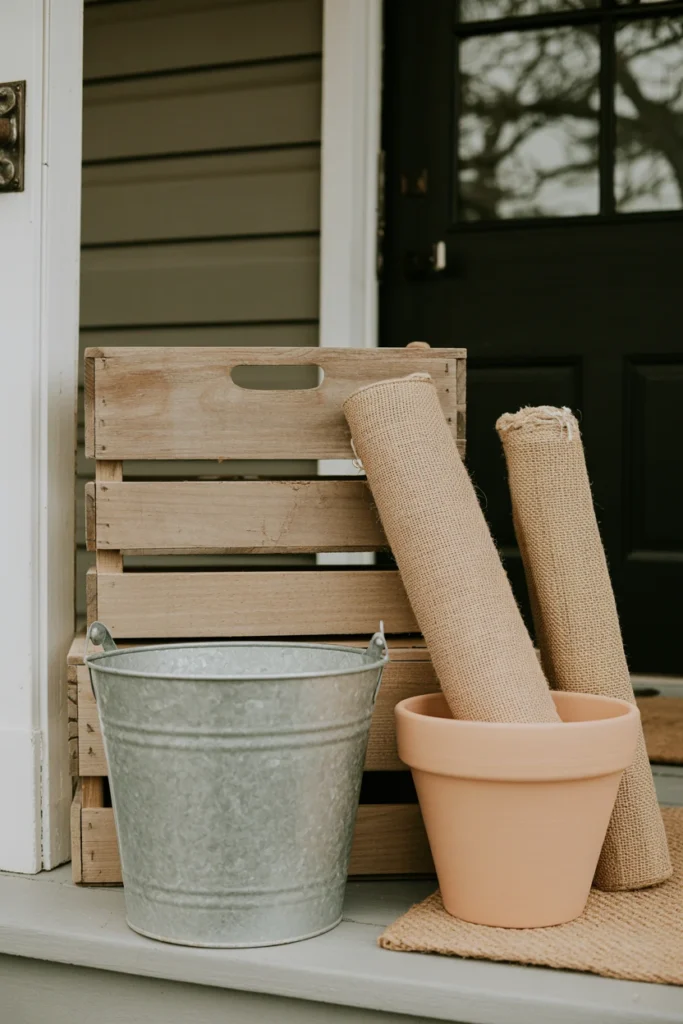
Buying single-use, one-season Halloween props wastes money you could redirect into fewer, better-built pieces. Cheap disposable decor degrades after one season outdoors, and replacing it every October eliminates any savings from buying cheap in the first place. A reusable neutral base layer permanently reduces your annual Halloween decor budget.
Start by building 3 to 5 neutral-toned base pieces — think plain wooden crates, galvanized buckets, or unpainted pumpkins — that work across multiple color schemes. Use materials like raw wood, burlap, and unfinished terracotta, since these neutrals pair with any accent color you choose in future years. This approach means next year’s refresh costs only the price of new accent pieces, not an entirely new display.
| Base Material | Reusable Across How Many Palettes |
| Unpainted wood crates | 4+ color schemes |
| Galvanized metal buckets | 4+ color schemes |
| Burlap and jute fabric | 3+ color schemes |
| Plain terracotta pots | 3+ color schemes |
DIY Halloween Porch and Entryway Decor Projects
Your porch and entryway are the first thing every trick-or-treater and neighbor sees, so these homemade Halloween decorations carry the most visual weight in your entire display. Each project below is designed to survive outdoor weather and hold up through the full month of October.
4. Layer Pumpkins in Odd-Numbered Groupings
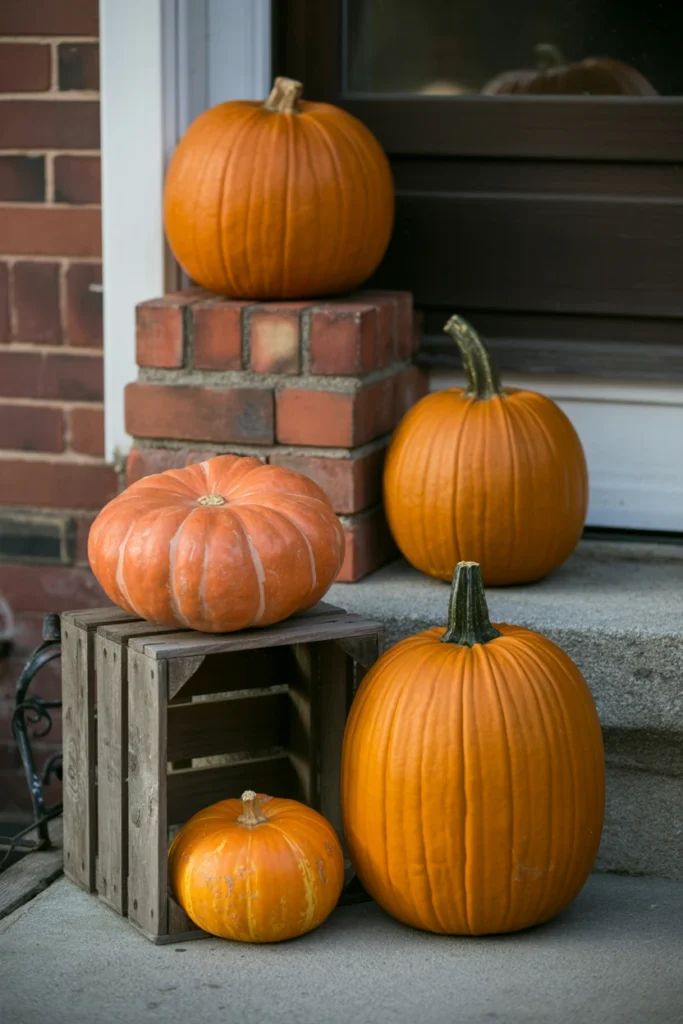
A single row of same-size pumpkins reads as staged rather than naturally gathered. Even-numbered, same-height groupings create visual symmetry that photographs flat and lacks the layered depth guests notice in professionally styled porches. Odd-numbered groupings instantly add dimension without adding any extra cost.
Start by grouping pumpkins in sets of 3 or 5, mixing at least two different sizes within each group. Stagger heights using upturned crates or stacked bricks underneath the smaller pumpkins, creating at least 4 to 6 inches of height variation. This layering technique makes even three inexpensive pumpkins look like a professionally curated arrangement.
| Group Size | Height Variation Needed |
| 3 pumpkins | 4–6 inches between tallest and shortest |
| 5 pumpkins | 6–10 inches between tallest and shortest |
| 7 pumpkins (large porch) | 8–12 inches, staggered in 3 depth rows |
| Single pumpkin | Pair with a taller neutral prop for contrast |
5. Install a Cobweb Stretch Across the Doorframe
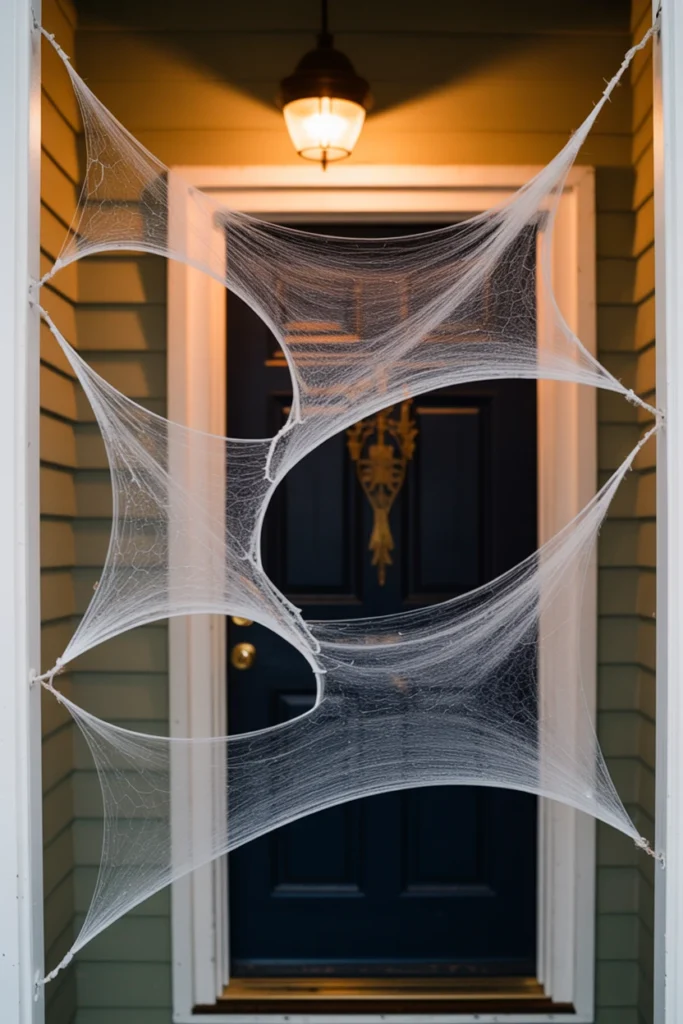
A cobweb applied in one flat sheet looks like a plastic prop the moment porch light hits it. Store-bought stretch webbing straight out of the bag lies too dense and uniform, which eliminates the realistic, layered look real spiderwebs actually have. Pulling and thinning the material transforms a $2 bag of webbing into a convincingly eerie doorframe feature.
Start by pulling a bag of stretch cobweb material apart slowly by hand for a full 2 to 3 minutes, working in small sections rather than one large pull. Anchor it at 3 to 4 points around the doorframe using clear removable hooks, leaving natural sagging gaps of 2 to 3 inches between anchor points. This uneven, gapped installation creates shadow depth that a flat sheet never achieves.
| Anchor Points | Best Doorframe Width |
| 3 points | Under 36 inches (standard door) |
| 4 points | 36–48 inches (wide entry) |
| 5–6 points | 48+ inches (double doors) |
| 2 points + corner drape | Narrow apartment entry |
6. Hang a Silhouette Display on Your Front Window
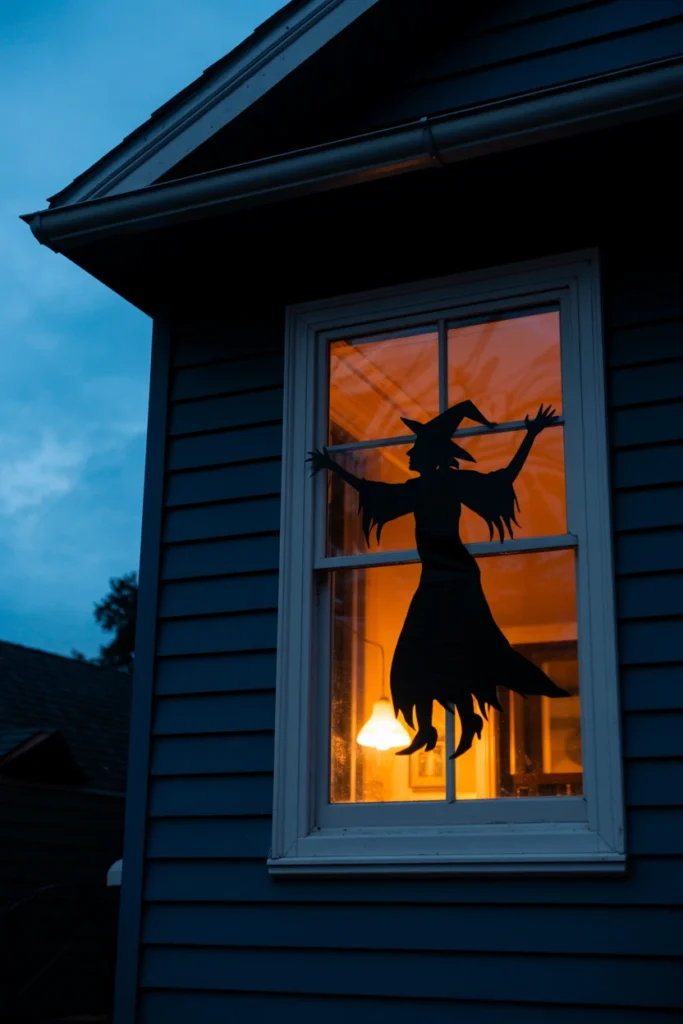
An empty, undecorated window next to a fully decorated porch creates a visual gap that undercuts the rest of your display. Guests approach from the street and see the window before the door, so a bare window immediately signals an unfinished, half-effort setup. A silhouette display closes that gap using nothing but black paper and a single light source.
Start by cutting silhouette shapes — a witch, a black cat, or bare branches — from black cardstock or foam board, sized to at least 60% of your window’s height. Tape the shapes directly to the interior glass and place a single lamp or battery light 12 to 18 inches behind them after dark. This technique creates a moving, dramatic shadow effect that costs less than five dollars in materials.
| Window Size | Silhouette Height |
| Small (24–36 in) | 15–22 inches |
| Standard (36–48 in) | 22–29 inches |
| Large (48–60 in) | 29–36 inches |
| Bay/picture window | 3 layered silhouettes, varied heights |
DIY Halloween Lighting and Ambiance Ideas
Lighting defines whether your Halloween decor reads as spooky or just dim, and these homemade lighting techniques control mood without a single expensive smart-light purchase.
7. Swap White Bulbs for Amber or Orange-Toned Lights
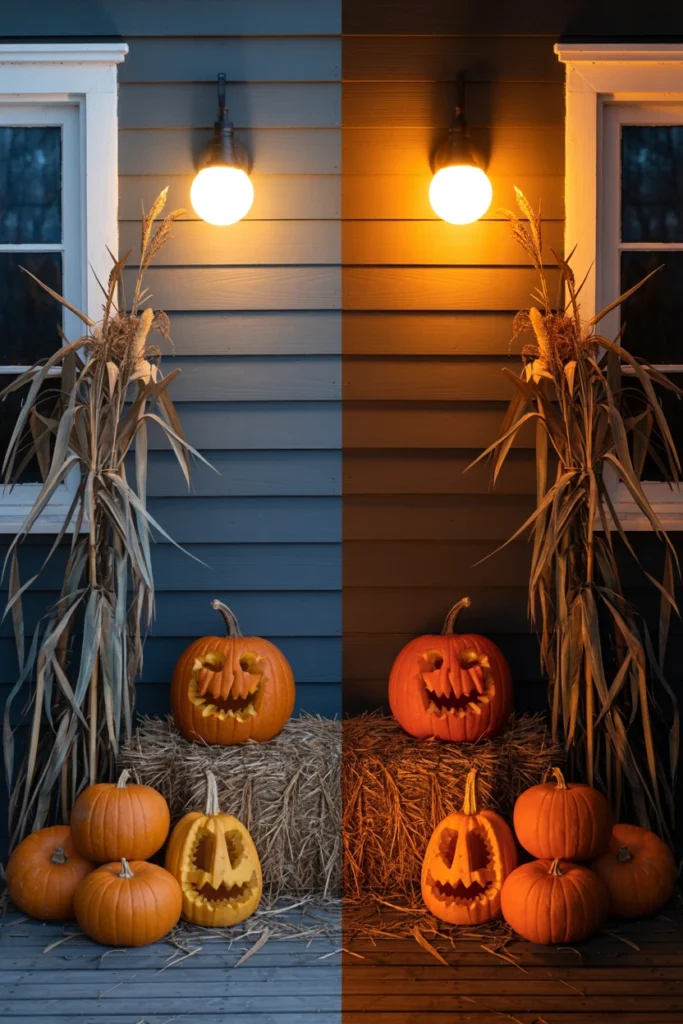
Standard white porch bulbs wash out every carved detail on your pumpkins and props, flattening the exact texture you spent time creating. Cool white light reads as clinical and bright rather than atmospheric, which undercuts every other decor choice in your display. Amber-toned bulbs instantly shift the entire porch from “lit” to “haunted” with zero other changes re
Start by replacing your porch light bulb with a 2200K to 2700K amber or warm-white LED, which is the color temperature range associated with candlelight and firelight. Add one additional low-wattage amber bulb at ground level behind your pumpkin grouping to cast shadows upward instead of down. This upward lighting angle is the single most effective trick professional haunted-house designers use for depth.
| Light Temperature | Visual Effect |
| 2200K | Deep amber, candlelight effect |
| 2700K | Warm orange-white, classic porch glow |
| 3000K | Soft warm white, subtle spooky tone |
| 5000K+ (avoid) | Cool white, flattens texture and mood |
8. Add Flickering Battery Candles Inside Jars
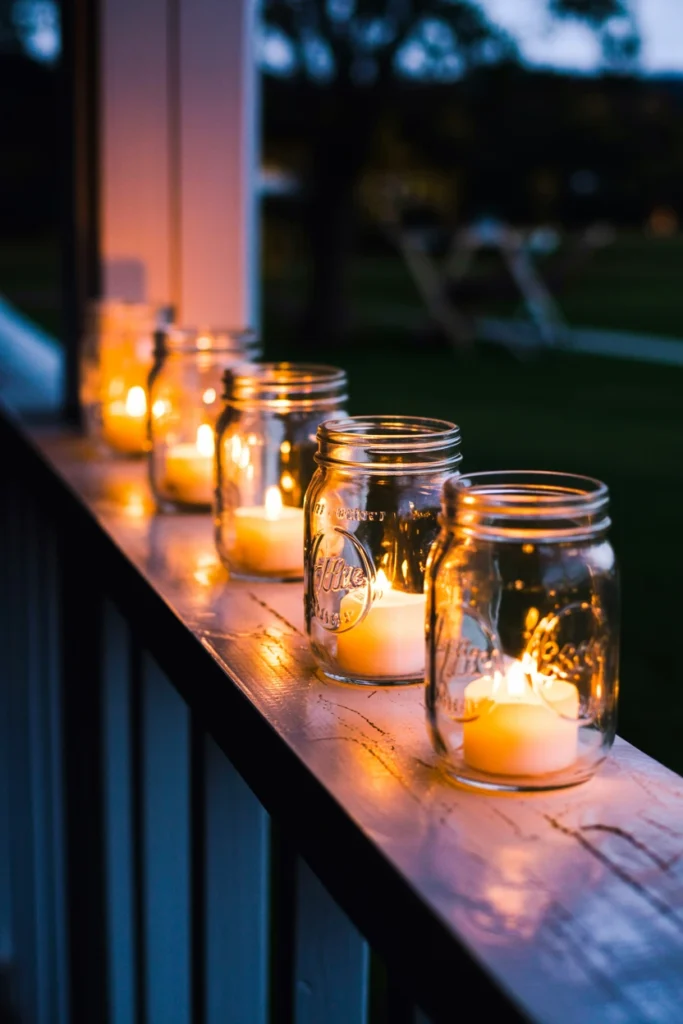
Real flames on an outdoor porch create a fire hazard around paper decorations, fabric webbing, and dry autumn leaves. Battery-powered options that don’t flicker look obviously fake under close inspection, which breaks the illusion the moment a guest walks past. Flickering LED candles inside glass jars solve both problems for under three dollars per unit.
Start by placing one flickering-mode LED tealight inside each mason jar or hurricane glass, positioned at varying heights along your porch railing or steps. Space jars 12 to 18 inches apart in groups of 3 to 5, since evenly spaced single jars read as generic string lighting rather than intentional ambiance. This spacing pattern creates a warm, staggered glow that guides guests toward your front door.
| Jar Spacing | Best Use |
| 12 inches apart | Steps, narrow railing |
| 18 inches apart | Wide porch ledge |
| Clustered groups of 3 | Entry table, focal point |
| Single jar per step | Staircase pathway lighting |
9. Create a Fog Effect Using a Cool-Mist Humidifier
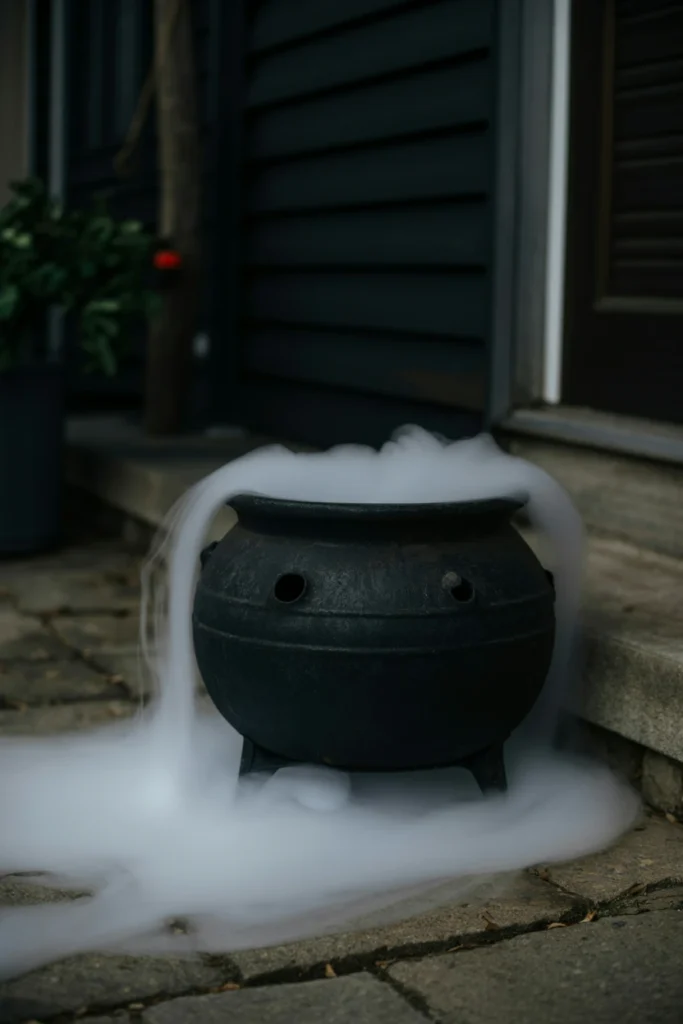
Full-size fog machines cost upward of forty dollars and often produce too much output for a single porch or entryway. Overpowering fog obscures your other decor entirely within seconds, wasting the time you spent building pumpkin groupings and silhouette displays. A cool-mist humidifier produces a controllable, low-lying fog effect for a fraction of the cost.
Start by filling a standard cool-mist humidifier with water and placing it inside a black cauldron or bucket to hide the unit itself. Drill 4 to 6 small holes around the base of the container to let fog escape at ground level rather than shooting straight up. This ground-level release mimics the low, creeping fog effect seen in professional haunted attractions.
| Container | Fog Height Achieved |
| Plastic cauldron (12 in) | 4–8 inches, ground-hugging |
| Bucket (14 in) | 6–10 inches |
| Open tray (no cover) | 10–14 inches, less controlled |
| Tall vase (18+ in) | Not recommended, fog escapes upward |
Budget and Upcycled Materials for Homemade Halloween Decorations
These homemade Halloween decorations use materials already in your recycling bin or garage, proving that a genuinely impressive display doesn’t require a large budget.
10. Repurpose Cardboard Boxes Into Tombstone Shapes
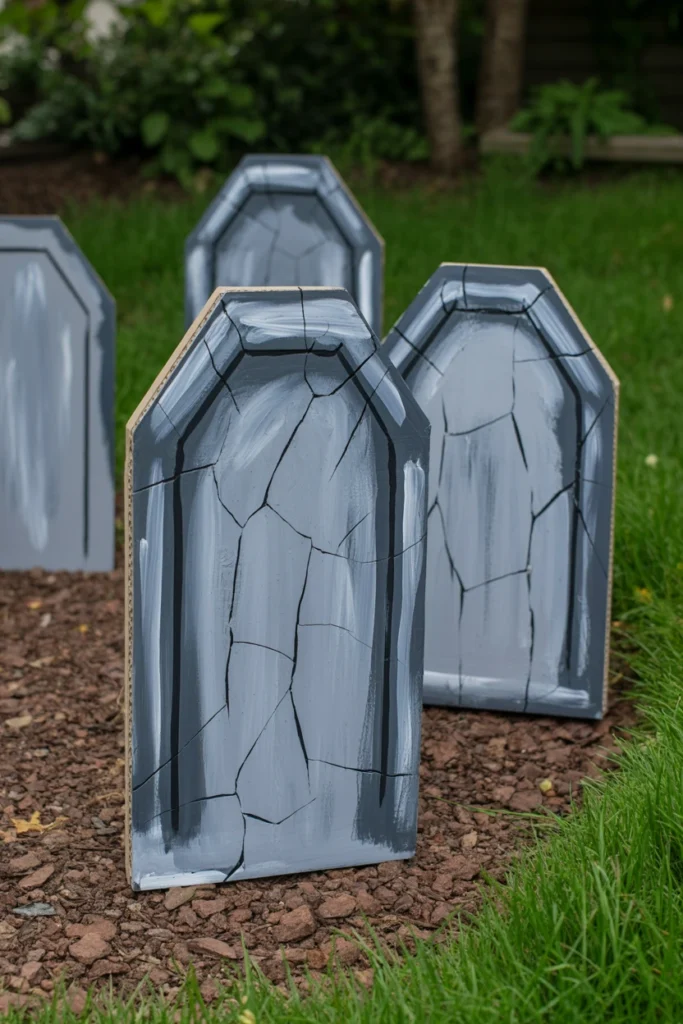
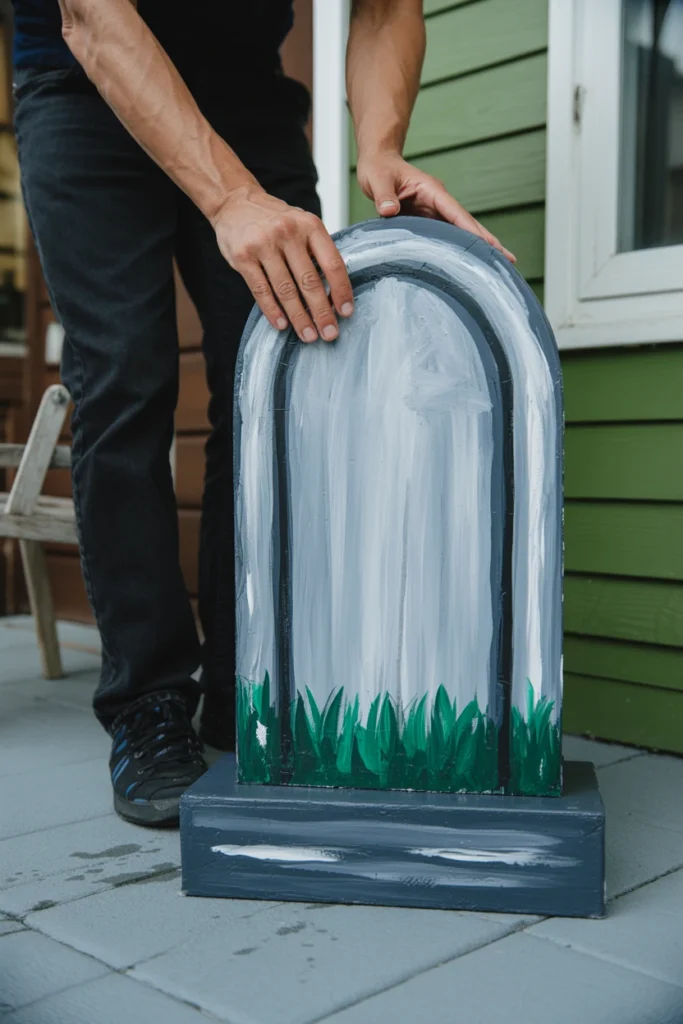
Store-bought foam tombstones cost $8 to $15 each and rarely survive more than two seasons of outdoor weather. Buying multiples for a full graveyard scene quickly turns into a $60 to $100 expense for props that crack within a year. Cardboard tombstones cost nothing beyond paint and last just as long with proper sealing.
Start by cutting rounded-top tombstone shapes from moving boxes or appliance packaging, sizing each between 18 and 30 inches tall for realistic proportion. Coat each shape with two layers of gray exterior paint, then seal with a clear waterproof spray to survive rain and dew. This sealing step is the specific detail that determines whether your tombstones last one Halloween or five.
| Tombstone Height | Best Placement |
| 18–20 inches | Front of grouping, low visibility |
| 22–26 inches | Mid-row, standard focal height |
| 28–30 inches | Back row or single statement piece |
| 12–15 inches (mini) | Along walkway edges |
11. Use Cheesecloth to Build Creepy Ghost Figures
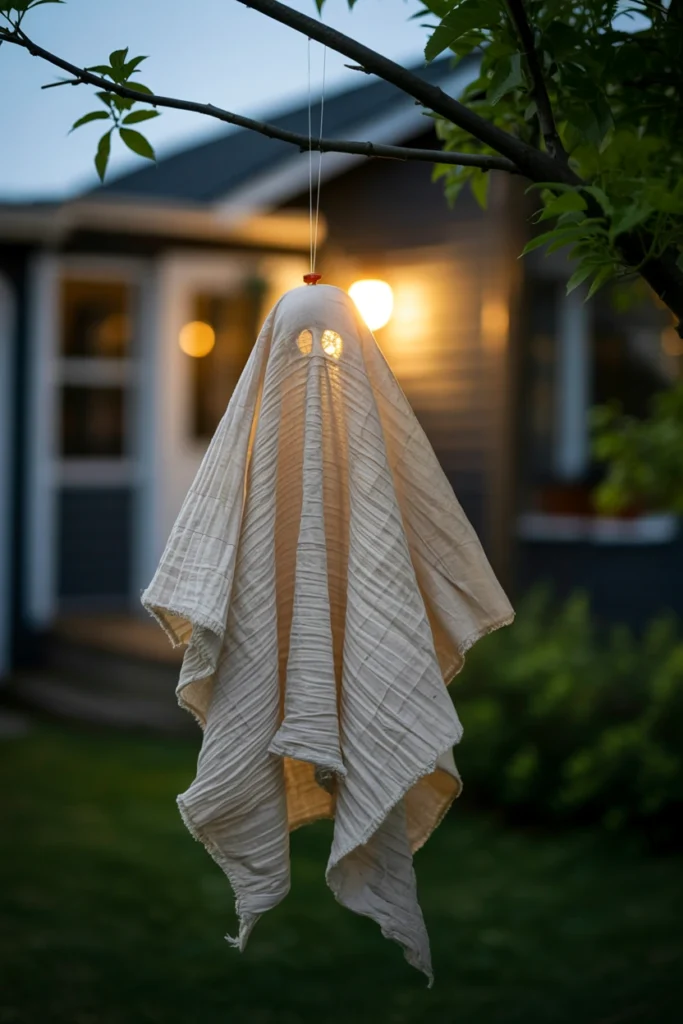
Plastic sheet ghosts from the dollar store move stiffly in wind and look identical to every other house on the street. A generic, mass-produced prop eliminates any sense that your display took real effort or creativity. Cheesecloth ghosts move naturally in a breeze and cost under five dollars for a set of three.
Start by dipping cheesecloth in a mixture of fabric stiffener and water, then draping it over a suspended balloon or foam head shape to dry for 24 hours. Remove the balloon once dry and hang the hollow shape from a tree branch or porch beam using clear fishing line. This drying method creates realistic draped folds that a flat sheet ghost can never replicate.
| Cheesecloth Amount | Ghost Size |
| 1 yard | Small, 18–24 inch ghost |
| 2 yards | Medium, 30–36 inch ghost |
| 3 yards | Large, 40+ inch ghost |
| 4+ yards | Draped multi-figure cluster |
12. Transform Mason Jars Into Apothecary Bottles
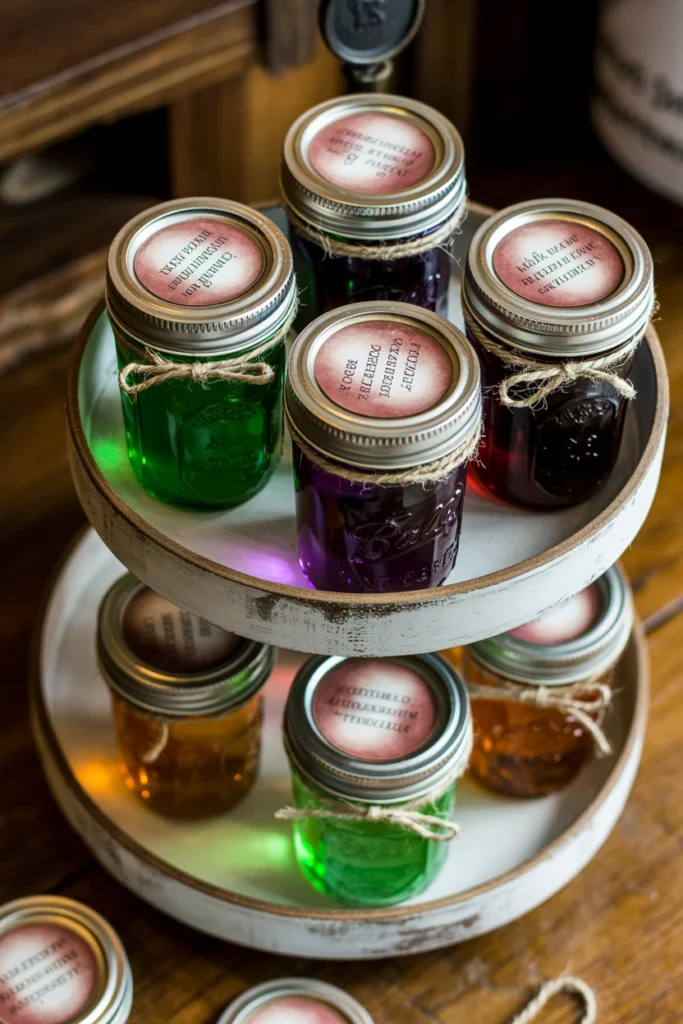
Empty mason jars sitting unlabeled on a shelf add nothing to a Halloween display beyond generic clutter. Without a clear theme, jars read as leftover kitchen storage rather than intentional decor, wasting a genuinely versatile material. Labeled apothecary bottles turn the same jars into one of the most complimented small details on any Halloween table.
Start by filling each jar with a colored liquid base — water tinted with food coloring, or filler like rice dyed with fabric dye — then add a printed vintage-style label. Wrap the jar neck with twine or lace and set 5 to 7 jars together on a tiered tray or shelf for a full apothecary shelf effect. This grouping number is specific: fewer than five looks sparse, and more than nine starts to look cluttered.
| Jar Count | Display Style |
| 3 jars | Small side-table accent |
| 5–7 jars | Full apothecary shelf effect |
| 9+ jars | Statement bookshelf or mantel display |
| 1 oversized jar | Single dramatic centerpiece |
Styling and Finishing Touches for Spooky Home Decor
The details in this section separate a decorated house from one that looks professionally styled. These finishing touches take the least time but deliver the most visible polish.
13. Anchor Each Vignette With One Statement Piece
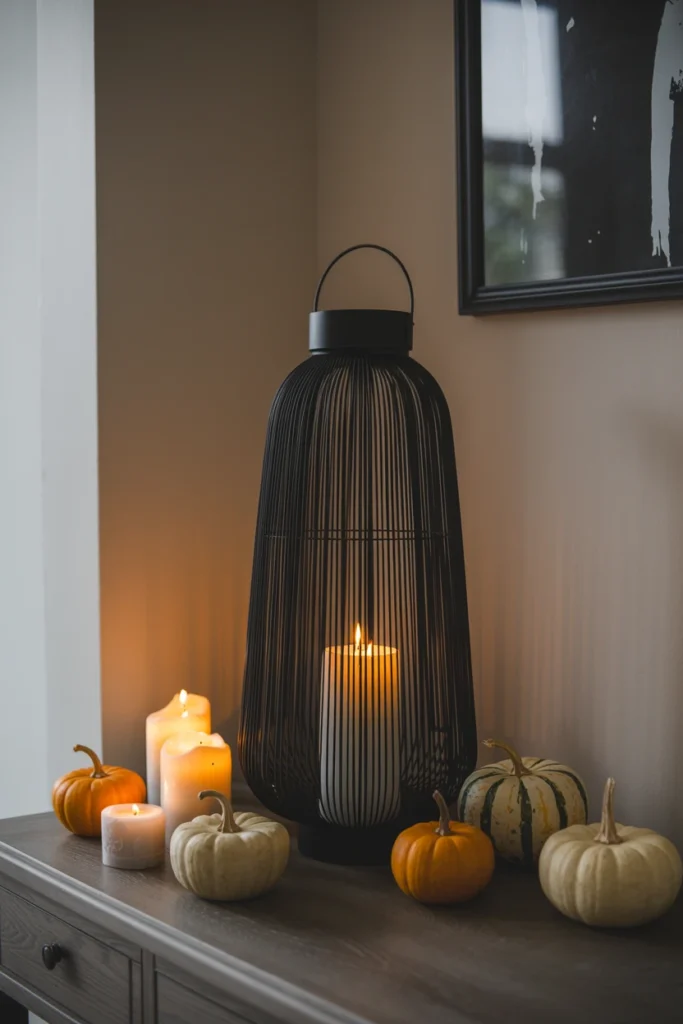
A collection of small, same-size props with nothing larger creates a visually flat grouping that guests glance past without stopping. Every item competing for equal attention means none of them actually stand out. One larger statement piece per vignette instantly gives the eye a place to land first.
Start by selecting one prop at least 1.5 times the height of everything else nearby — a tall lantern, an oversized pumpkin, or a life-size figure. Place it slightly off-center within the grouping rather than dead center, following the same rule of thirds used in professional photography composition. This off-center placement is the detail that makes a vignette look curated instead of arranged in a straight line.
| Statement Piece Height | Supporting Prop Height |
| 24 inches | 12–16 inches |
| 36 inches | 18–24 inches |
| 48 inches | 24–32 inches |
| 60+ inches | 32–40 inches |
14. Layer Textures to Avoid a Flat, Store-Bought Look
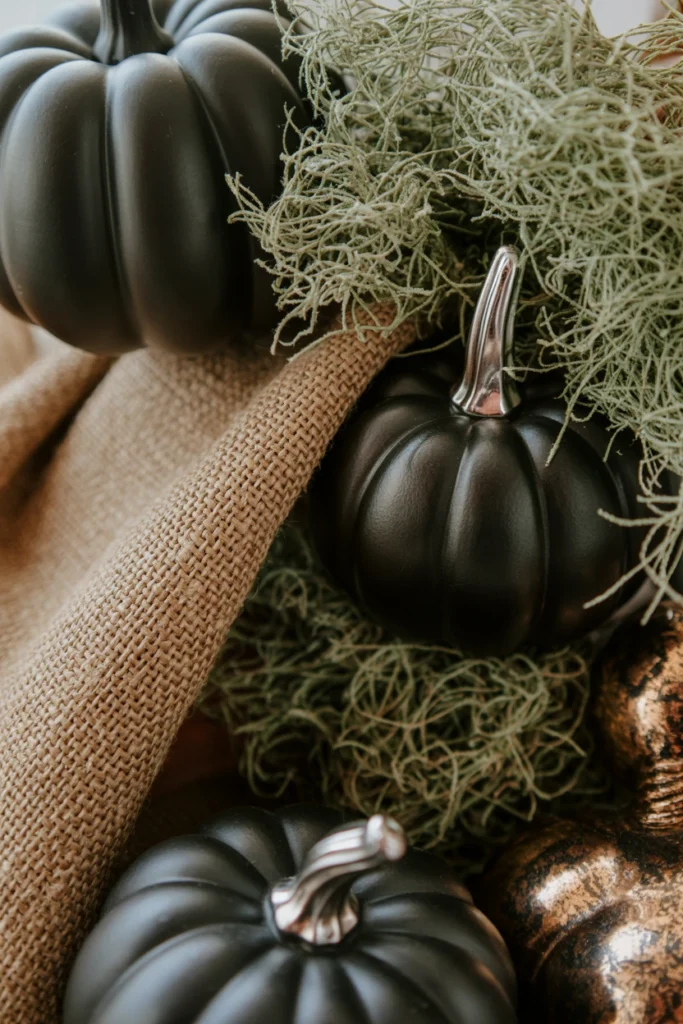
An entire display built from the same smooth plastic finish reads as cheap regardless of how much you spent. Uniform texture eliminates the visual depth that makes a scene feel handmade and collected over time. Mixing at least three distinct textures transforms the same props into something that photographs like a styled shoot.
Start by combining at least three textures within each vignette: something rough like burlap or bark, something smooth like glass or ceramic, and something soft like moss or dried florals. Layer these textures at different heights rather than side by side on the same plane. This texture layering technique is the single most effective upgrade for making budget props look expensive.
| Texture Category | Example Materials |
| Rough | Burlap, bark, twine, raw wood |
| Smooth | Glass, ceramic, painted metal |
| Soft | Moss, dried flowers, feathers |
| Reflective | Mirror, metallic paint, glazed finish |
15. Apply Weathering Techniques to New Props
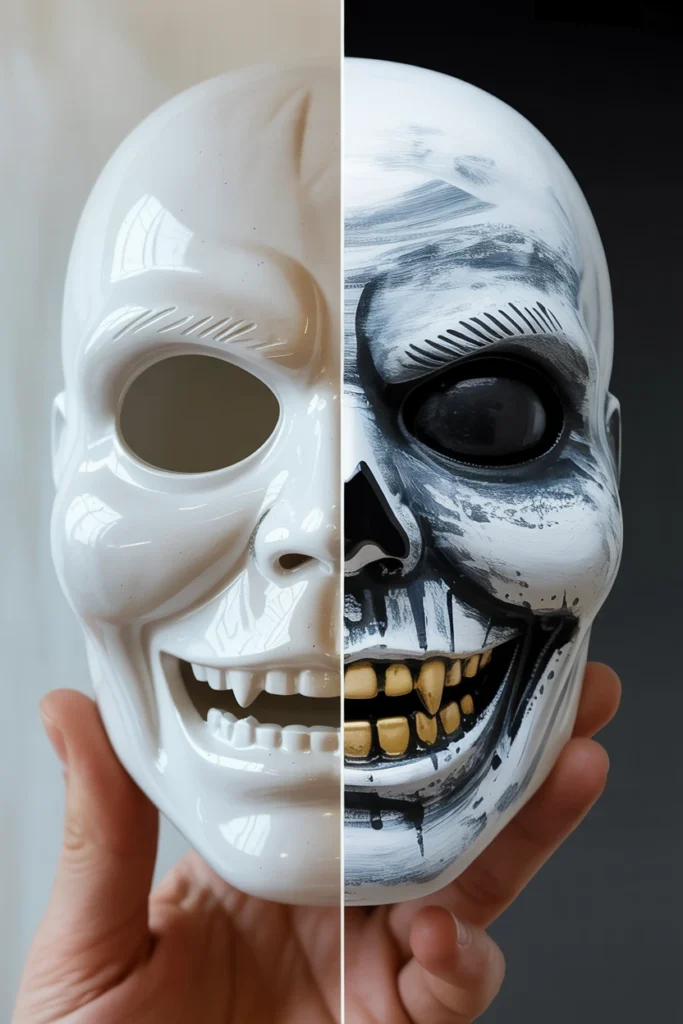
Brand-new, brightly painted props look obviously fake next to naturally aged materials like real pumpkins and dried branches. This mismatch in apparent age eliminates the illusion that your entire scene belongs together in the same abandoned, spooky world. Weathering new props for under ten minutes each closes that gap completely.
Start by mixing black or dark brown craft paint with water at a 1-to-4 ratio, then dry-brushing it lightly over edges and raised details of any new prop. Wipe excess with a dry rag immediately, leaving pigment settled only in crevices and corners. This dry-brushing technique is the specific method professional prop makers use to simulate years of weather exposure in minutes.
| Prop Material | Weathering Technique |
| Plastic/resin | Dry-brush with diluted dark paint |
| Foam | Light sanding, then dry-brush |
| Fabric | Tea-stain soak, air dry |
| Metal | Vinegar-salt solution for rust effect |
Maintenance and Long-Term Habits for Halloween Decorating
DIY Halloween decor that looks perfect on October 1st can look tired and worn by Halloween night without a maintenance routine. These habits keep your display consistent for the full month.
16. Rotate Outdoor Props Weekly to Prevent Weather Damage
Props left in the exact same spot for a full month absorb concentrated sun fade on one side and moisture damage on the other. This uneven wear becomes visibly obvious by the third week, undercutting weeks of setup effort right before Halloween night itself. A simple weekly rotation prevents this damage entirely at zero additional cost.
Start by rotating each outdoor prop 90 to 180 degrees once per week, and shift entire groupings 6 to 12 inches from their original position if rain is forecast. Check the undersides of fabric and paper props specifically, since moisture collects there first and causes mold within 5 to 7 days. This rotation habit extends the usable life of every prop into next season.
17. Store Reusable Pieces in Labeled, Stackable Bins
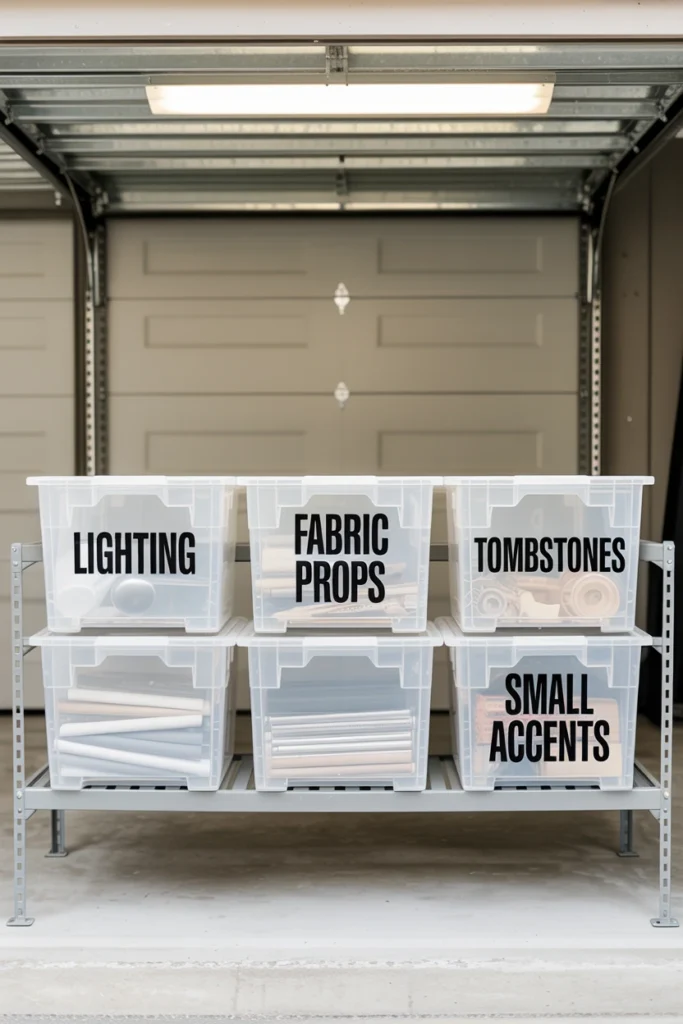
Unlabeled storage boxes turn next year’s setup into a frustrating hour of digging through unrelated holiday decor. This disorganization is the specific reason most households rebuy props they already own rather than reusing what’s already stored. Labeled bins by category eliminate that wasted time and wasted money permanently.
Start by sorting props into 3 to 5 clear, stackable bins labeled by category — lighting, fabric props, tombstones, and small accents. Wrap fragile items like glass jars in the same tissue paper or cloth you used during display to prevent scratching in storage. This category system means next October’s setup takes under 30 minutes instead of a full afternoon.
| Bin Category | Typical Contents |
| Lighting | LED candles, string lights, bulbs |
| Fabric props | Cheesecloth ghosts, webbing, cloth |
| Structural props | Tombstones, crates, stands |
| Small accents | Jars, labels, twine, paint supplies |
18. Replace Batteries and Bulbs Before Peak Trick-or-Treat Nights
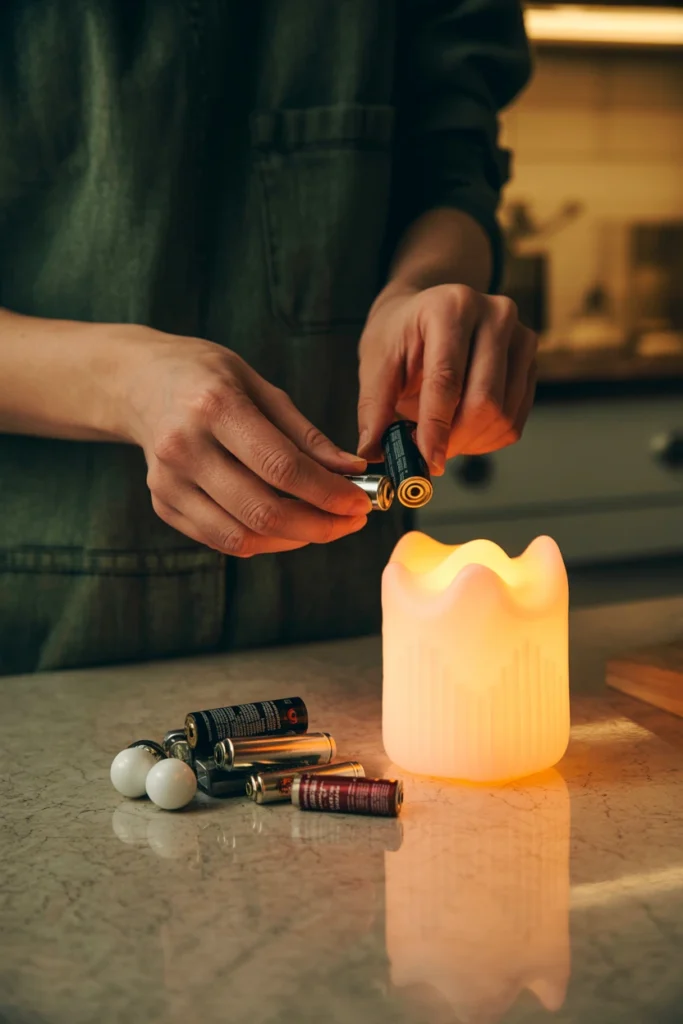
Dead batteries in flickering candles or silhouette lighting go unnoticed until the exact night guests actually see your display. A dark prop that was supposed to glow eliminates the entire effect it was built to create, and nobody notices the failure until it’s too late to fix quickly. Replacing batteries proactively guarantees your display works when it matters most.
Start by testing every battery-powered element 48 hours before Halloween night, not on the day itself when stores may be sold out of replacements. Keep one spare set of batteries per light type stored inside your labeled bins year-round. This 48-hour buffer gives you enough time to source replacements without last-minute stress.
| Element | Recommended Check Timing |
| Flickering candles | 48 hours before Halloween |
| String lights | 1 week before, full test run |
| Silhouette backlight | 48 hours before |
| Fog humidifier | Day before, refill and test |
Common DIY Halloween Decor Mistakes That Kill Curb Appeal
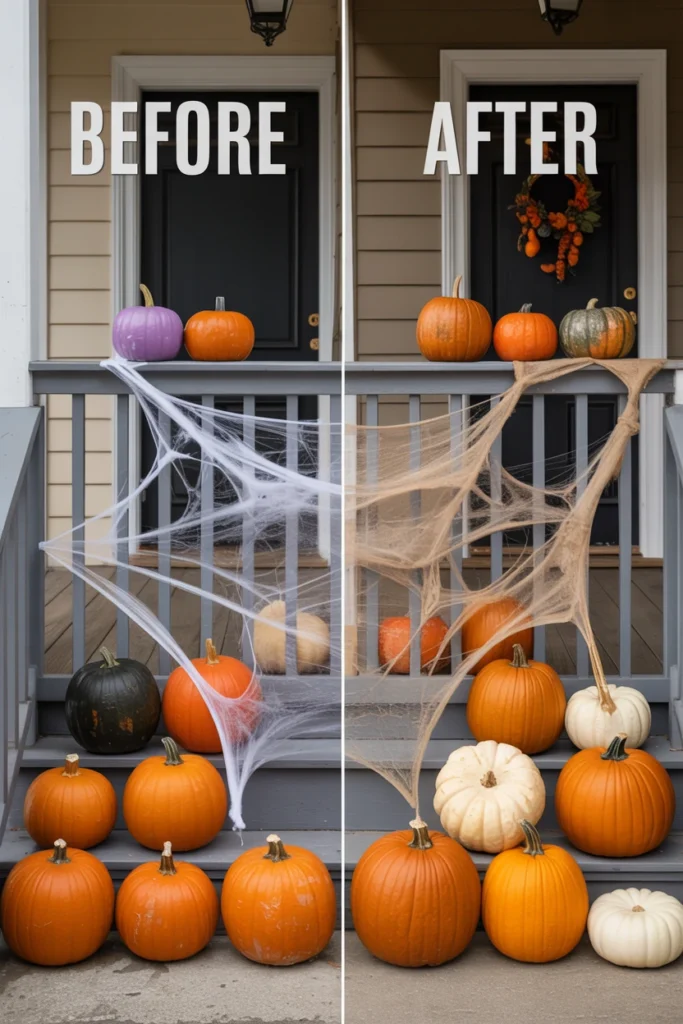
These eight mistakes appear in nearly every under-performing DIY Halloween display. Correcting them costs nothing beyond a small adjustment to materials or placement.
| Mistake | Why It Hurts the Space | Better Alternative |
| Mixing more than 3 colors | Creates visual chaos, no cohesion | Limit to a 3-color palette with a 60/30/10 ratio |
| Even-numbered prop groupings | Reads as staged and symmetrical | Group props in odd numbers of 3 or 5 |
| Cool white porch lighting | Flattens texture, feels clinical | Switch to 2200K–2700K amber bulbs |
| Flat stretch cobweb straight from bag | Looks obviously plastic and dense | Hand-pull webbing for 2–3 minutes before hanging |
| Same-height prop groupings | Lacks depth, looks flat in photos | Stagger heights with crates or bricks |
| Unlabeled storage bins | Wastes hours next season, causes rebuying | Sort into 3–5 labeled category bins |
| Overcrowding every surface | No clear focal point, reads as clutter | Limit to 3–4 mapped focal points |
| Skipping battery checks | Dead lights go unnoticed until guests arrive | Test all elements 48 hours before Halloween |
DIY Halloween Decor by Space and Situation
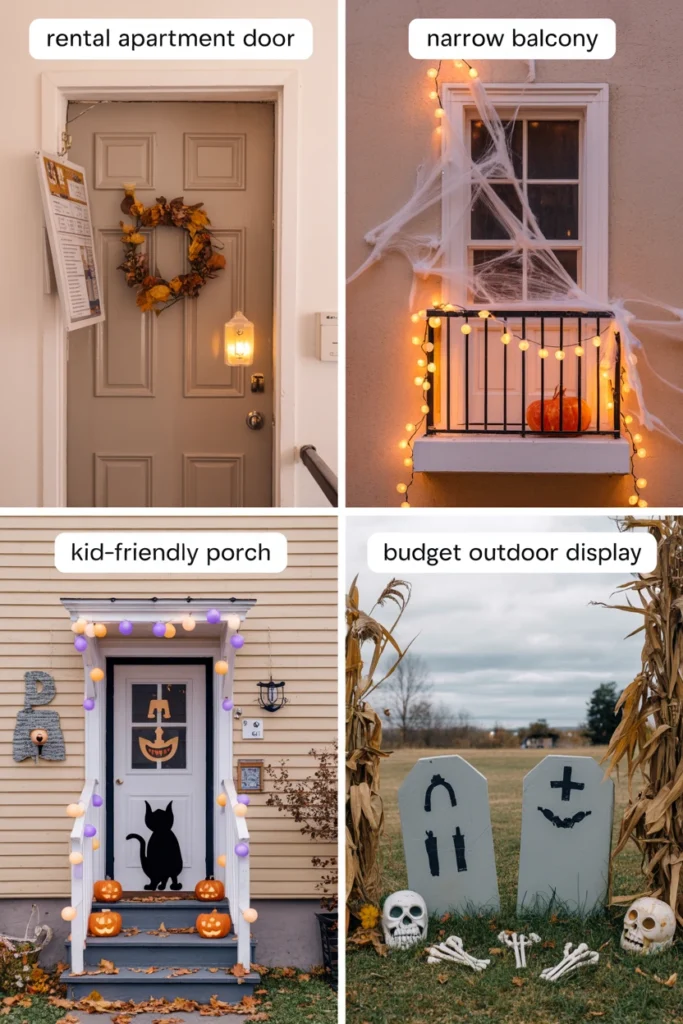
Renters
Renters need DIY Halloween decor that avoids permanent damage to walls, doors, and exterior fixtures while still creating real visual impact. The core constraint is reversibility — every attachment method must remove cleanly without marks or holes.
Key strategies for renters:
- Use removable clear hooks rated for outdoor use instead of nails or screws
- Weight freestanding props with sand-filled bases instead of ground stakes
- Choose command-strip-mounted silhouettes for window displays
- Skip paint on any shared or landlord-owned surface, including porch railings
- Store all props in bins clearly labeled for a quick, complete move-out removal
Small Apartments and Balconies
Small apartments and balconies need decor that fits a narrow footprint without blocking walkways or fire exits required by most lease agreements. The core constraint is scale — oversized porch-style groupings simply don’t fit.
Key strategies for small apartments:
- Scale every prop down by roughly 40% compared to single-family home sizing
- Use door-hanging displays instead of floor-standing groupings
- Choose battery lighting exclusively, since balconies rarely have outdoor outlets
- Layer decor vertically on a single shelf or ledge rather than spreading it out
- Prioritize one strong focal point over multiple small scattered accents
Families With Young Kids
Families with young children need DIY Halloween decor that skips genuinely frightening elements while still delivering festive impact. The core constraint is age-appropriateness combined with safety around curious hands.
Key strategies for families with young kids:
- Replace fog and dry-ice effects with simple string lighting around ground level
- Choose friendly silhouette shapes like black cats over frightening figures
- Secure all freestanding props to prevent tip-over near foot traffic
- Involve kids directly in painting cardboard tombstones for a shared project
- Keep candle-style lighting to flameless LED versions exclusively
Outdoor-Only Budget Decorators
Outdoor-only budget decorators need every dollar spent to show up clearly from the street, since interior decor isn’t part of the plan. The core constraint is maximum visible impact per dollar spent.
Key strategies for outdoor-only budget decorators:
- Prioritize lighting upgrades first, since they affect the entire display’s mood
- Build tombstones from free cardboard before buying any single prop
- Focus your full budget on one strong focal point instead of spreading thin
- Choose reusable neutral bases that carry into next year’s theme
- Skip fog machines initially and add them only after lighting and props are set
Frequently Asked Questions
How do you make Halloween decorations at home?
Start with cardboard, cheesecloth, mason jars, and paint — materials most households already have on hand. Build tombstones from cardboard boxes, ghosts from stiffened cheesecloth, and apothecary bottles from labeled mason jars. Focus on one cohesive color palette so homemade pieces look intentional rather than mismatched. These materials also survive multiple seasons when properly sealed or stored.
What Halloween decorations should you avoid making yourself?
Avoid DIY electrical projects involving exposed wiring, open-flame candles near fabric props, and large fog machines without proper ventilation research. These carry real safety risk that outweighs any cost savings. Stick to battery-powered lighting and humidifier-based fog instead, both of which deliver similar effects with far less risk.
How do you decorate for Halloween on a tight budget?
Build a reusable neutral base layer first — crates, buckets, and burlap — then add cheap seasonal accents like paint and twine each year. Cardboard tombstones and cheesecloth ghosts cost under five dollars total for materials. Reusing the same structural pieces across multiple years is what actually keeps the annual budget low long-term.
How do you do DIY Halloween decor in an apartment?
Scale every prop down roughly 40% compared to single-family home sizing, and rely on door-hanging and window displays instead of floor groupings. Battery-powered lighting works best since balconies rarely have outdoor outlets. One strong focal point on your door or a single window creates more impact than several scattered small pieces.
Should you buy or make Halloween decorations?
A mix works best: buy foundational neutral pieces like crates or lighting, and make detail pieces like tombstones and ghosts yourself. Store-bought foam tombstones cost $8 to $15 each and crack within a couple seasons, while a cardboard version costs almost nothing and lasts just as long when sealed. Homemade pieces also let you match your exact chosen color palette, which pre-made sets rarely do.
How often should you update your Halloween decor?
Rotate outdoor props weekly to prevent sun fade and moisture damage, and refresh your color accents or theme every 2 to 3 years to keep the display feeling current. The reusable neutral base pieces don’t need replacing at all if stored properly. Small seasonal refreshes cost far less than replacing an entire display every year.
Does DIY Halloween decor work for a small porch?
Yes — small porches actually benefit from the “3–4 focal point” mapping rule more than large ones, since limited space forces intentional placement instead of clutter. Stick to one main grouping near the door and one smaller accent near a window or railing. Vertical layering, like hanging silhouettes and stacked lanterns, adds visual interest without taking up floor space.
How much does DIY Halloween decor cost compared to store-bought?
A full DIY porch display built from cardboard, cheesecloth, mason jars, and repainted thrift finds typically costs under $30 in materials. The same visual impact from store-bought foam and plastic props usually runs $80 to $150. The gap widens further each year since DIY neutral base pieces are reusable and store-bought foam props often crack after one or two seasons.
How do you keep DIY Halloween decorations from falling apart?
Seal cardboard and foam props with a clear waterproof spray after painting, and store fabric pieces flat or loosely folded rather than crushed in tight bins. Check outdoor props for moisture every 5 to 7 days, since dampness is the leading cause of early breakdown. Rotating props weekly also prevents the concentrated sun and rain exposure that causes most seasonal damage.
Conclusion
DIY Halloween decor delivers the biggest visual impact per dollar of any home decorating season, and the results start with a single locked-in color palette. Begin with the three foundation steps — palette, focal points, and a reusable neutral base — before building a single prop. Building one cardboard tombstone or one cheesecloth ghost today gives you a finished, testable technique to repeat across the rest of your display.
A display built through consistent weekly maintenance, not a single weekend effort, is what actually holds up through a full month of guests and weather. Every technique in this guide works because it combines a specific material, a specific measurement, and a specific placement rule — and that combination is what separates a curated display from a cluttered one.