
DIY Halloween decorations outdoor displays fail for one reason: scattered props with no plan. As professional interior designers consistently find, a haunted yard reads as intentional only when one focal point, one color story, and layered lighting work together instead of competing. Research consistently shows that 51% of Halloween celebrants decorate their homes or yards, with $4.2 billion spent on Halloween decorations nationwide (National Retail Federation, 2025) — which is why getting the planning steps right makes every later build easier.
This guide gives you 23 exact builds, in order, for your porch, lawn, pumpkins, and lighting. Every tip names the materials, the measurements, and the first physical action. You finish with homemade Halloween decorations outdoor that survive wind, rain, and a full October.
Before You Begin: 3 Foundation Steps for Outdoor Halloween Decorations
1. Measure Your Display Zone Before Buying Supplies
Props bought without measurements look tiny in a real yard. Scale errors cost you money twice, because undersized props get replaced and oversized ones crowd the walkway you need clear. A measured zone lets you buy exactly the right number of props and creates a display that fills the space cohesively without clutter.
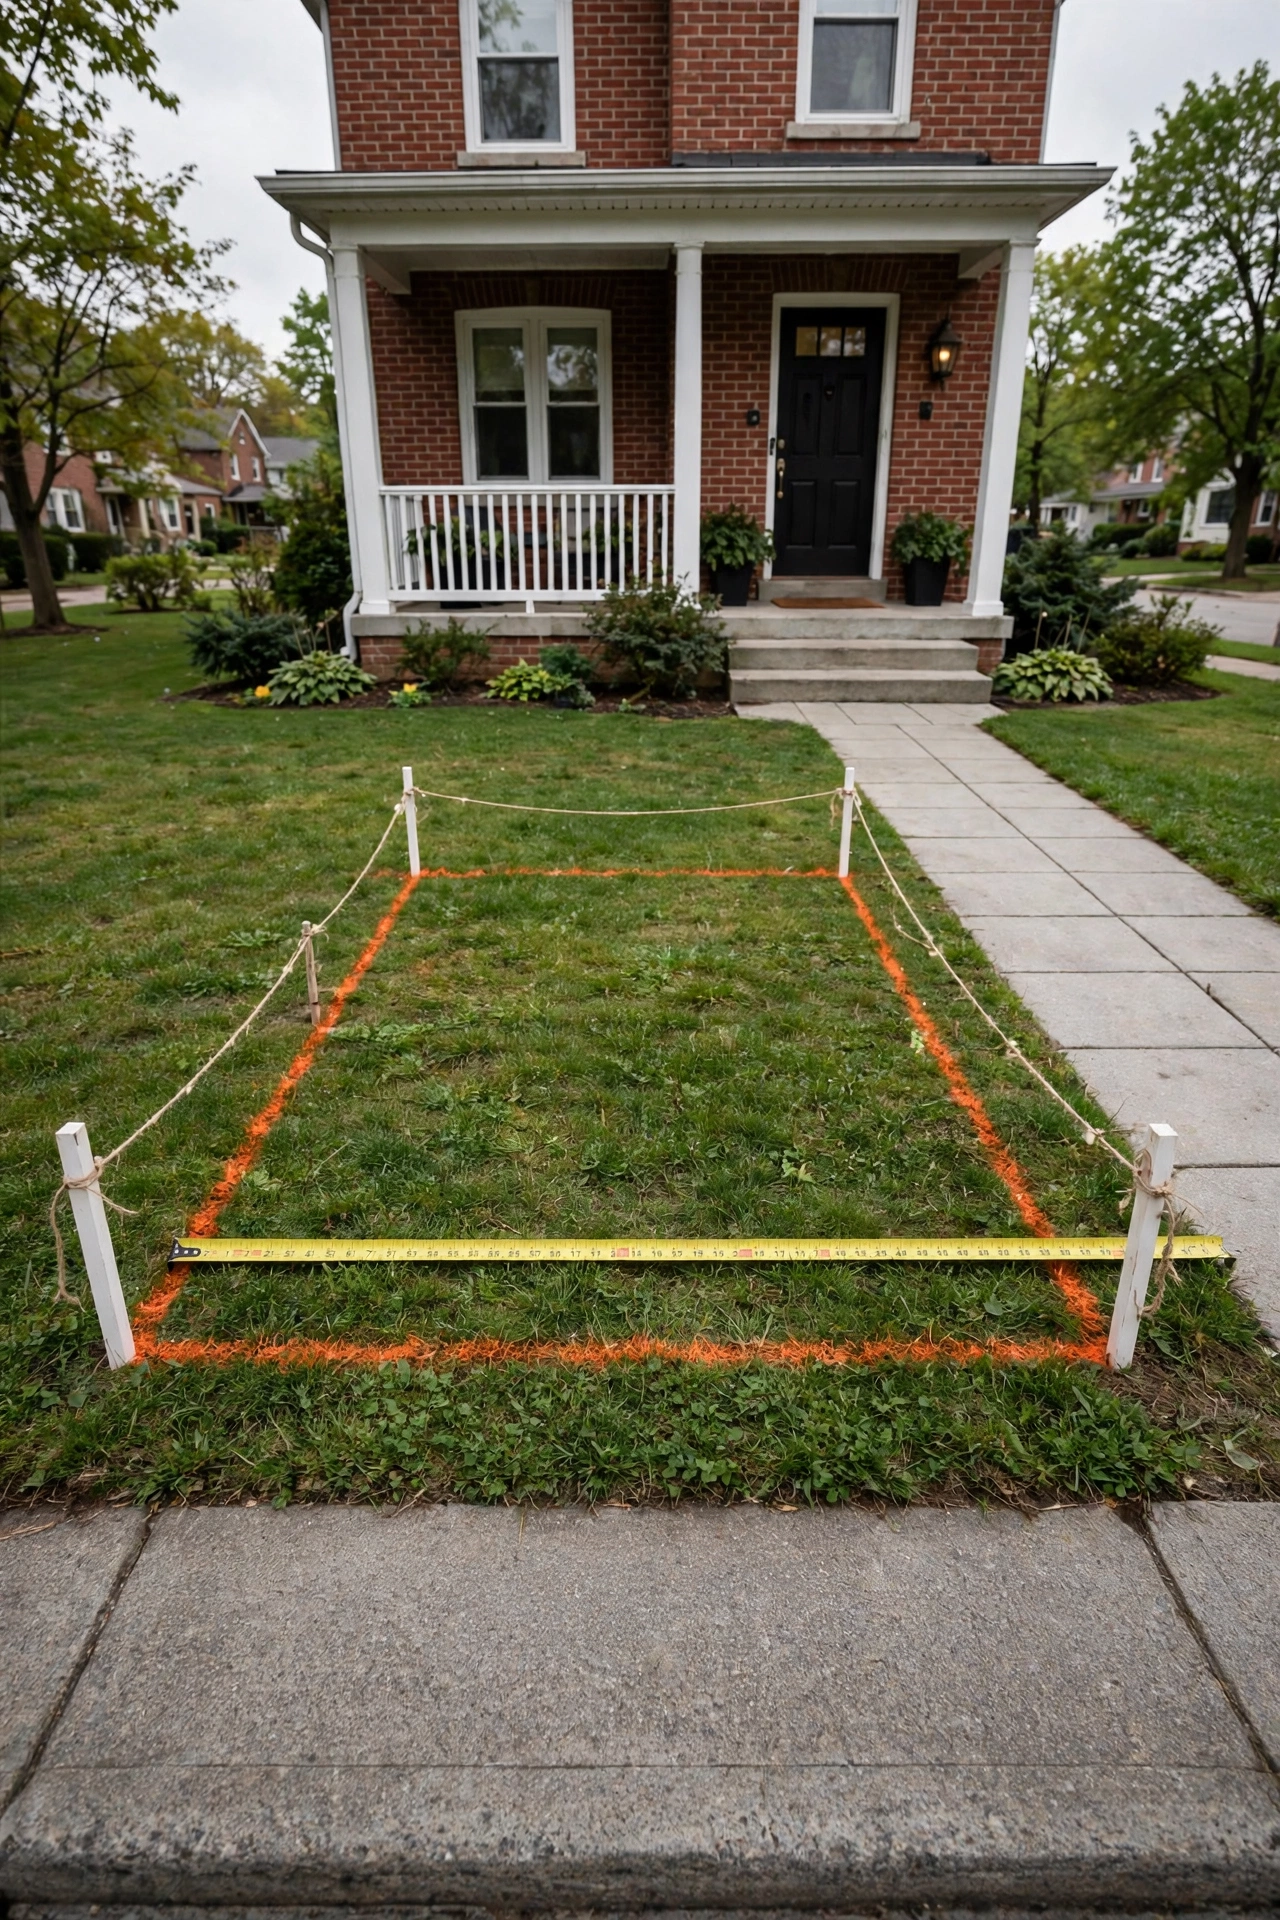
Stretch a tape measure along the porch and lawn edge, then mark every corner with a stake and twine. Keep a clear 36-inch walkway from the sidewalk to your door, and leave 4 feet between large props so each reads as a separate vignette. Your marked zone also reveals dead space, which shows you where one tall prop replaces five small ones.
2. Set a Budget Using Dollar-Store and Scrap Materials
Budget drift ruins more displays than bad design. Small impulse buys of $5 and $10 stack into a $200 bill, and non-rated items fail in the first rainstorm. A fixed budget forces material-first decisions, so cheap outdoor Halloween decorations come from foam board, fabric scraps, and dollar-store basics instead of one-use packaged props.
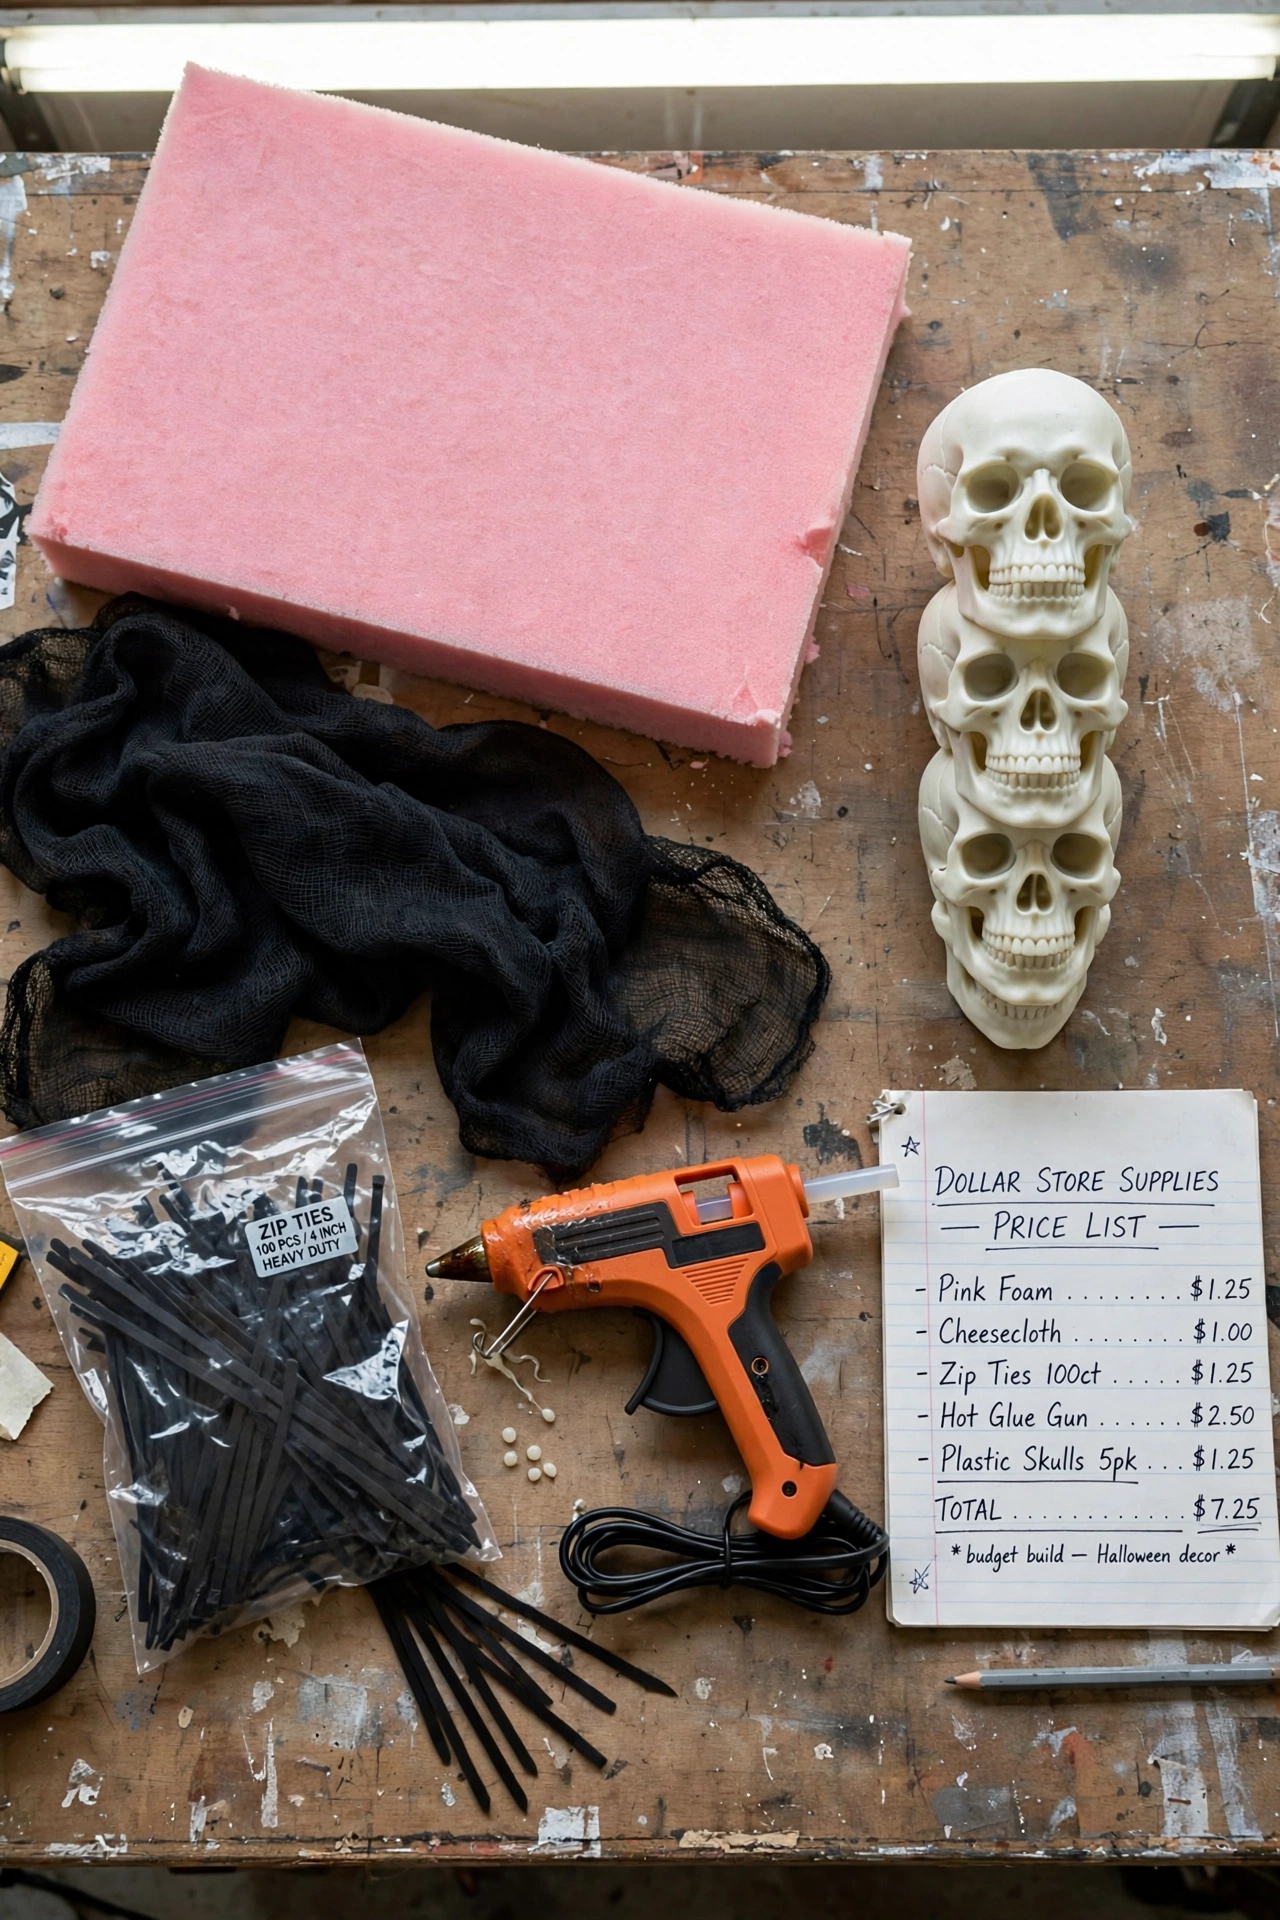
Write one total at the top of a notepad and subtract every purchase the moment you buy it. Split the total 50% for your focal prop, 30% for lighting, and 20% for small accents like webbing and garlands. That split puts your money where visitors look first and stops accent spending from eating your lighting budget.
3. Choose Weatherproof Materials for Outdoor Use
Indoor craft materials collapse outdoors within one wet week. Paper, standard cardboard, and untreated fabric absorb moisture, sag, and tear, so your build time disappears after the first heavy dew. Weatherproof materials hold their shape through rain and wind, which means you build once and reuse the same props for several Halloween seasons.
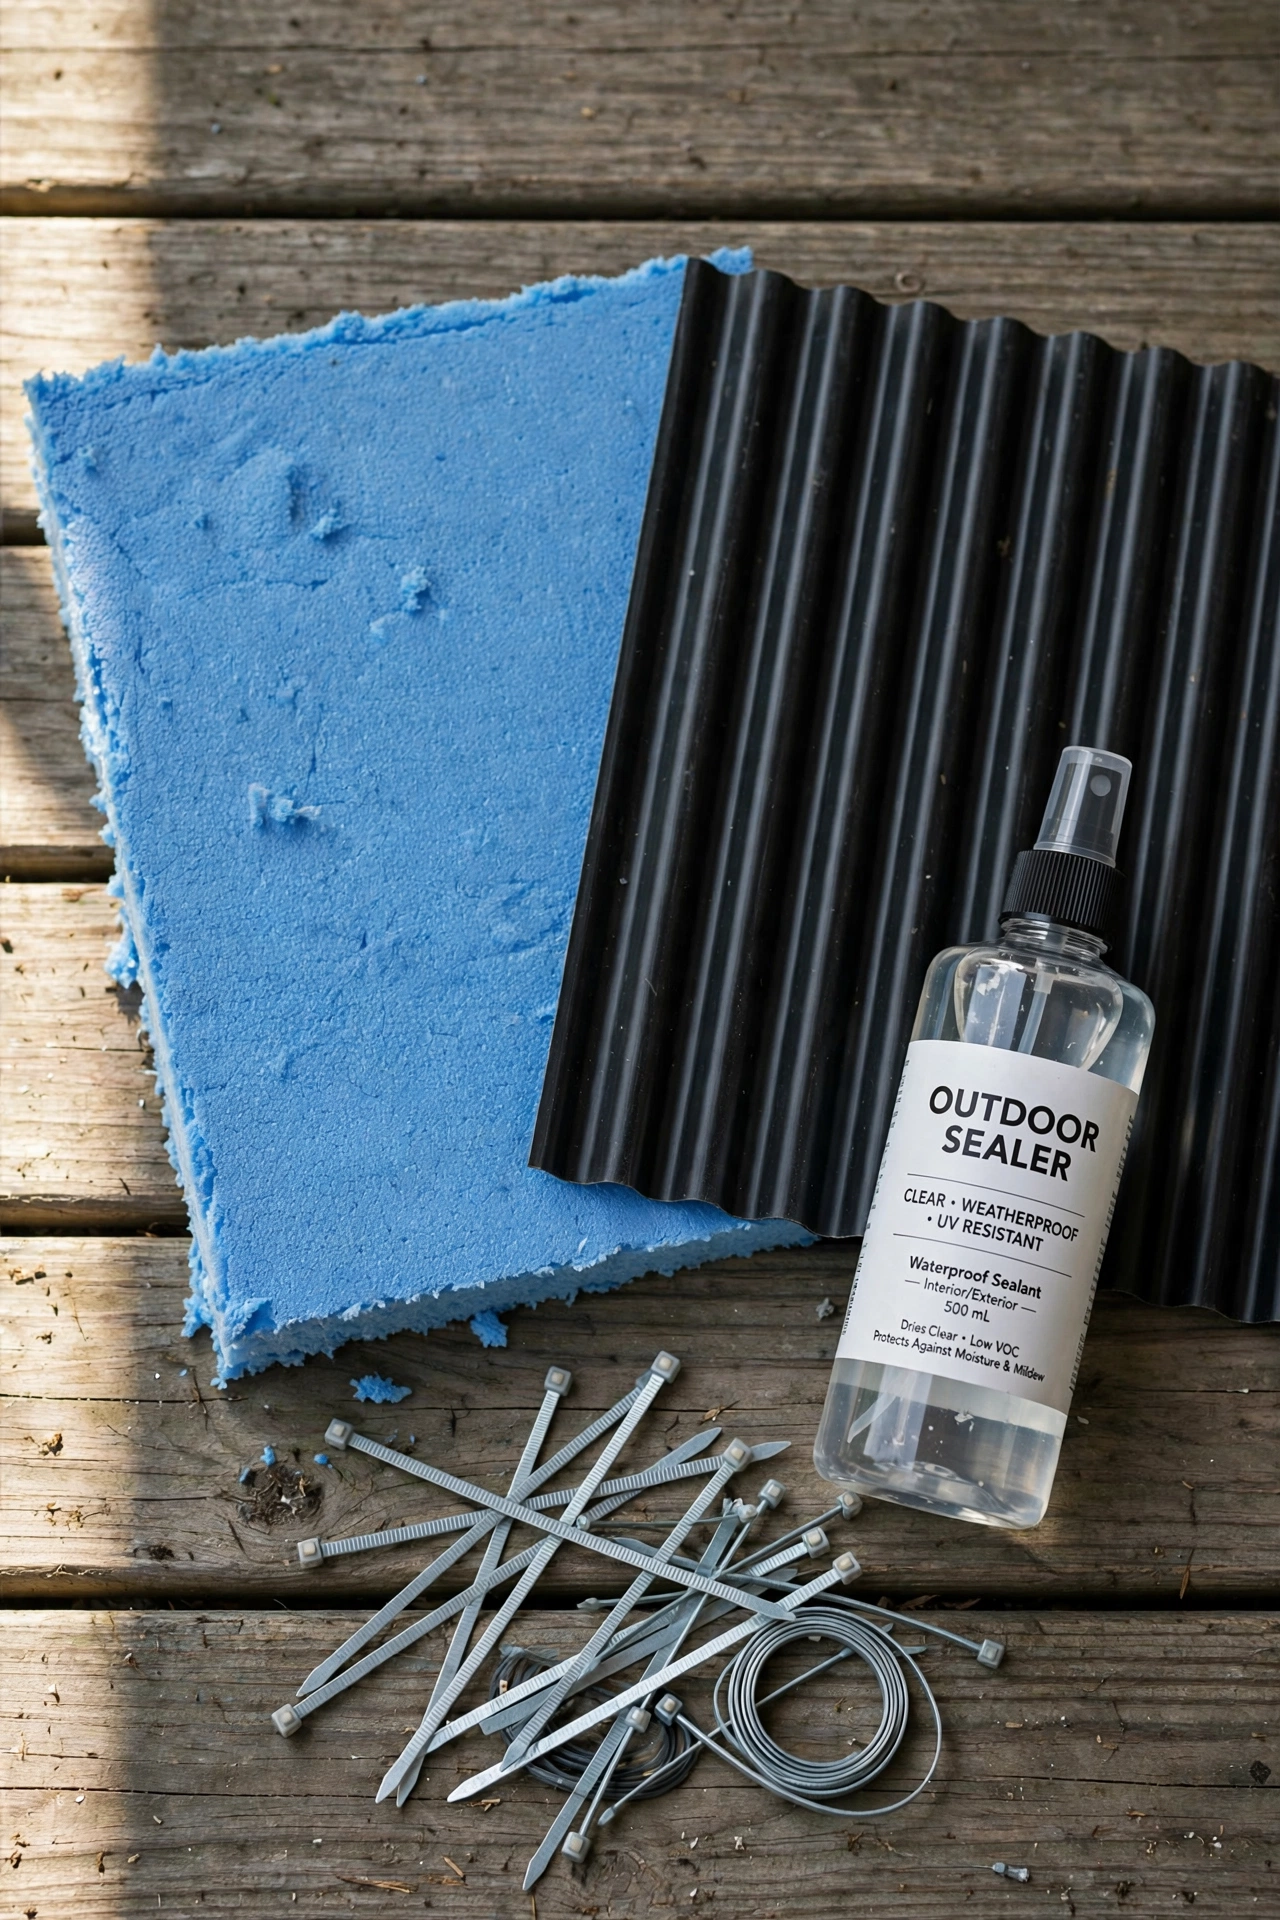
Replace cardboard with corrugated plastic sheets, and swap plain paper for laminated cardstock or craft foam. Pick 2-inch extruded polystyrene foam for tombstones, because it carves cleanly and resists water far better than craft foam. Galvanized or stainless fasteners also prevent the rust streaks that ruin white props by mid-October.
DIY Halloween Porch Decorations That Frame Your Front Door
4. Build a Cobweb Archway Around Your Door
Your front door sets the first impression of the whole display. A bare frame wastes the one spot every visitor stares at, while a webbed frame signals the full haunt from the sidewalk. A stretched cobweb archway frames the entrance with texture, adds layered depth, and instantly turns a plain doorway into a focal point.
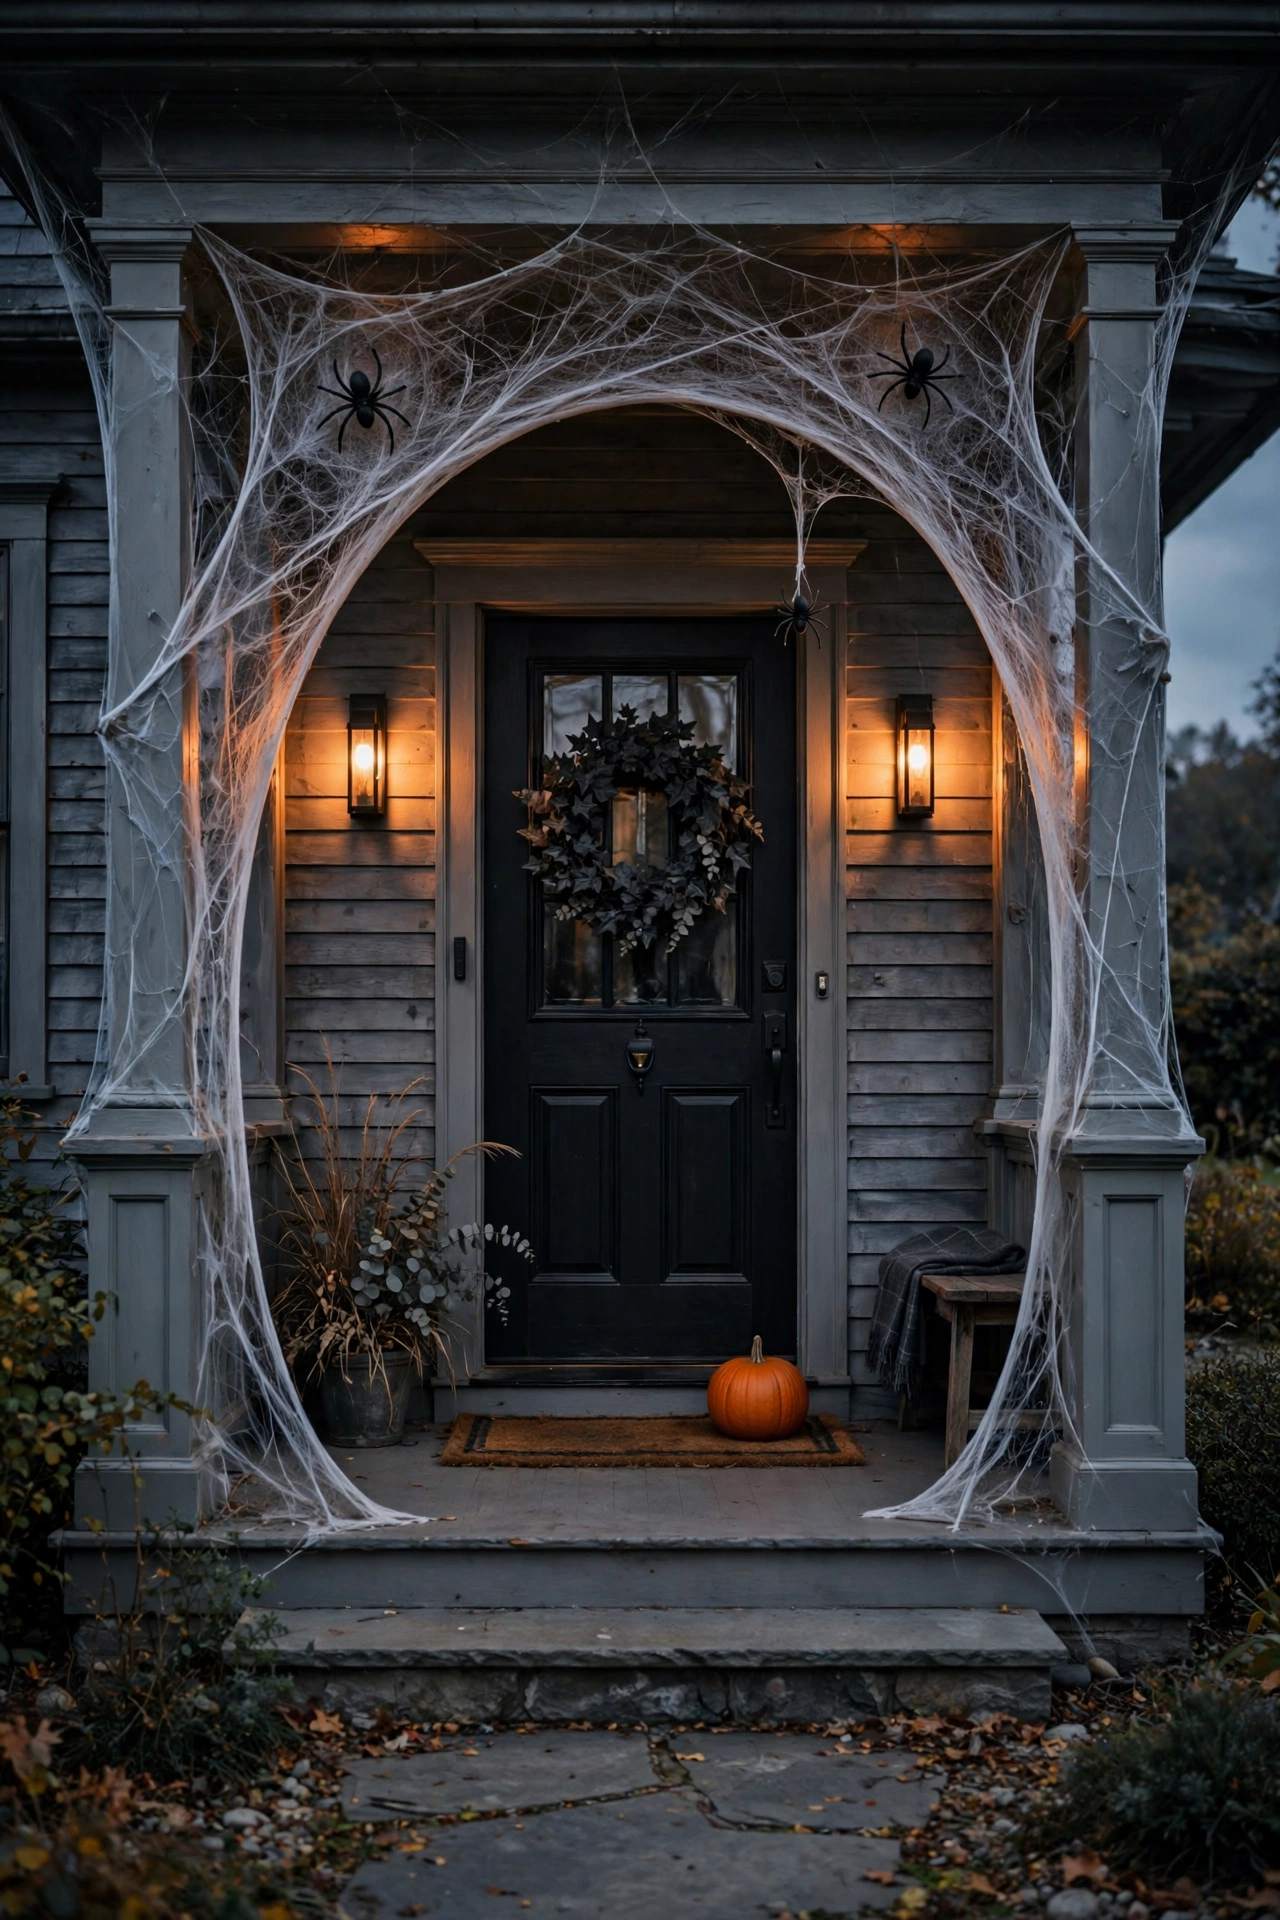
Pull cotton webbing apart into thin, wispy layers, then staple the edge to the top and sides of the door frame. Build 3 layers of webbing spaced 4–6 inches apart, and place 3 spiders in an off-center cluster. The layered fibers catch porch light and cast shadows that read as real depth.
Keep webbing at least 12 inches away from bulbs, candles, and heaters, because synthetic cobweb ignites fast.
5. Hang Paper Bat Silhouettes in Staggered Clusters
Evenly spaced bats look like wallpaper, not a swarm. Rows of identical bats at equal intervals read as a stencil pattern, which flattens your wall and removes any sense of motion. Staggered clusters in mixed sizes create a rising swarm, add visual movement, and make a flat exterior wall look genuinely alive.
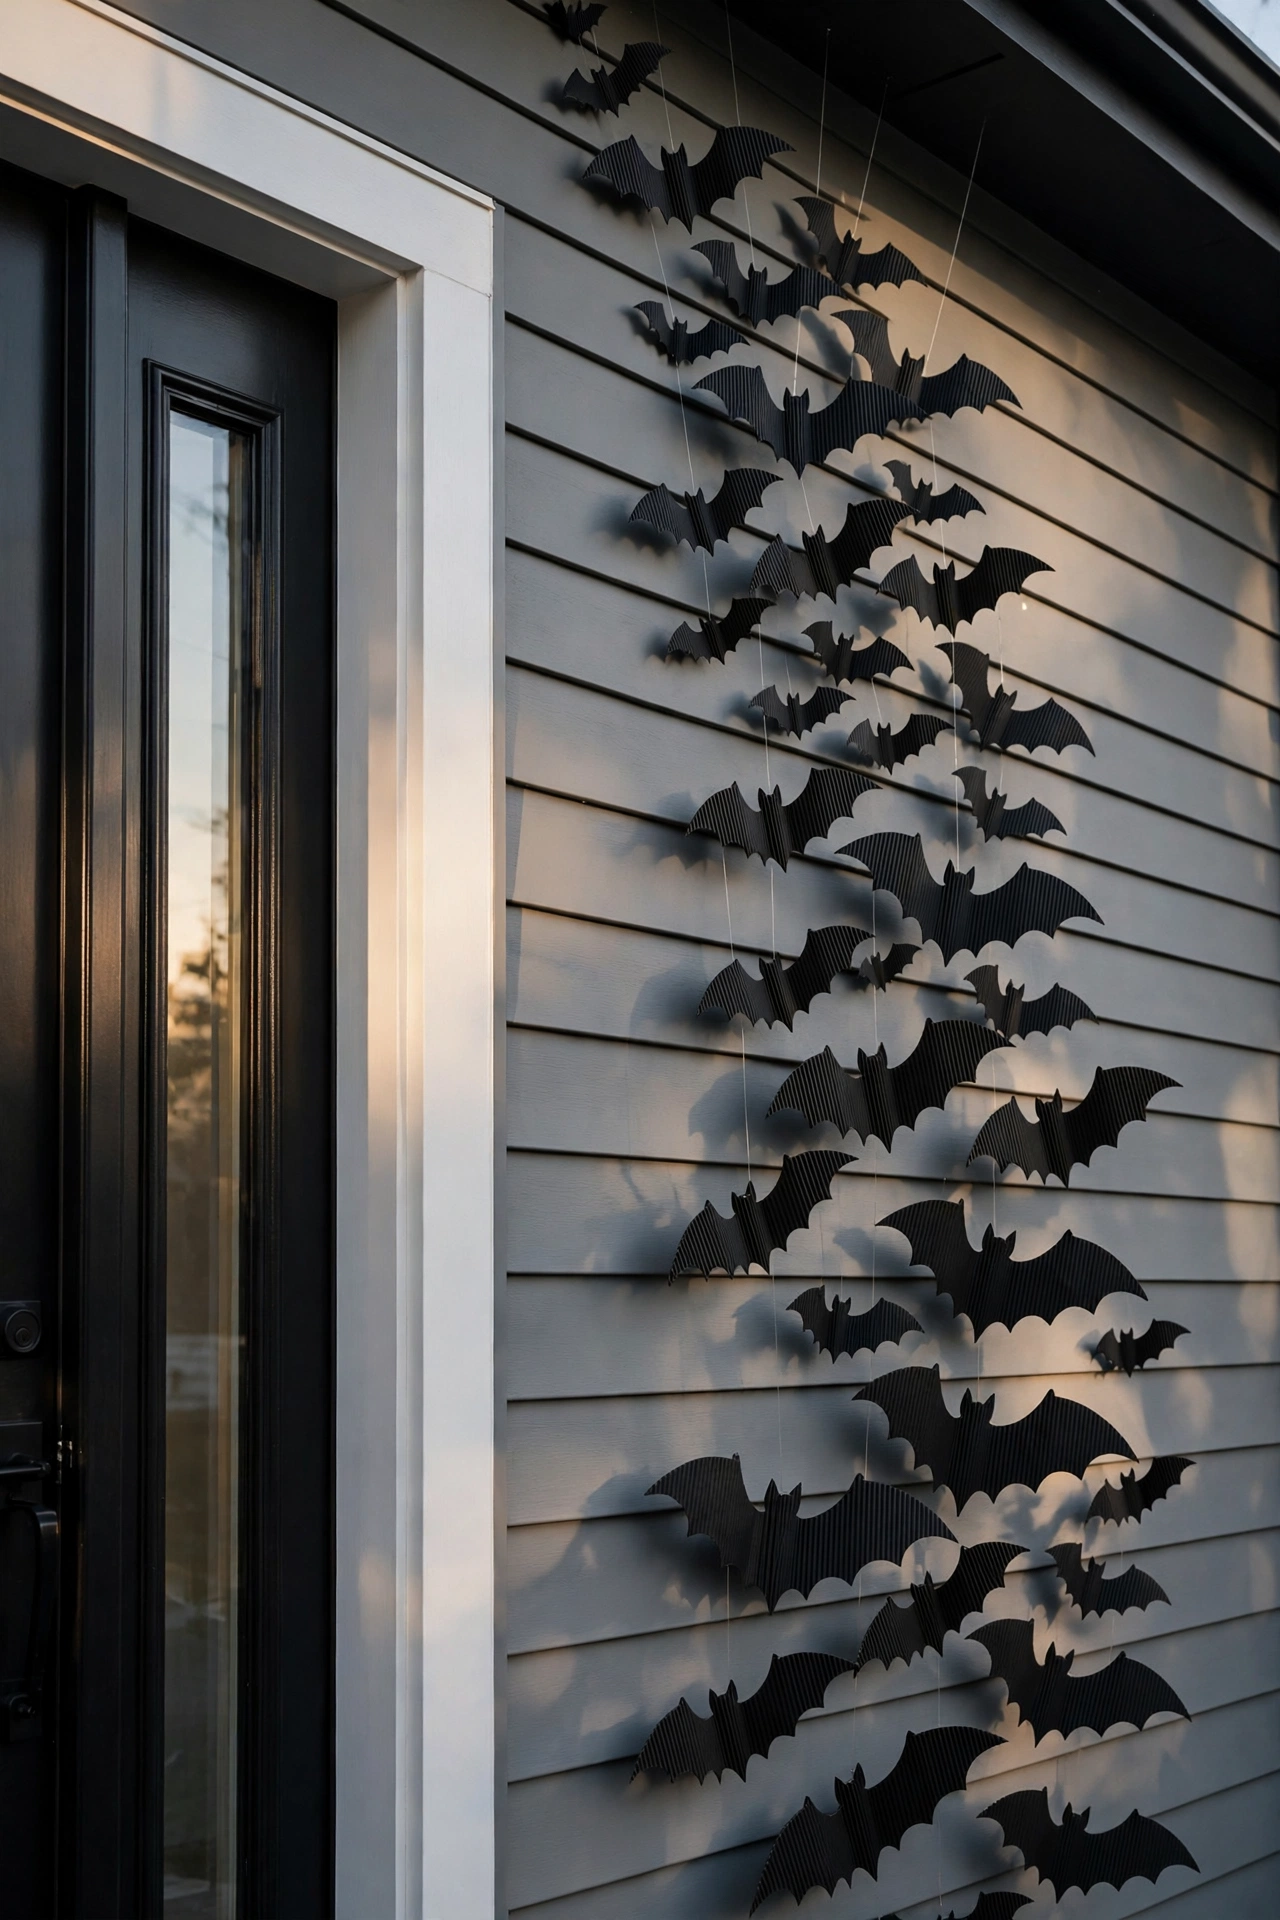
Cut 15 bats from laminated black cardstock or 4 mm corrugated plastic in three wingspans: 6, 9, and 12 inches. Group them in clusters of 3, 5, and 7 with 6–10 inches between bats, because odd numbers read as natural flight. Hang them on clear fishing line along a diagonal that leads the eye upward and makes a one-story porch look taller.
6. Create Ghost Garlands From Cheesecloth and Fabric Stiffener
Store-bought ghost garlands look thin and tear in wind. Cheap plastic versions fade after one week of sun, which sends you back to the store mid-October. Stiffened cheesecloth ghosts hold a sculpted shape in rain, cost a fraction of retail, and give your porch a handmade texture that retail props cannot match.
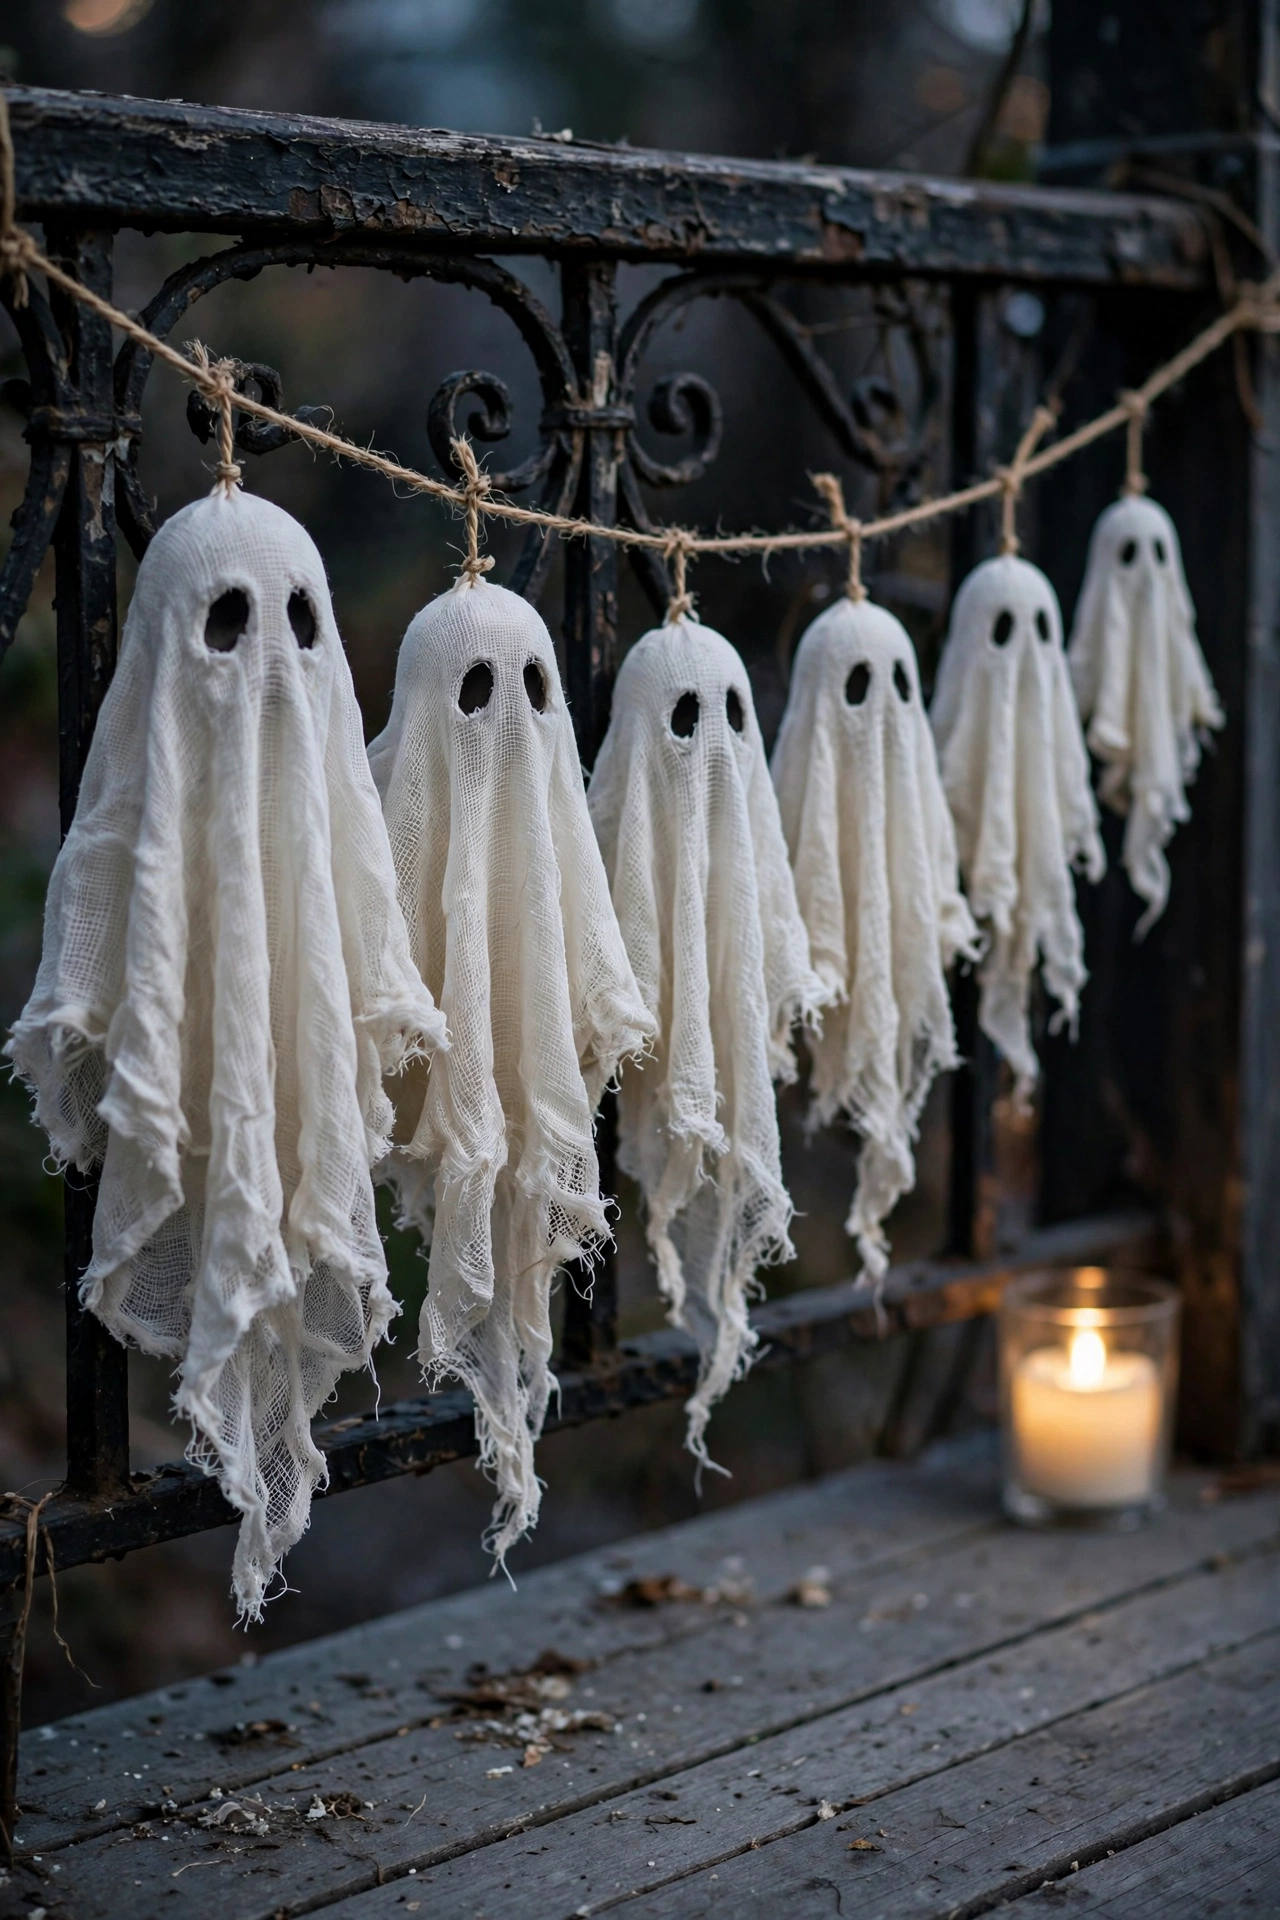
Soak 1-yard cheesecloth squares in fabric stiffener, then drape each one over an upside-down cup taped to a plastic bottle. Let each ghost cure for 24 hours, trim the hem into ragged points, and paint eyes with black outdoor acrylic. Hang 5–7 ghosts at graduated lengths of 8, 12, and 18 inches so the garland ripples like floating shrouds.
7. Wrap Porch Railings in Black Tulle and Faux Ivy
Bare railings leave your porch edge looking completely unfinished. A hard horizontal line cuts through your display and separates the porch from the yard, which breaks visual continuity. Layered tulle and ivy soften that line, add texture contrast, and tie the porch to the lawn props beyond it.
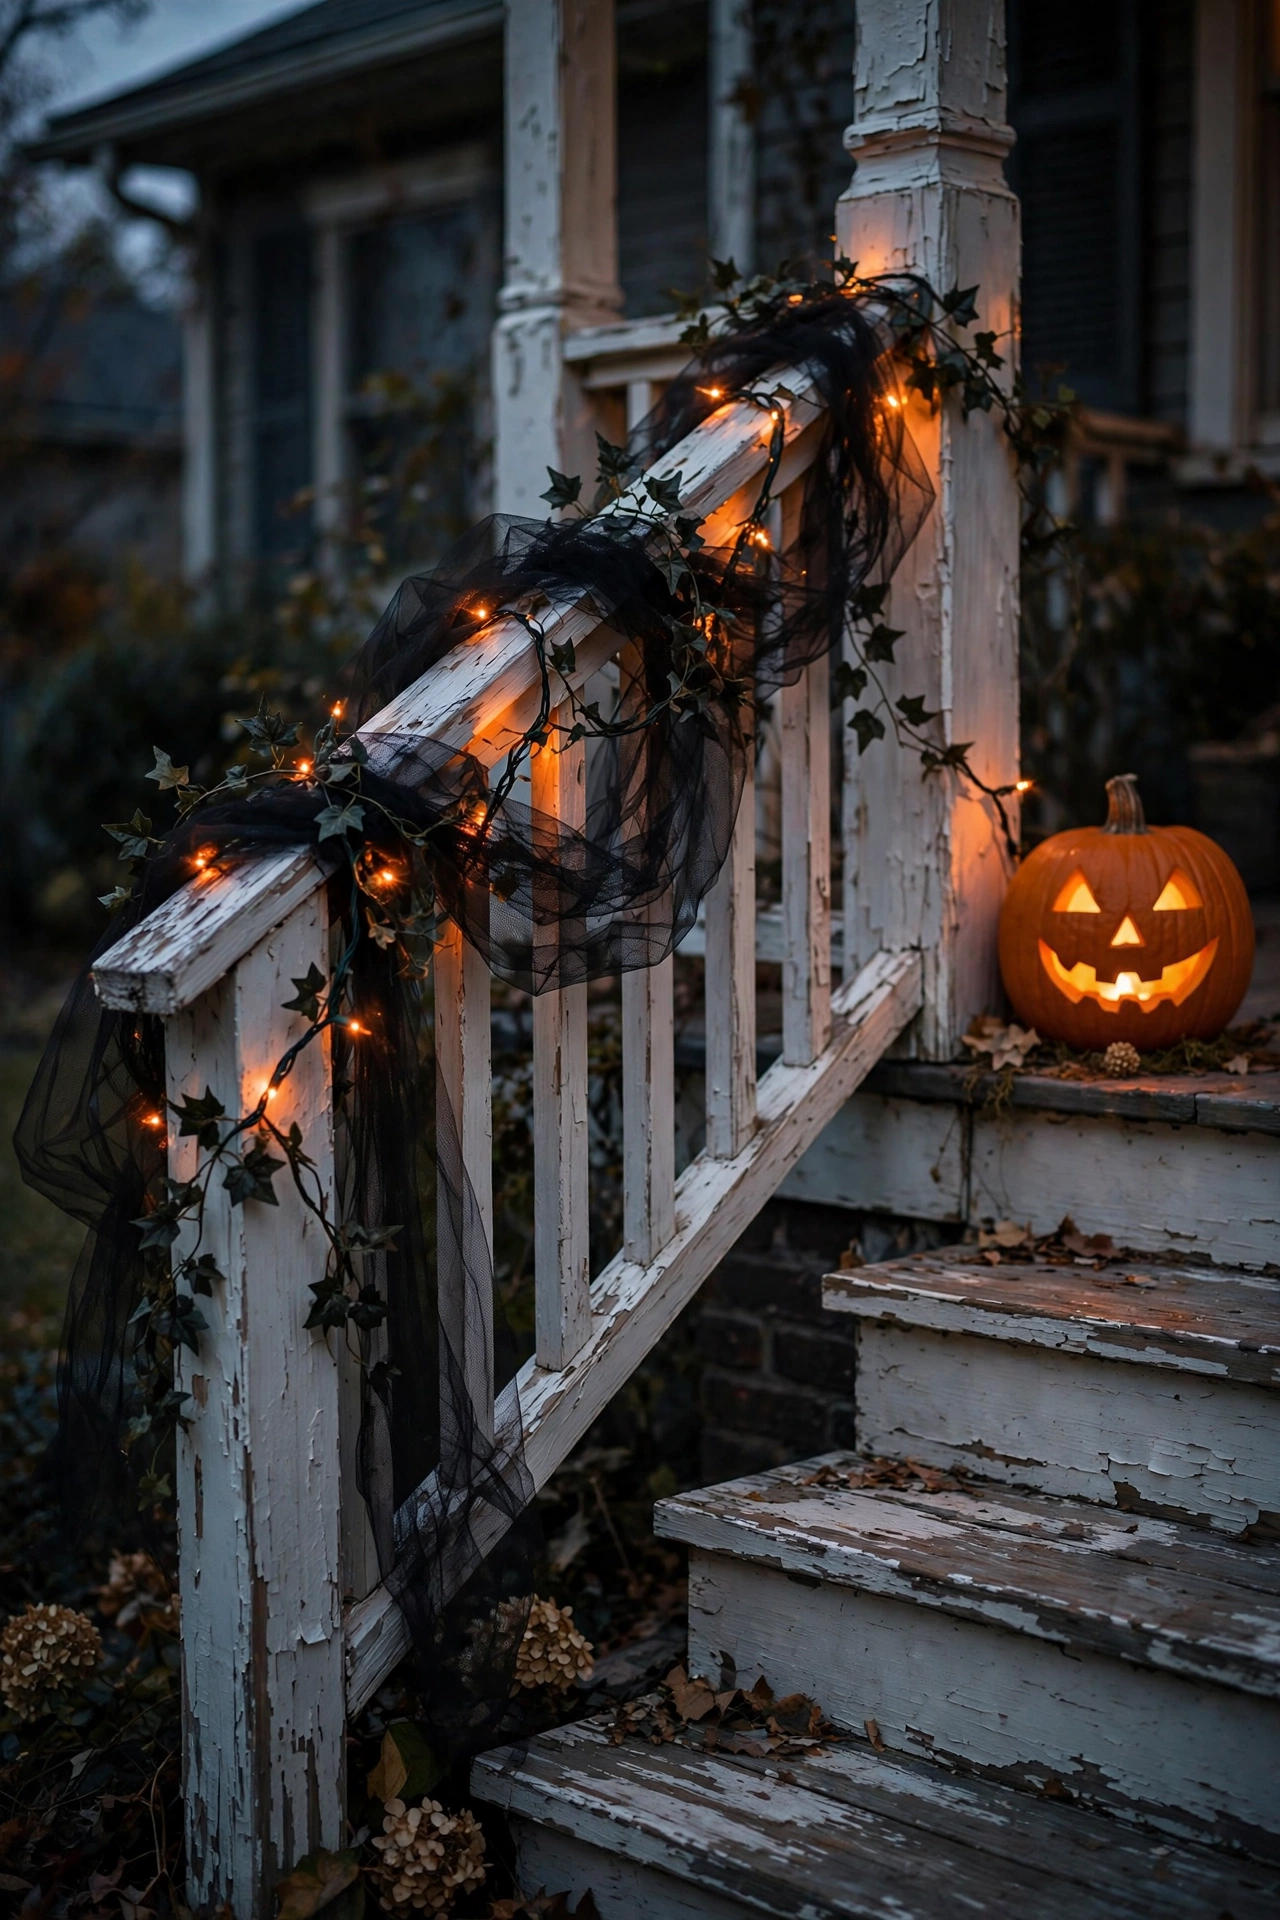
Spiral a 6-inch-wide black tulle roll along the railing, pulling it loose every 8 inches to form soft swags. Weave 3-foot faux ivy strands through the tulle and secure both with black zip ties at each post. Black zip ties vanish into the tulle, so the wrap looks grown rather than attached.
Outdoor Halloween Yard Decorations That Command the Lawn
8. Build Foam Tombstones From Insulation Board
Cardboard tombstones slump and peel after the first rainstorm. Soft materials lose their edges, so your graveyard looks like wet laundry instead of carved stone by the second weekend. Rigid insulation foam holds crisp edges, takes texture paint well, and produces tombstones that look like weathered granite from the street.
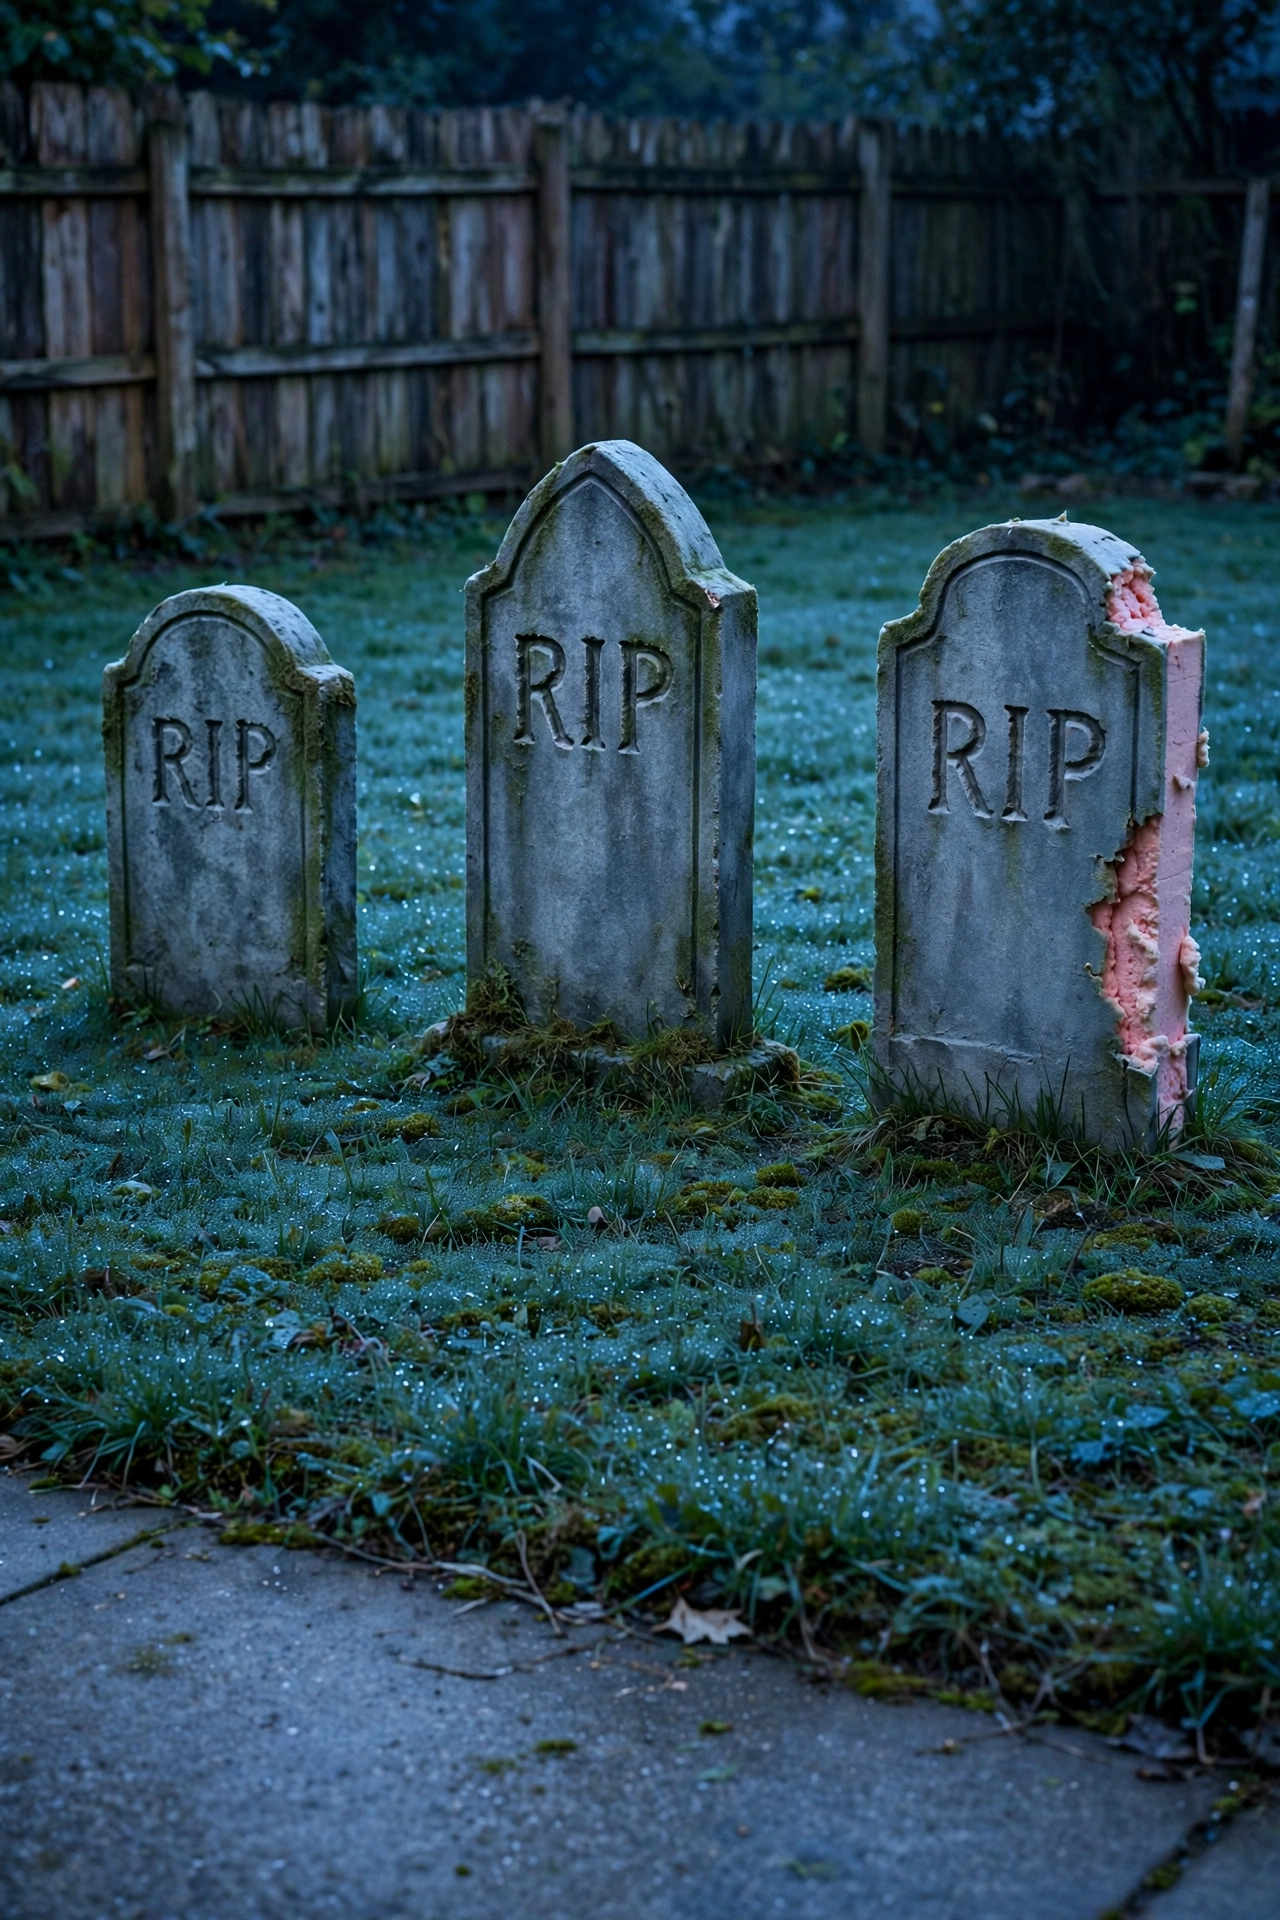
Cut 2-inch extruded polystyrene foam into 18 × 24-inch slabs with rounded tops using a serrated knife. Paint with latex or foam-safe paint only, because aerosol spray paint melts polystyrene on contact. Dry-brush black, then white, over a gray base to create stone texture that holds up under spotlights.
9. Arrange Your Graveyard in Odd-Numbered Groups
Even rows of tombstones look like a parking lot. Perfect lines and equal gaps read as staged, which strips the eerie realism that makes a graveyard effective. Odd-numbered groups at varied heights create visual balance, imply age, and turn a flat lawn into a layered scene.
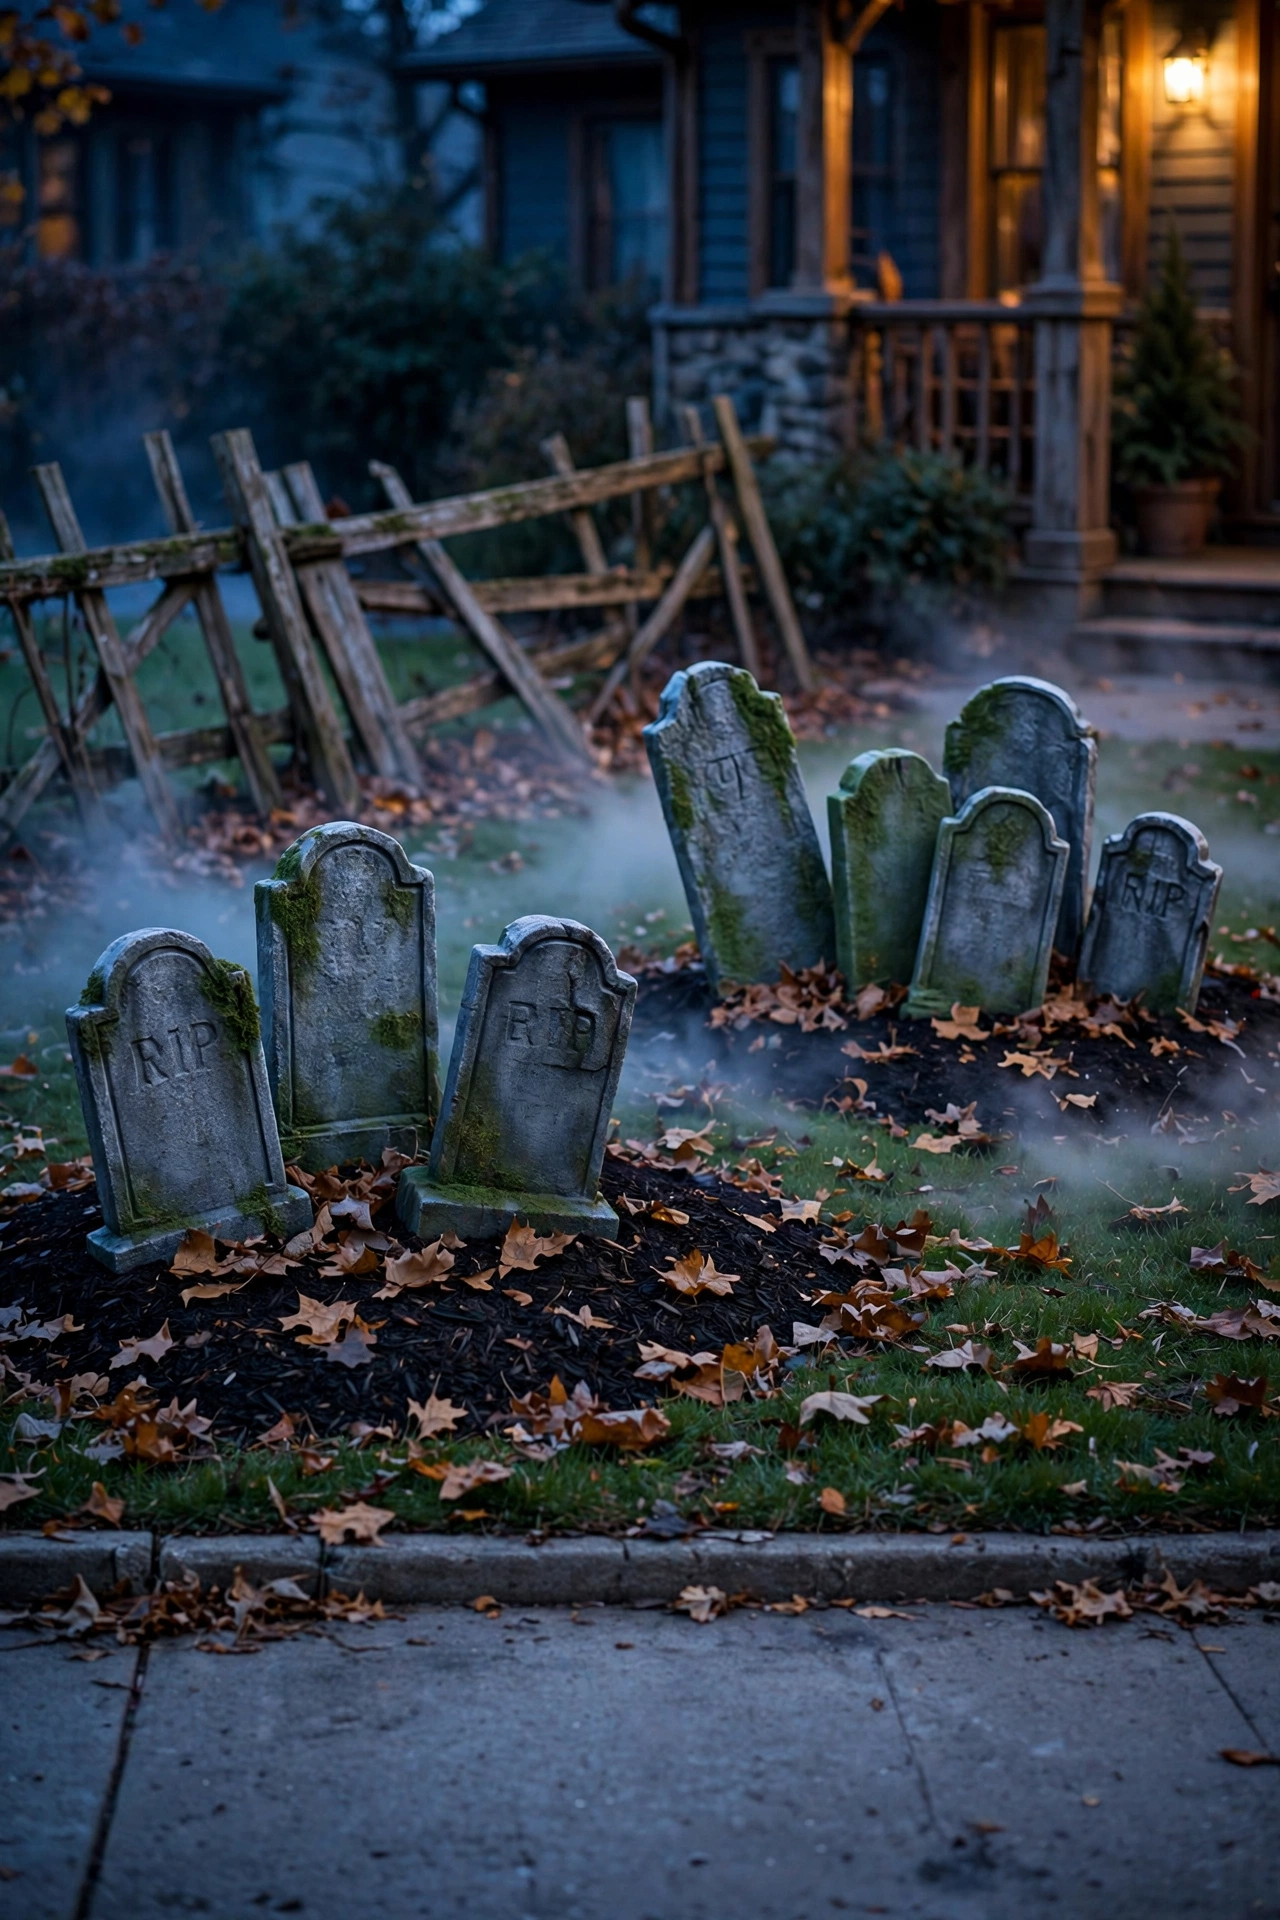
Place the tallest stone at the back, then step down to a short stone at the front of each group. Tilt 2 stones 5–10 degrees off vertical and leave 18–30 inches between groups to create breathing room. The tilt and spacing suggest decades of settling, which makes a weekend build look centuries old.
10. Stake Skeleton Hands Rising From the Lawn
A flat, empty lawn wastes your best scare opportunity. Ground-level props pull the eye downward, and visitors expect scares at eye level, which makes low ones hit harder. Skeleton hands rising from the soil add vertical drama, cost very little, and give any bare patch an instant story.
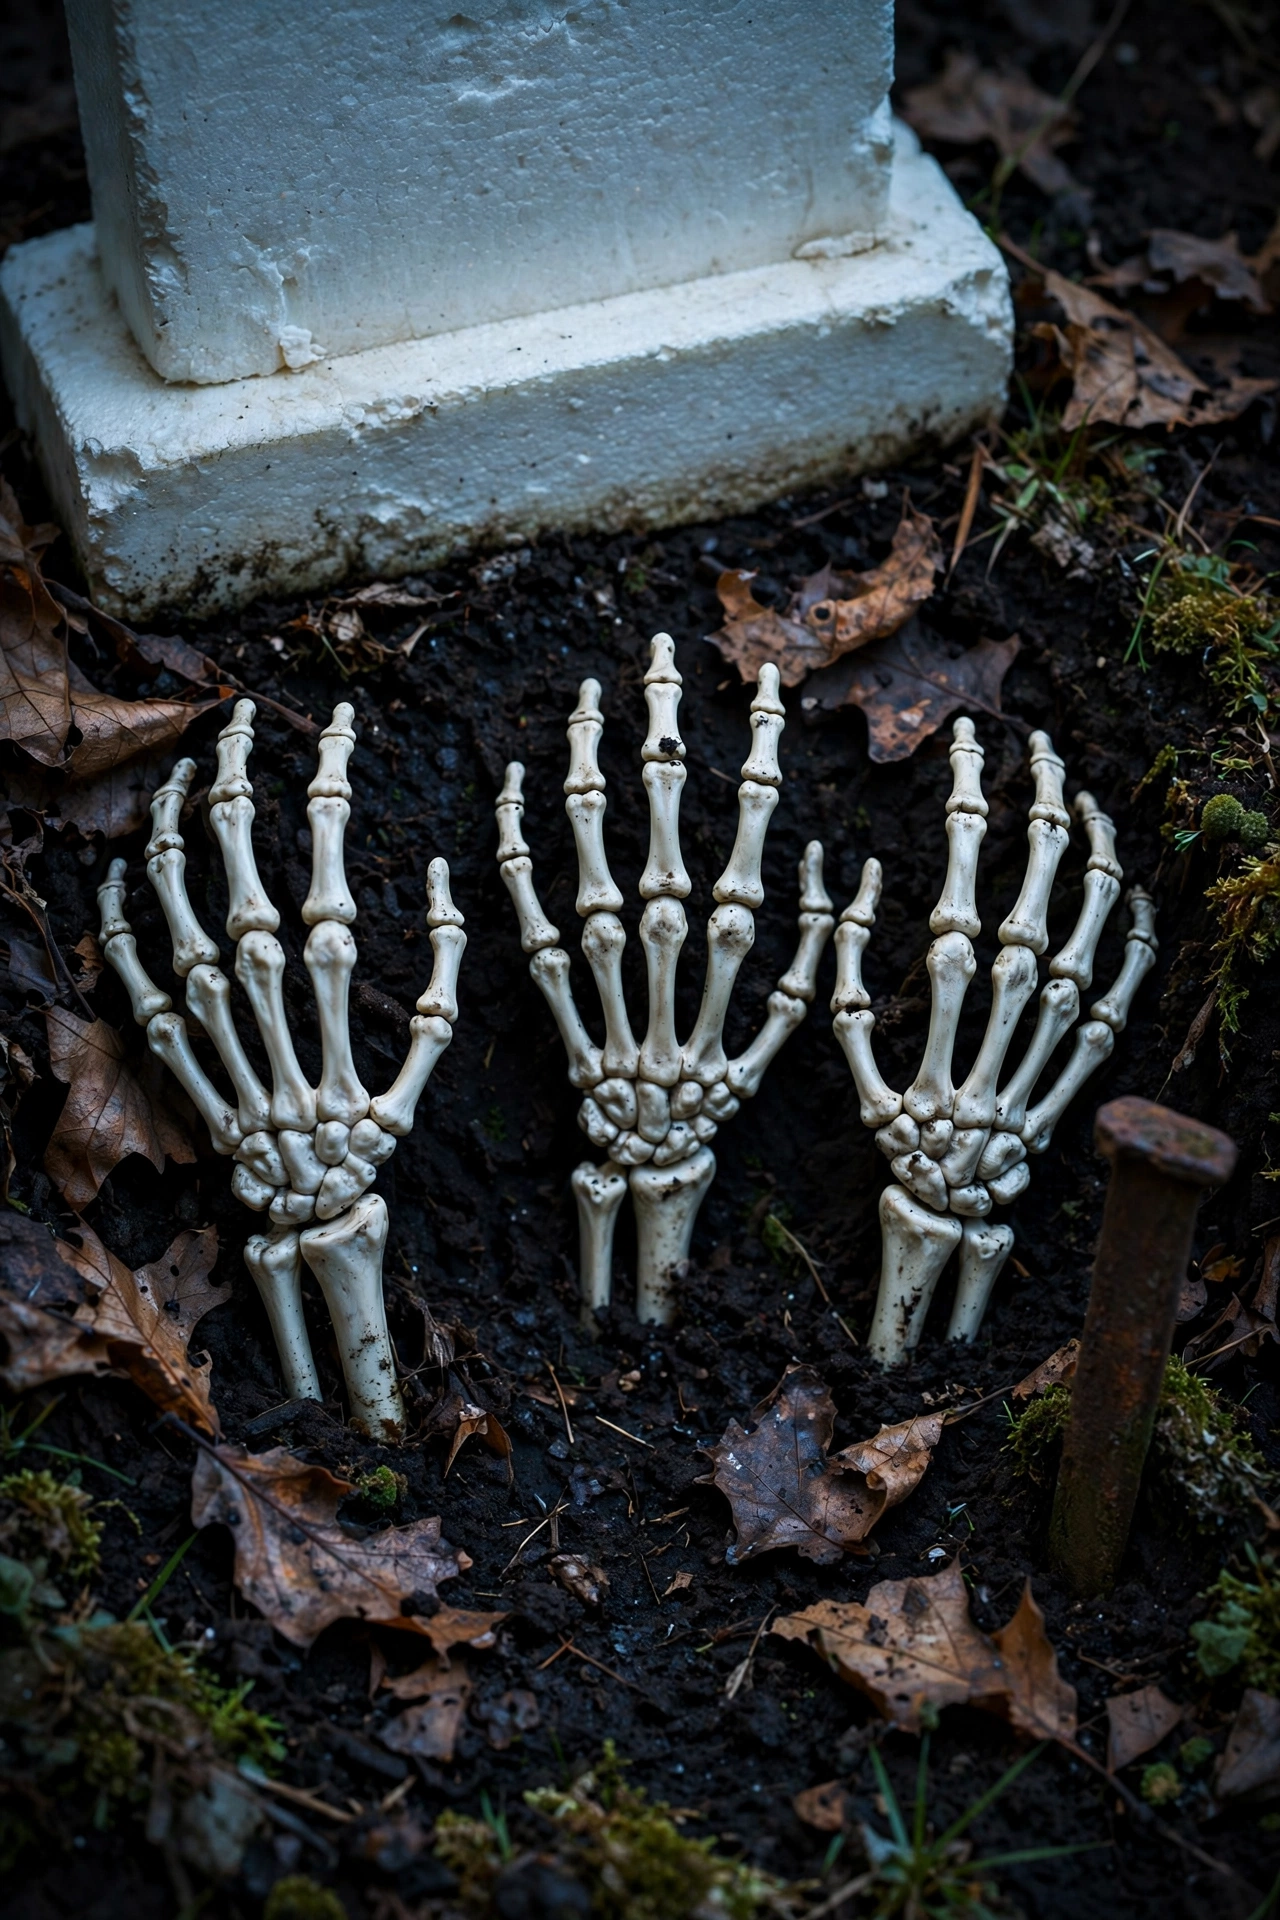
Zip-tie each plastic skeleton hand to a 12-inch metal stake with the fingers pointing up. Bury the stake 8 inches deep and cover the wrist with soil and dry leaves. Place hands in groups of 3 near a tombstone base, and the scene reads as buried rather than set down.
11. Suspend Glowing Ghosts From Bare Tree Branches
Empty branches waste the tallest space in your yard. Props sit at ground level while branches add height, so skipping them leaves your display flat and one-dimensional. Glowing ghosts hung at staggered heights fill the vertical space, create layered height, and make your tree the haunting centerpiece.
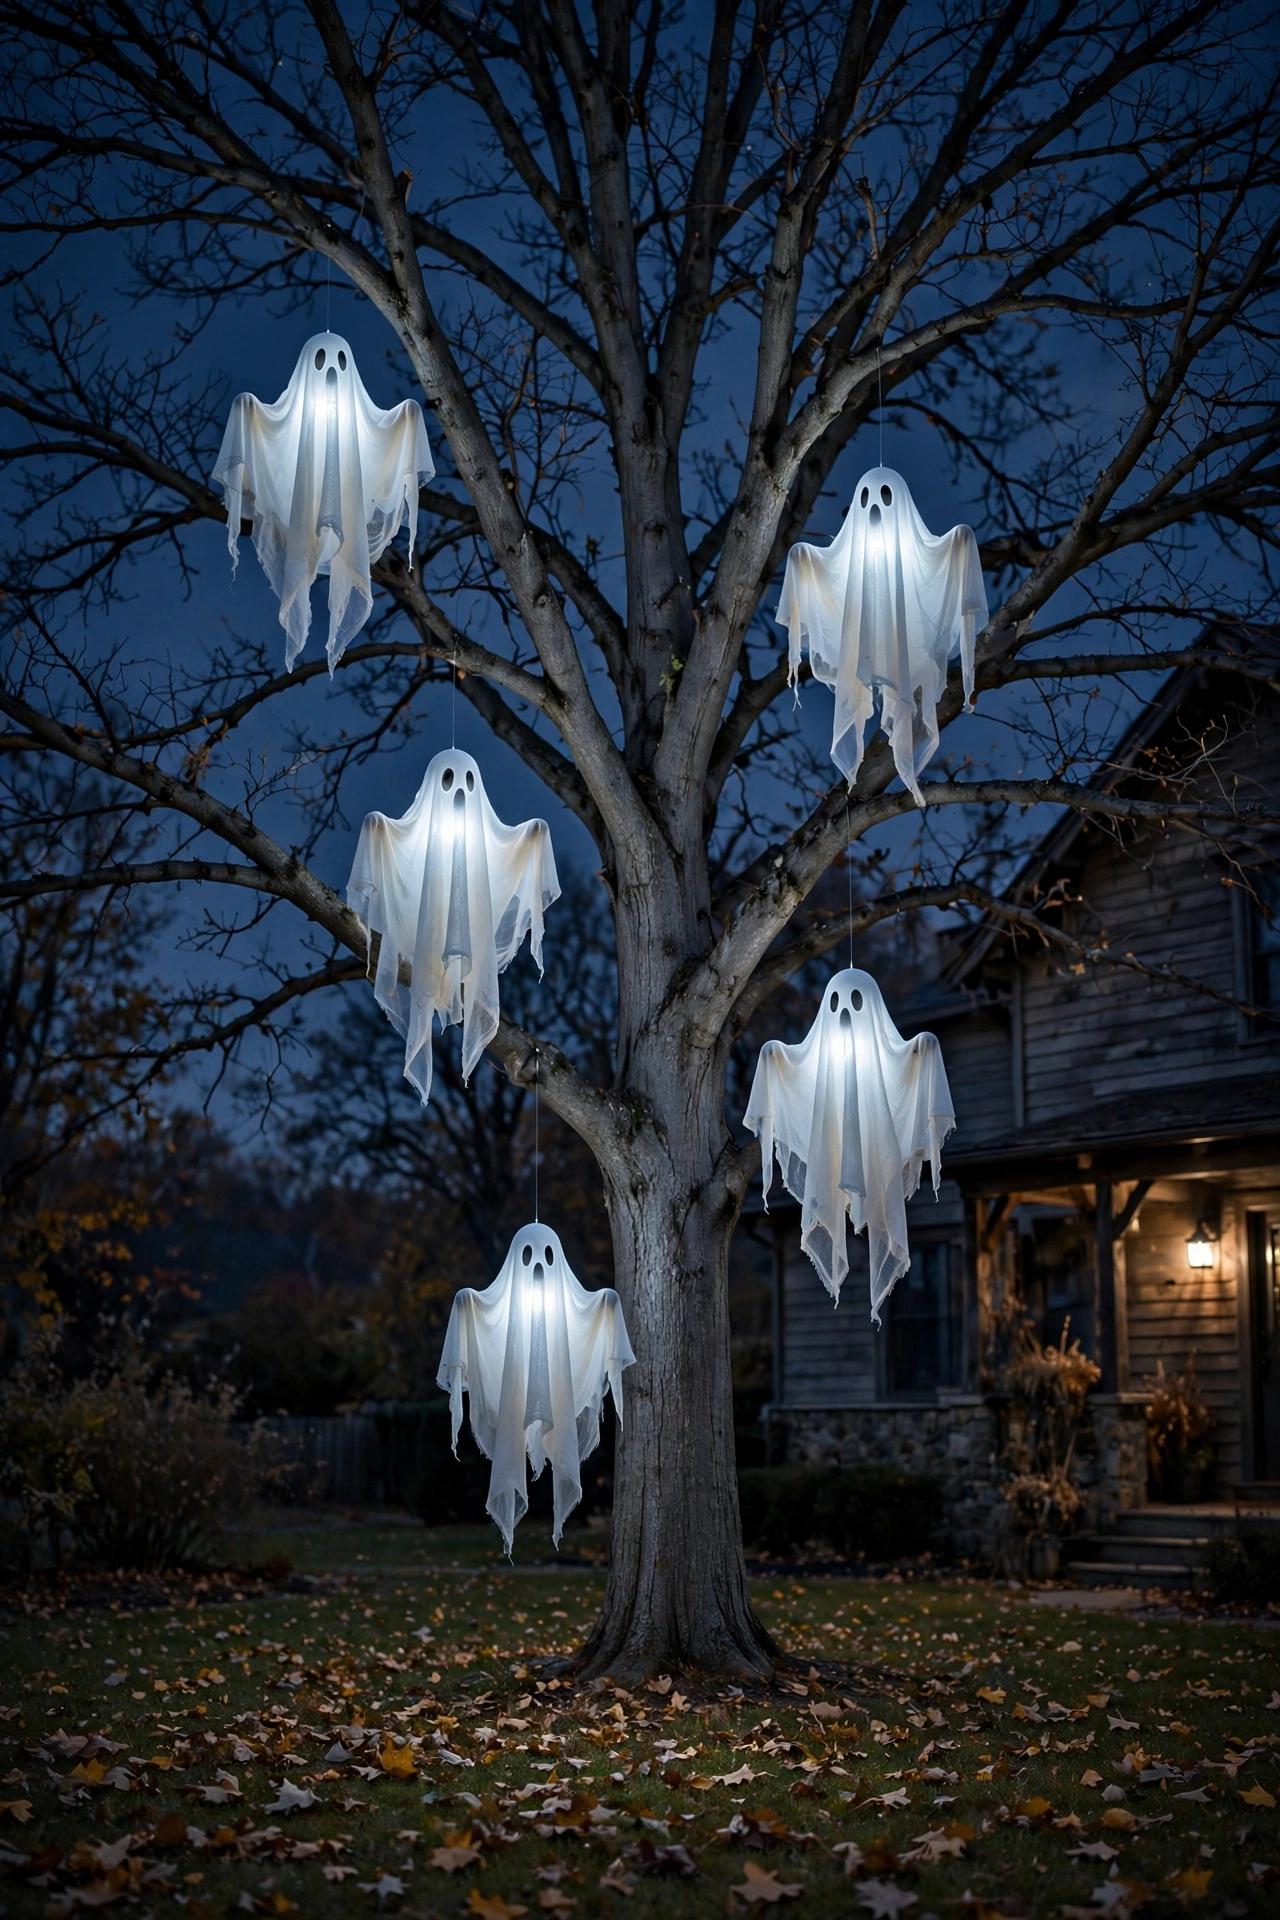
Tie 20–30 lb test fishing line to a branch, then lower each ghost on a drop between 5 and 8 feet. Stagger the drops at 5, 6.5, and 8 feet and slip a battery LED puck inside each ghost. Staggered drops make the ghosts sway independently in the wind, which creates motion without any motor.
Natural Pumpkin and Harvest Decor for Outdoor Halloween Displays
12. Carve Pumpkins Using Stencils and Drill Bits
Freehand carving produces uneven faces that read poorly from the street. Wobbly lines and thin walls speed up rot, so you end up replacing pumpkins before Halloween night arrives. Stenciled, drilled designs stay crisp for days, glow evenly with LED light, and read clearly from 30 feet away, which freehand faces never achieve.
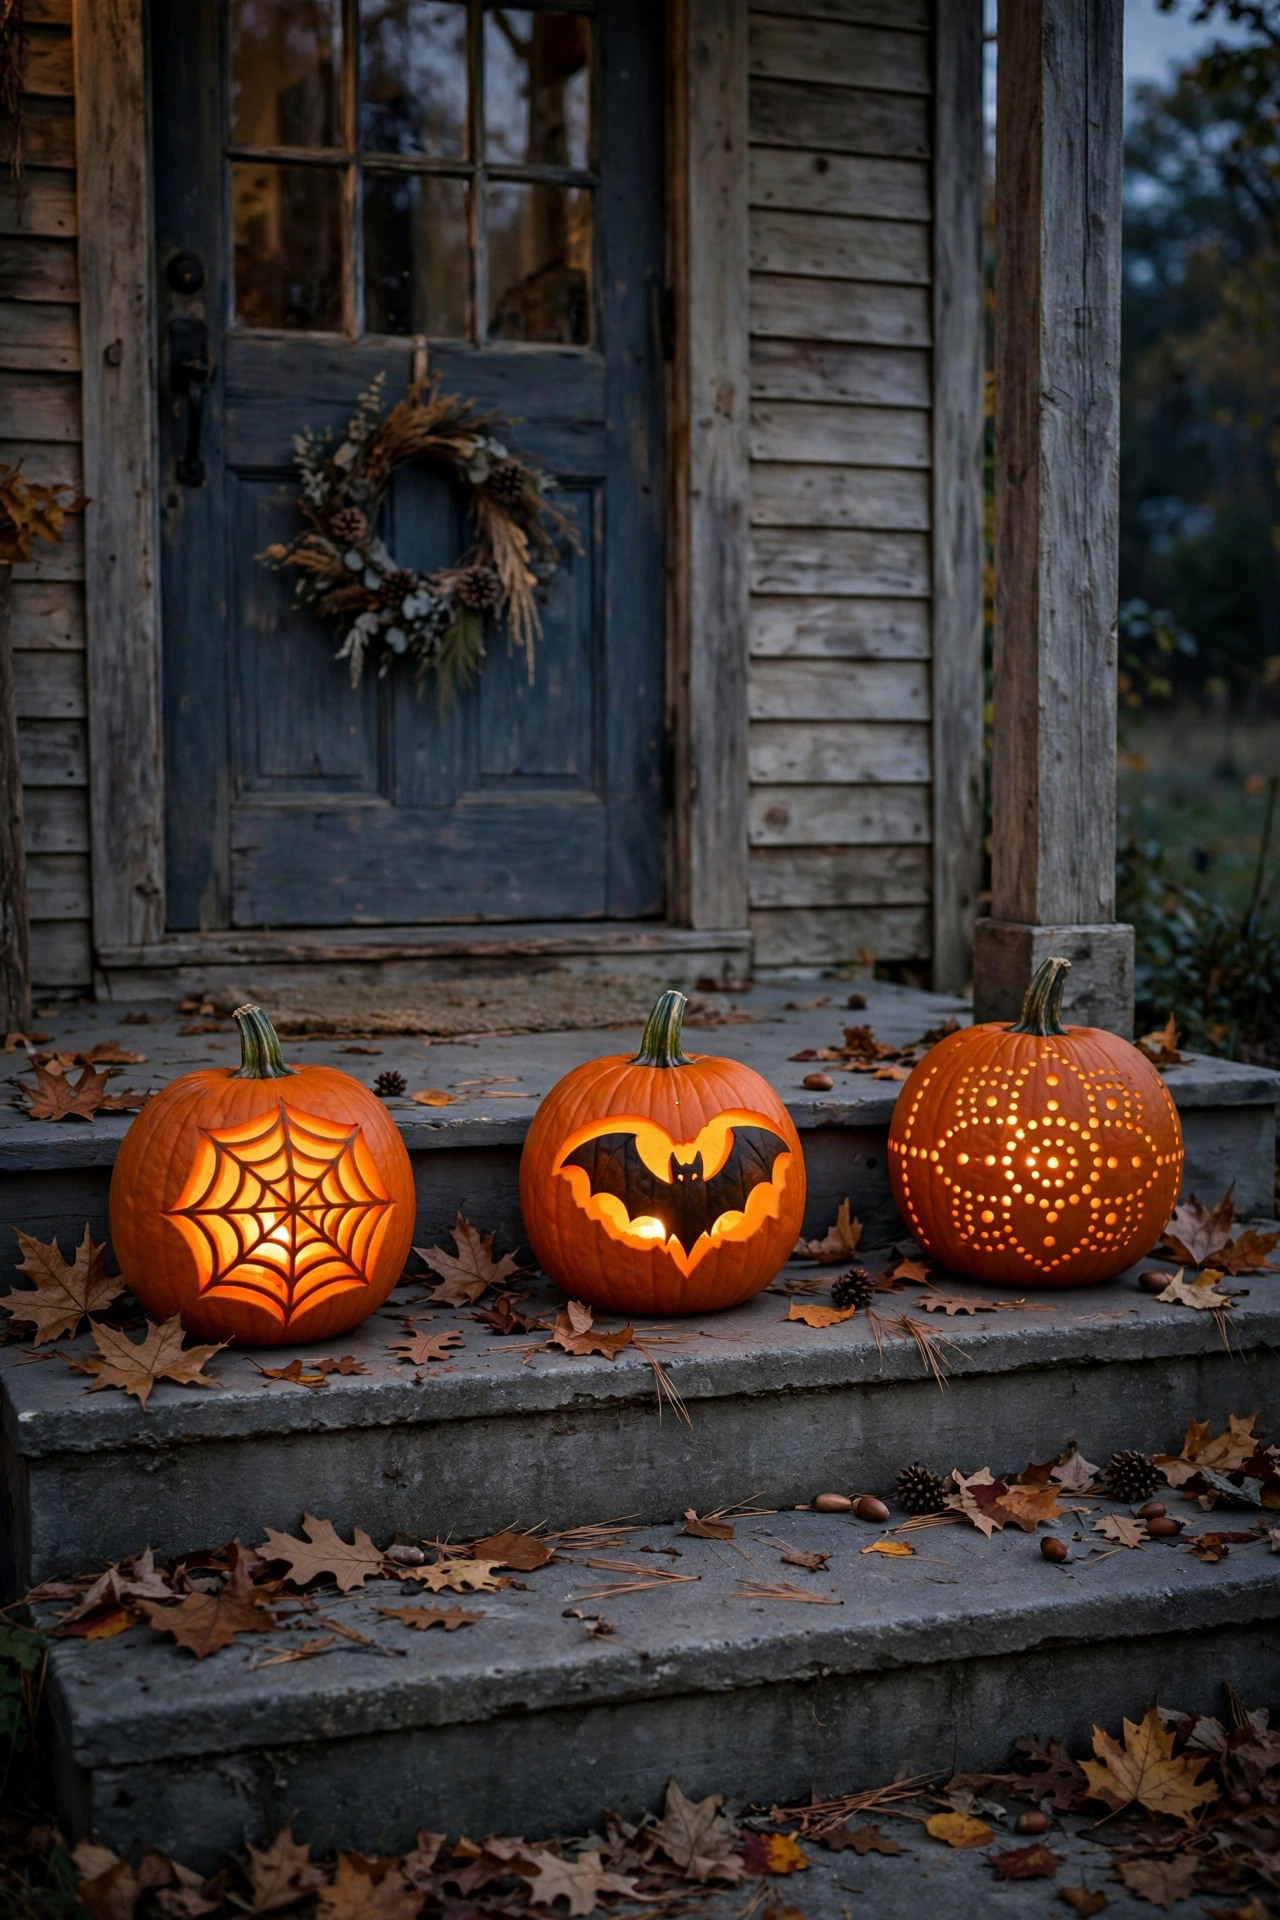
Tape the stencil to a smooth pumpkin and poke the pattern through with a push pin every ¼ inch. Drill holes with a ¼-inch to 1-inch bit, and cut the lid at a 45-degree angle so it never falls in. Rub petroleum jelly on every cut edge to slow drying and keep the design sharp longer.
13. Stack Pumpkins in Three Heights for Visual Layers
Flat rows of pumpkins look like a produce stand. Same-height pumpkins on the ground flatten your steps and hide your best carved faces behind the front row. A stack in three heights adds layered height, creates a clear focal point, and shows off every carved or painted pumpkin.
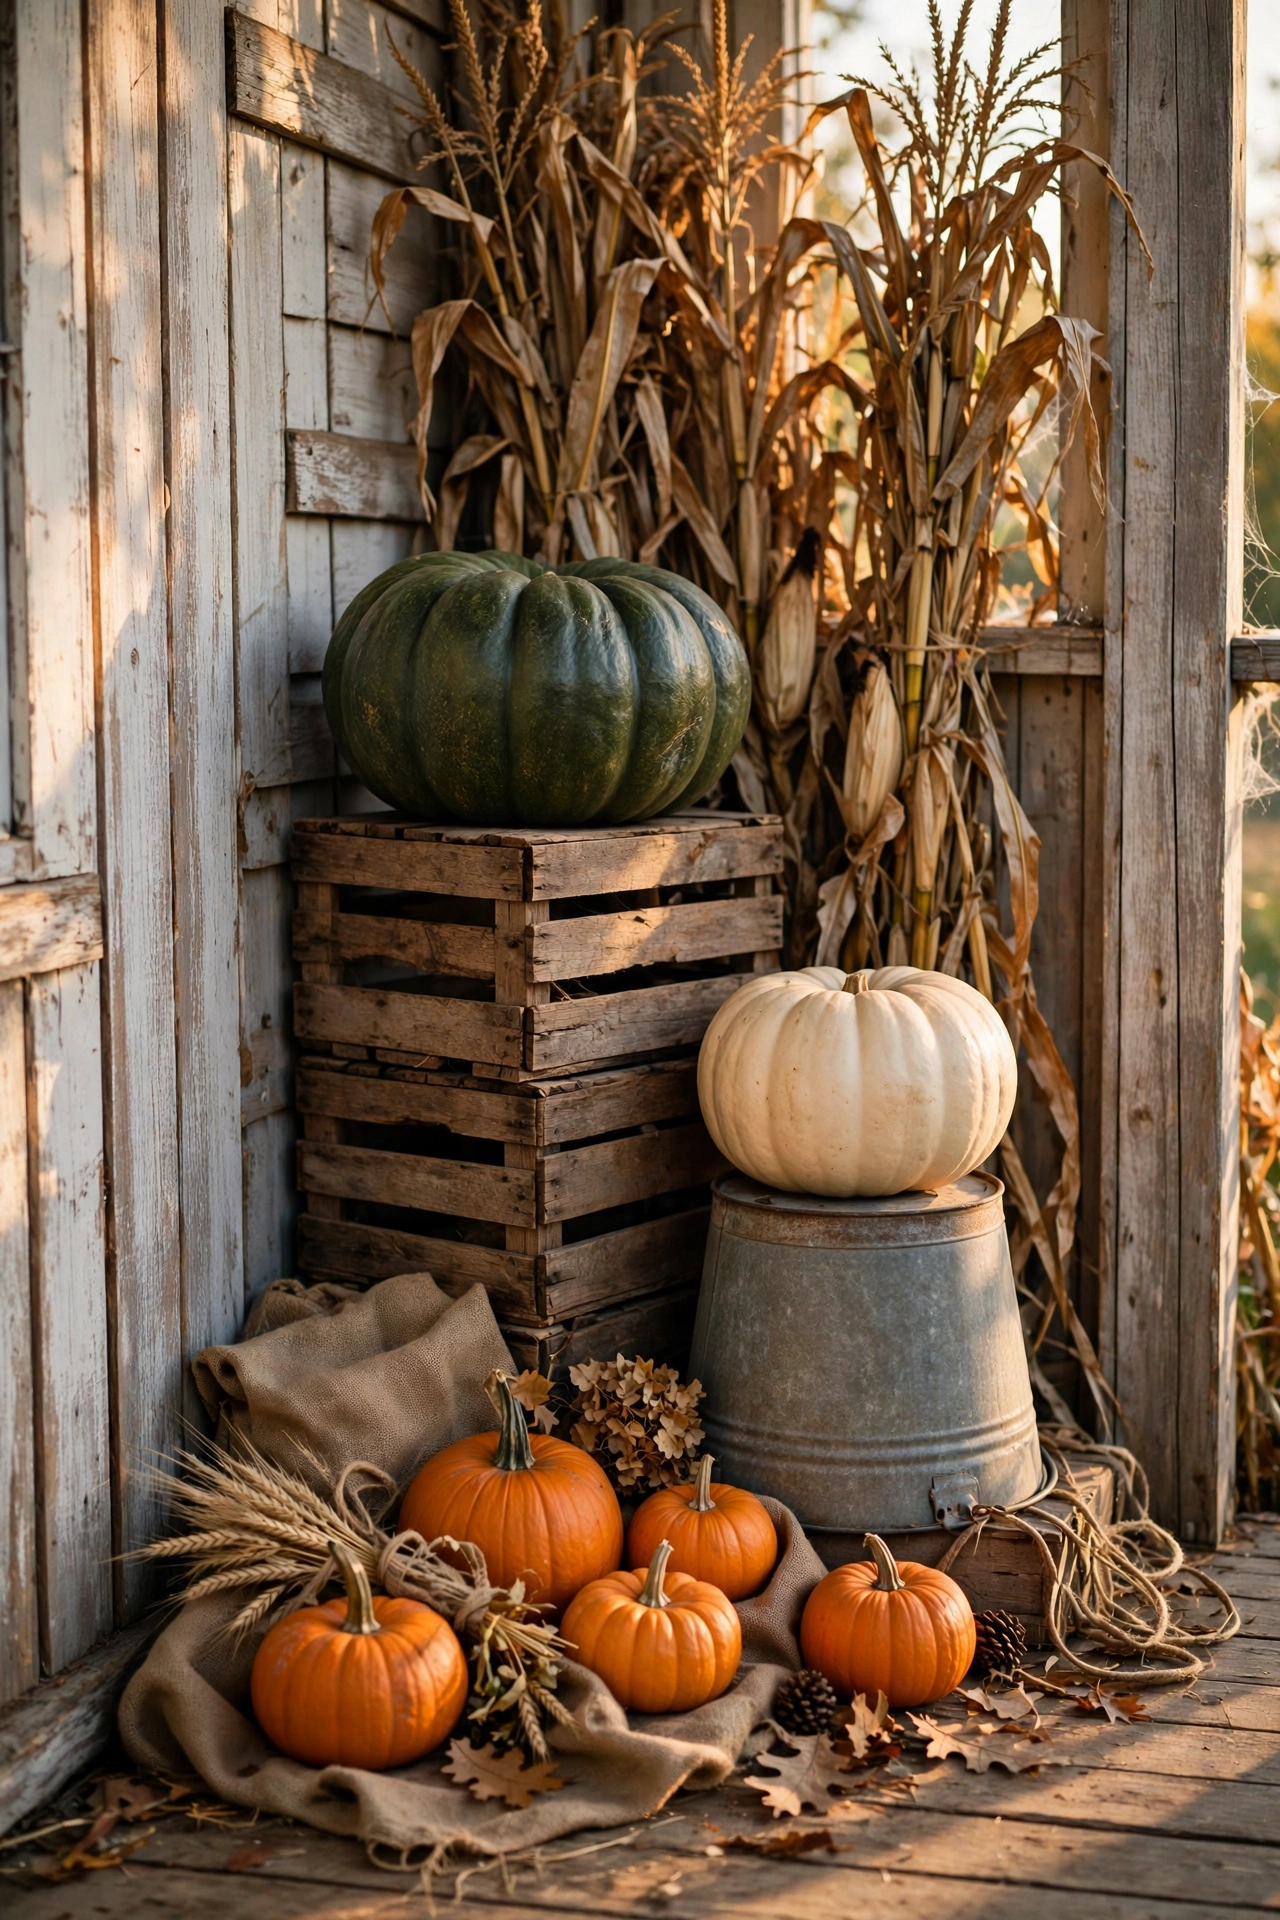
Set a 12-inch crate or overturned bucket at the back and place your largest pumpkin on top. Add a mid-height tier at 6–8 inches and finish with a group of 3 small pumpkins at ground level. Add one cream or green pumpkin among the orange ones for texture contrast and a curated look.
14. Paint Faux Pumpkins for Reusable Outdoor Displays
Real pumpkins rot long before the month ends. Carved pumpkins sag within days outdoors, which forces you to carve late and rush every other task. Painted faux pumpkins let you finish decorating weeks early, stay vibrant all month, and return next year without a single replacement.

Prime foam pumpkins with one coat of exterior primer, then paint two coats of matte acrylic in black, purple, or gold. Brush on 2 coats of water-based clear sealer, waiting 2 hours between coats, because solvent sprays eat foam. Matte finishes look like glazed pottery rather than plastic and resist the glare that gives faux pumpkins away.
Outdoor Halloween Lighting Ideas That Create Instant Atmosphere
15. Install Orange and Purple Spotlights at Ground Level
Porch bulbs flatten every prop in your yard. Overhead white light removes shadows and texture, so your tombstones, ghosts, and webbing all look flat after dark. Low-angle colored spotlights carve shadows into every surface, add depth, and make your display look dramatic from the street.
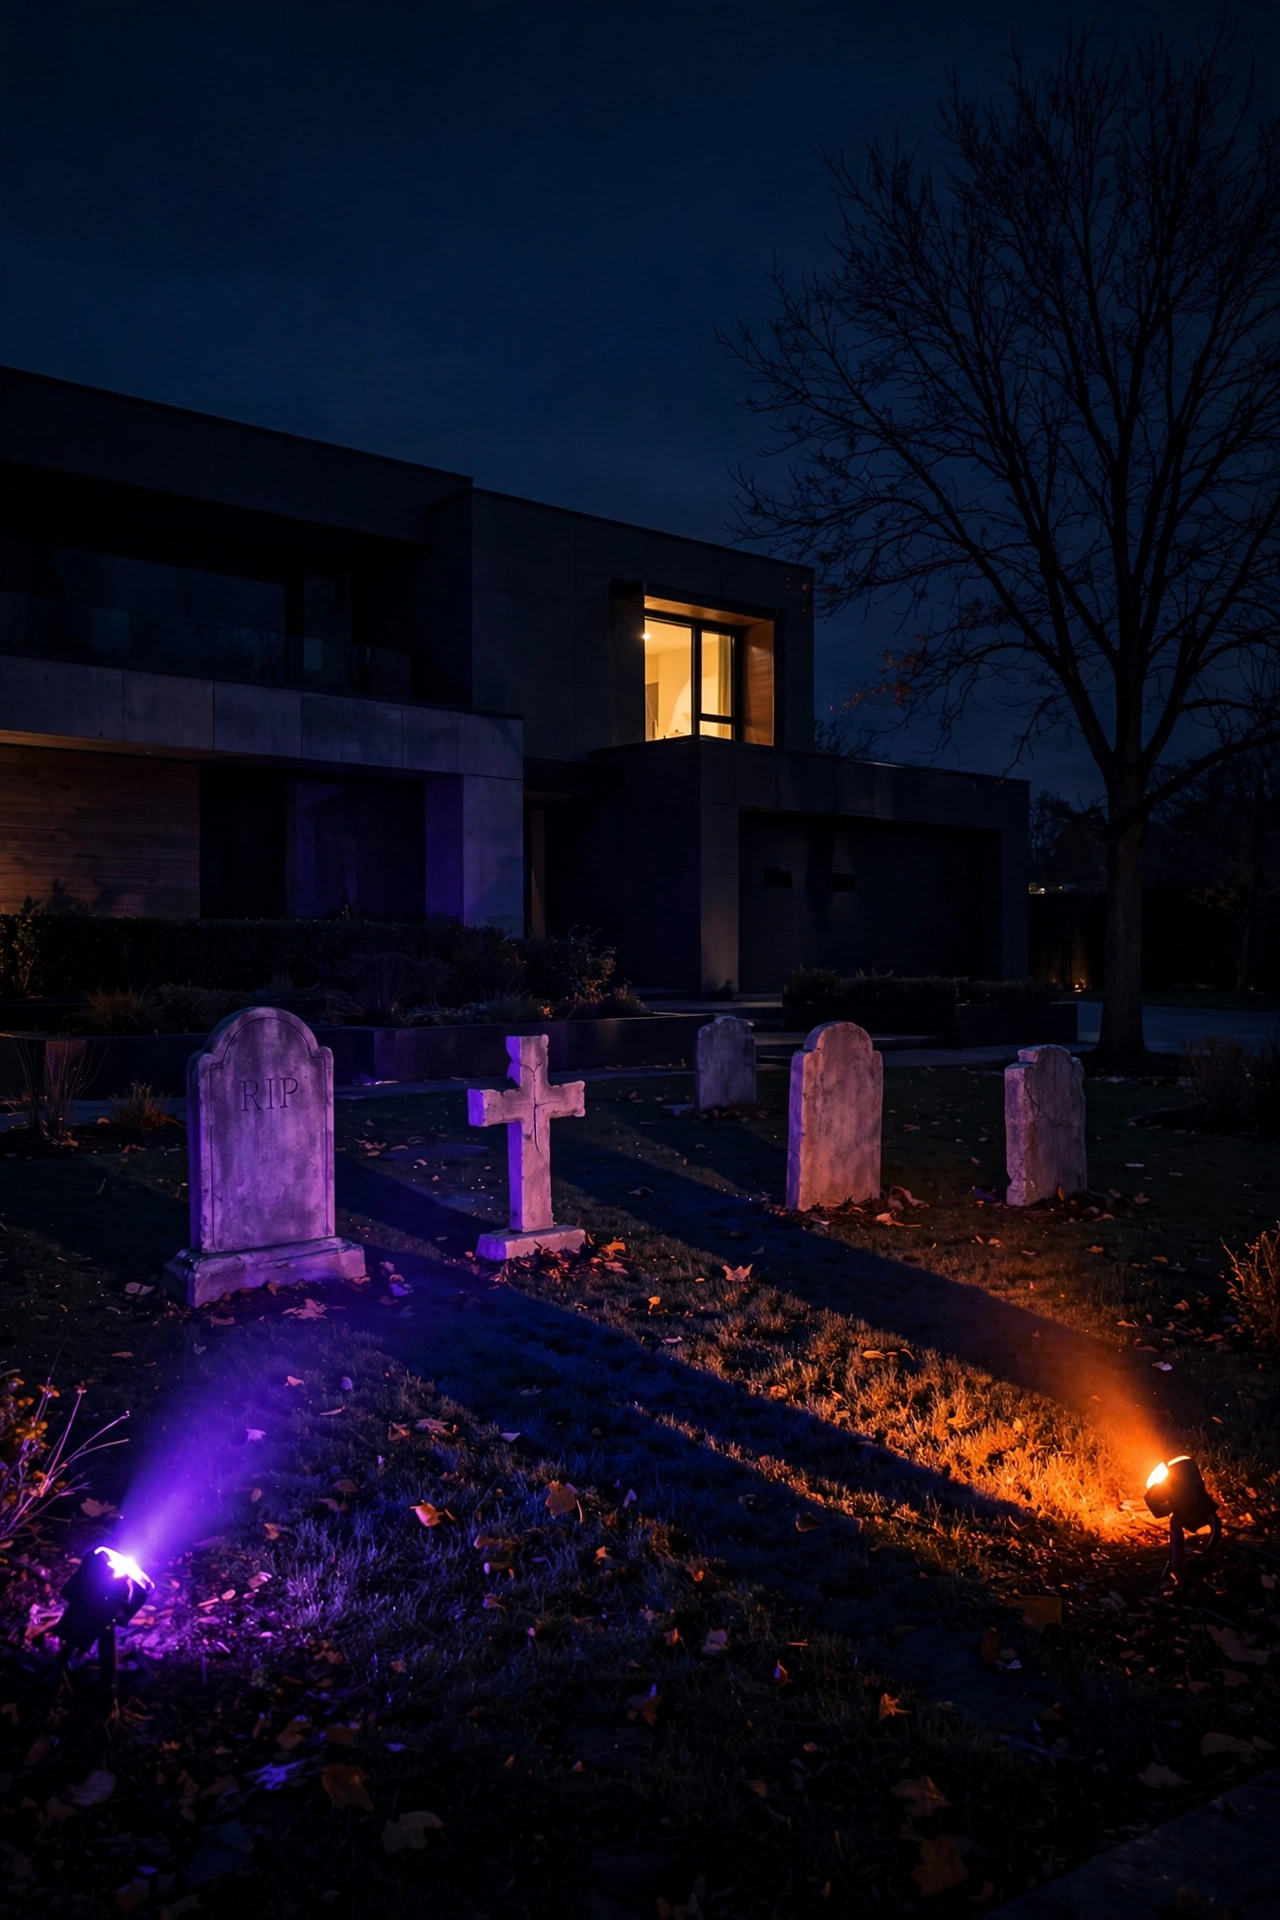
Stake a 5–10 watt outdoor LED flood 18–24 inches in front of the tombstones, angled up at 30–45 degrees. Pair one purple flood with one orange flood and cross the beams so shadows overlap in two colors. Set a timer from sunset to 11 p.m. so the display runs automatically every night.
Plug every light into a GFCI-protected outdoor outlet and use outdoor-rated extension cords only.
16. Add Flickering LED Candles Inside Mason Jar Lanterns
A dark walkway feels unwelcoming and unsafe after sunset. Visitors slow down and look at the ground instead of your display, which wastes the work you put into it. Mason jar lanterns line the path with warm flicker, add safe guidance, and give the entry a glowing, intentional border.
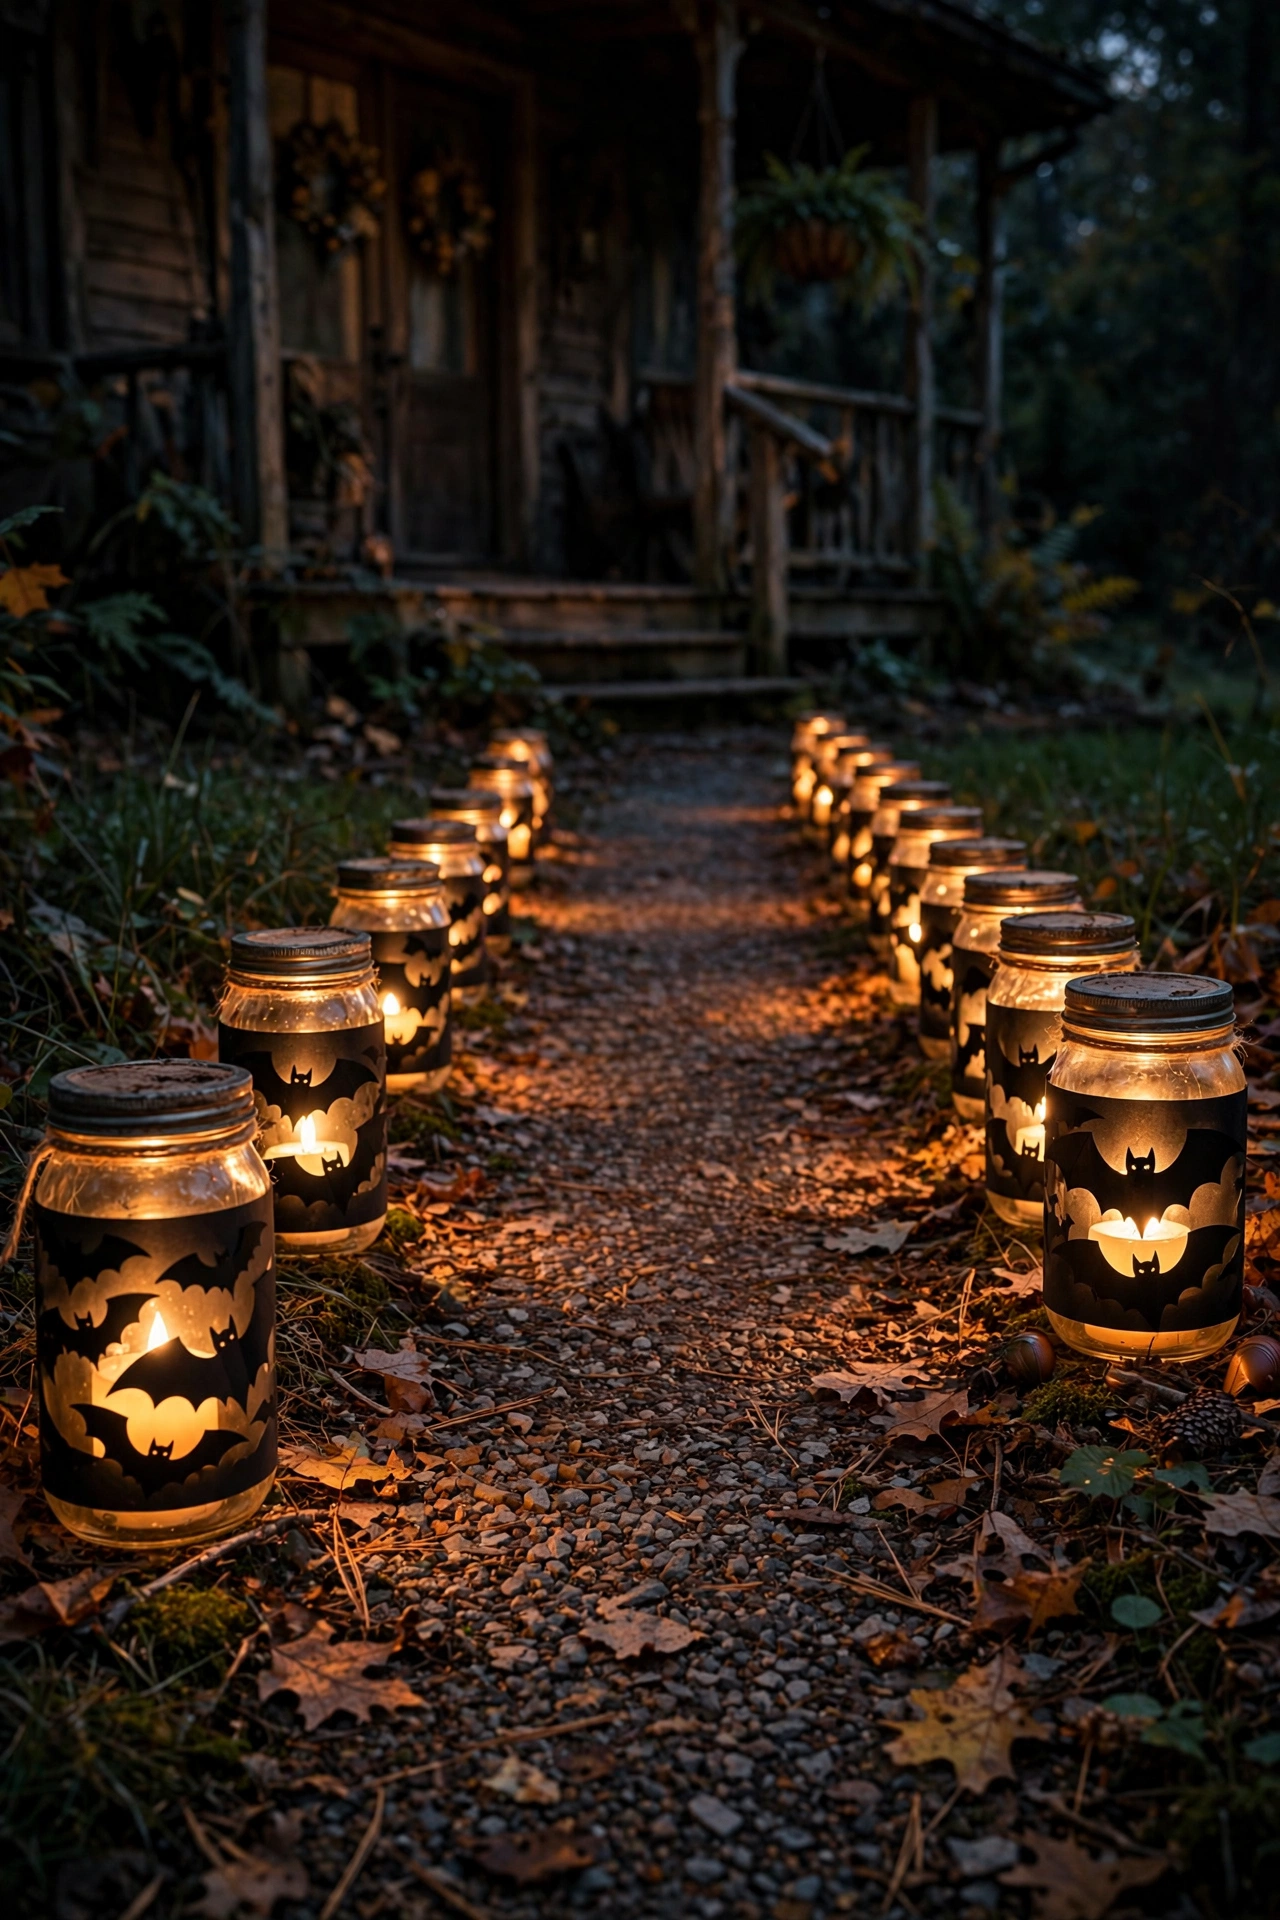
Wrap a pint mason jar in black cardstock cut with bat shapes and secure it with twine. Drop a flickering LED tea light inside and space jars 24 inches apart along both sides of the path. LED candles stay cool and wind-proof, so they last the whole night and remove the fire risk of open flame.
17. Place a Fog Machine Behind Your Graveyard Props
Clear air kills the mood of even the best prop. Without haze, your spotlights show only surfaces, and your tombstones sit like furniture instead of rising from haunted ground. Low-lying fog hides prop bases, catches colored spotlight beams, and merges separate props into one continuous atmospheric scene across your lawn.
Set a 400–700 watt fog machine behind the back row of tombstones, hidden by a shrub or a painted foam rock. Route the fog through a cooler filled with ice using 4-inch dryer duct so it hugs the ground. Chilled fog stays low, so it flows around tombstones like ground mist without clouding your walkway.
Finishing Touches for Halloween Yard Styling
18. Layer Sound Effects Using Hidden Weatherproof Speakers
A silent display engages only one of the senses. Without sound, the scare ends once the eye moves on, and visitors walk past your display in seconds. Layered ambient sound holds attention longer, adds unseen movement, and turns a static yard into a scene visitors stop to experience.
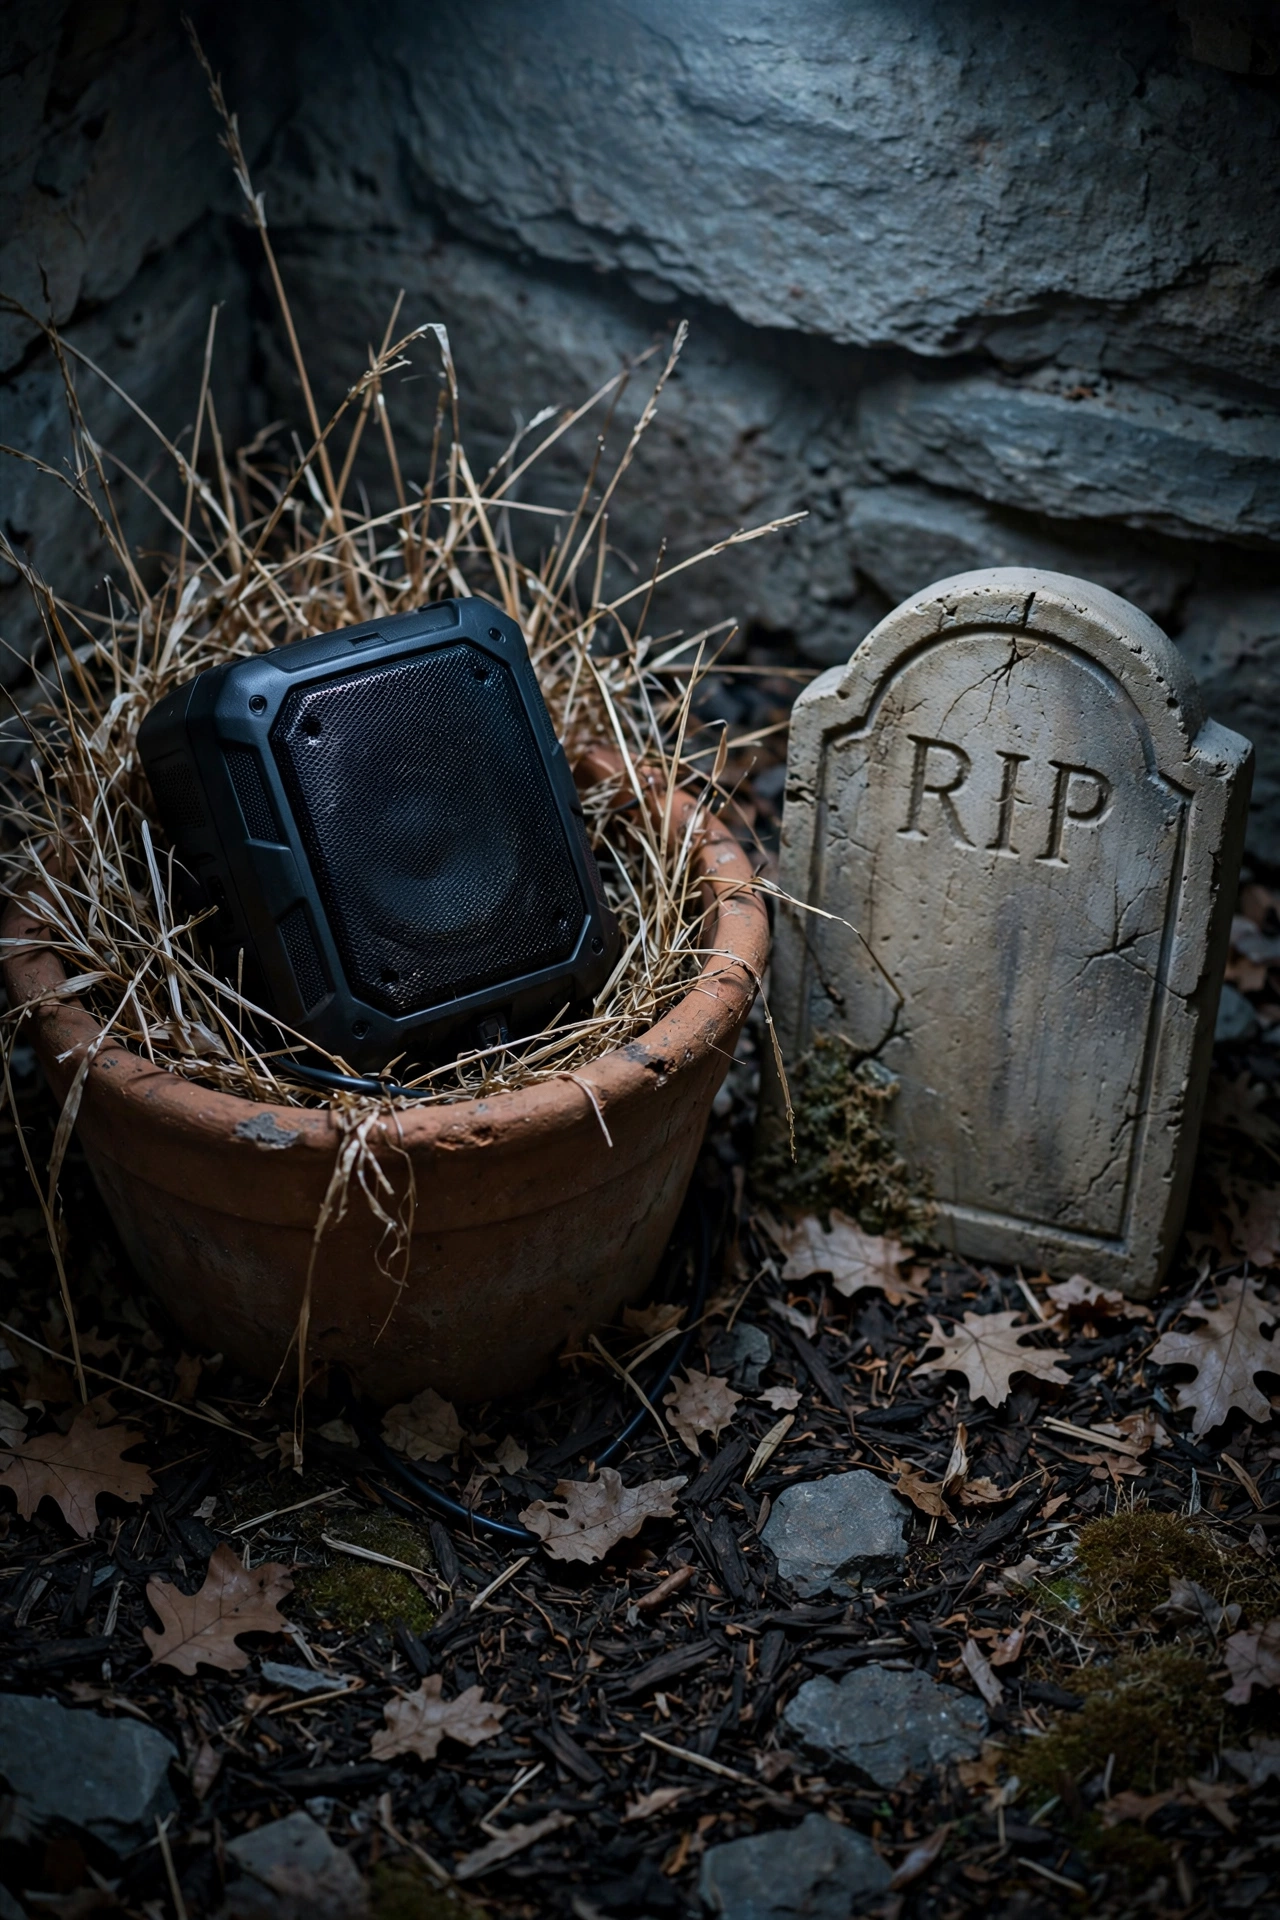
Place two IP65-rated weatherproof speakers 15–20 feet apart, each hidden inside a planter or behind a tombstone. Play wind and crickets on one speaker and distant howls and chains on the other, looped over 10 minutes. Spaced speakers create a moving soundscape, so sounds seem to travel across your yard.
Keep volume low enough that a neighbor 30 feet away hears only a murmur.
19. Anchor Your Display With One Oversized Focal Prop
Ten small props fight each other for attention. Equal-size props split the viewer’s eye, so nothing reads as the star and the whole yard looks cluttered. One oversized anchor piece creates a clear focal point, organizes every smaller prop around it, and reads from across the street.
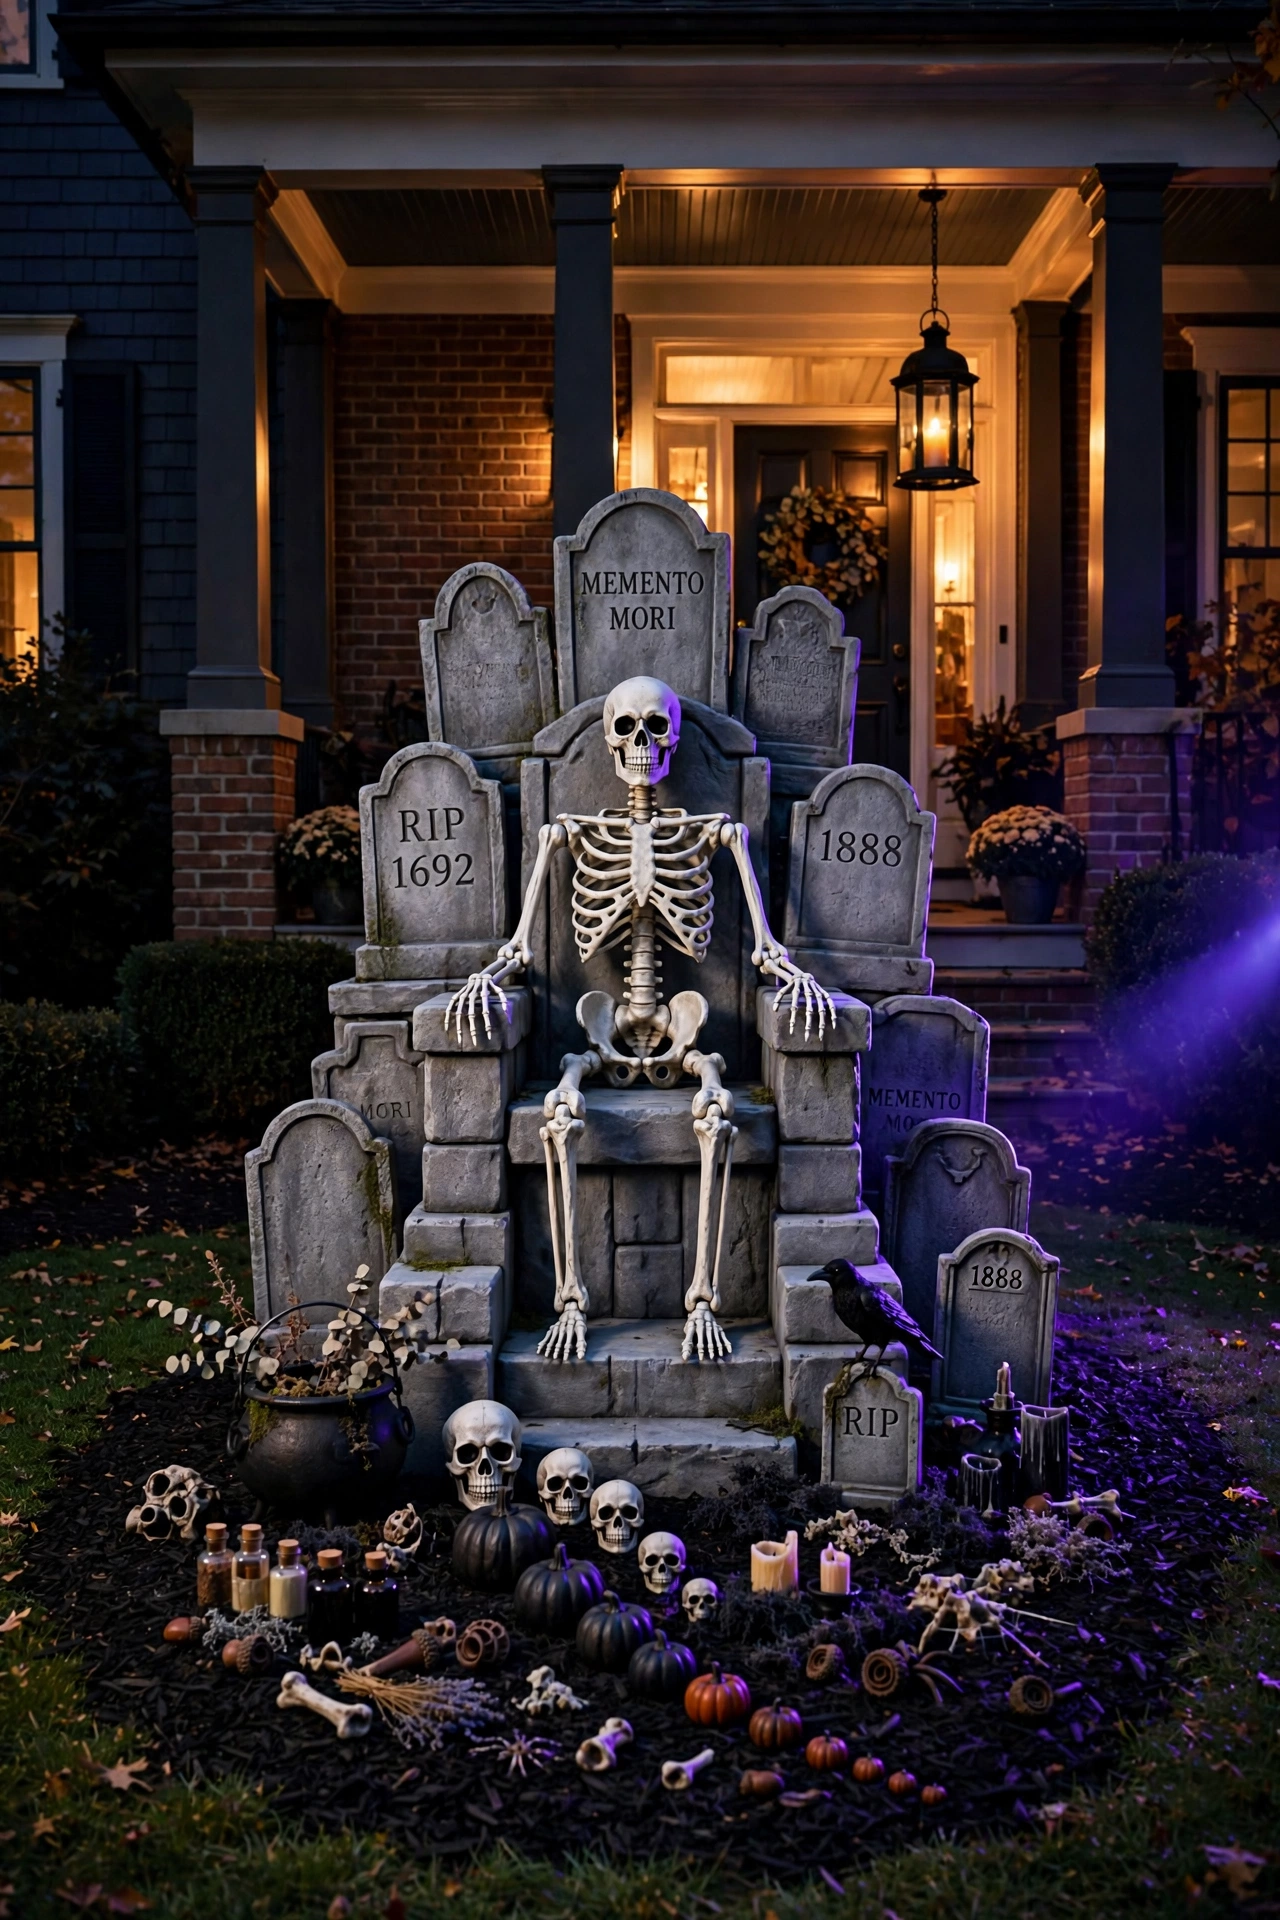
Build or buy one prop 6–8 feet tall and place it at the visual center of your lawn, about 12 feet from the street. Group smaller props at its base in odd numbers, and keep every other prop under 3 feet so the anchor stays dominant. The scale difference adds hierarchy, which makes the whole display look designed rather than assembled.
20. Limit Your Color Palette to Three Core Colors
Five colors turn a haunt into a yard sale. Mismatched purples, greens, and oranges dilute the effect, so every prop competes and none looks intentional. Three core colors create a cohesive color story, tie separate builds together, and make a mixed collection look purchased as a set.
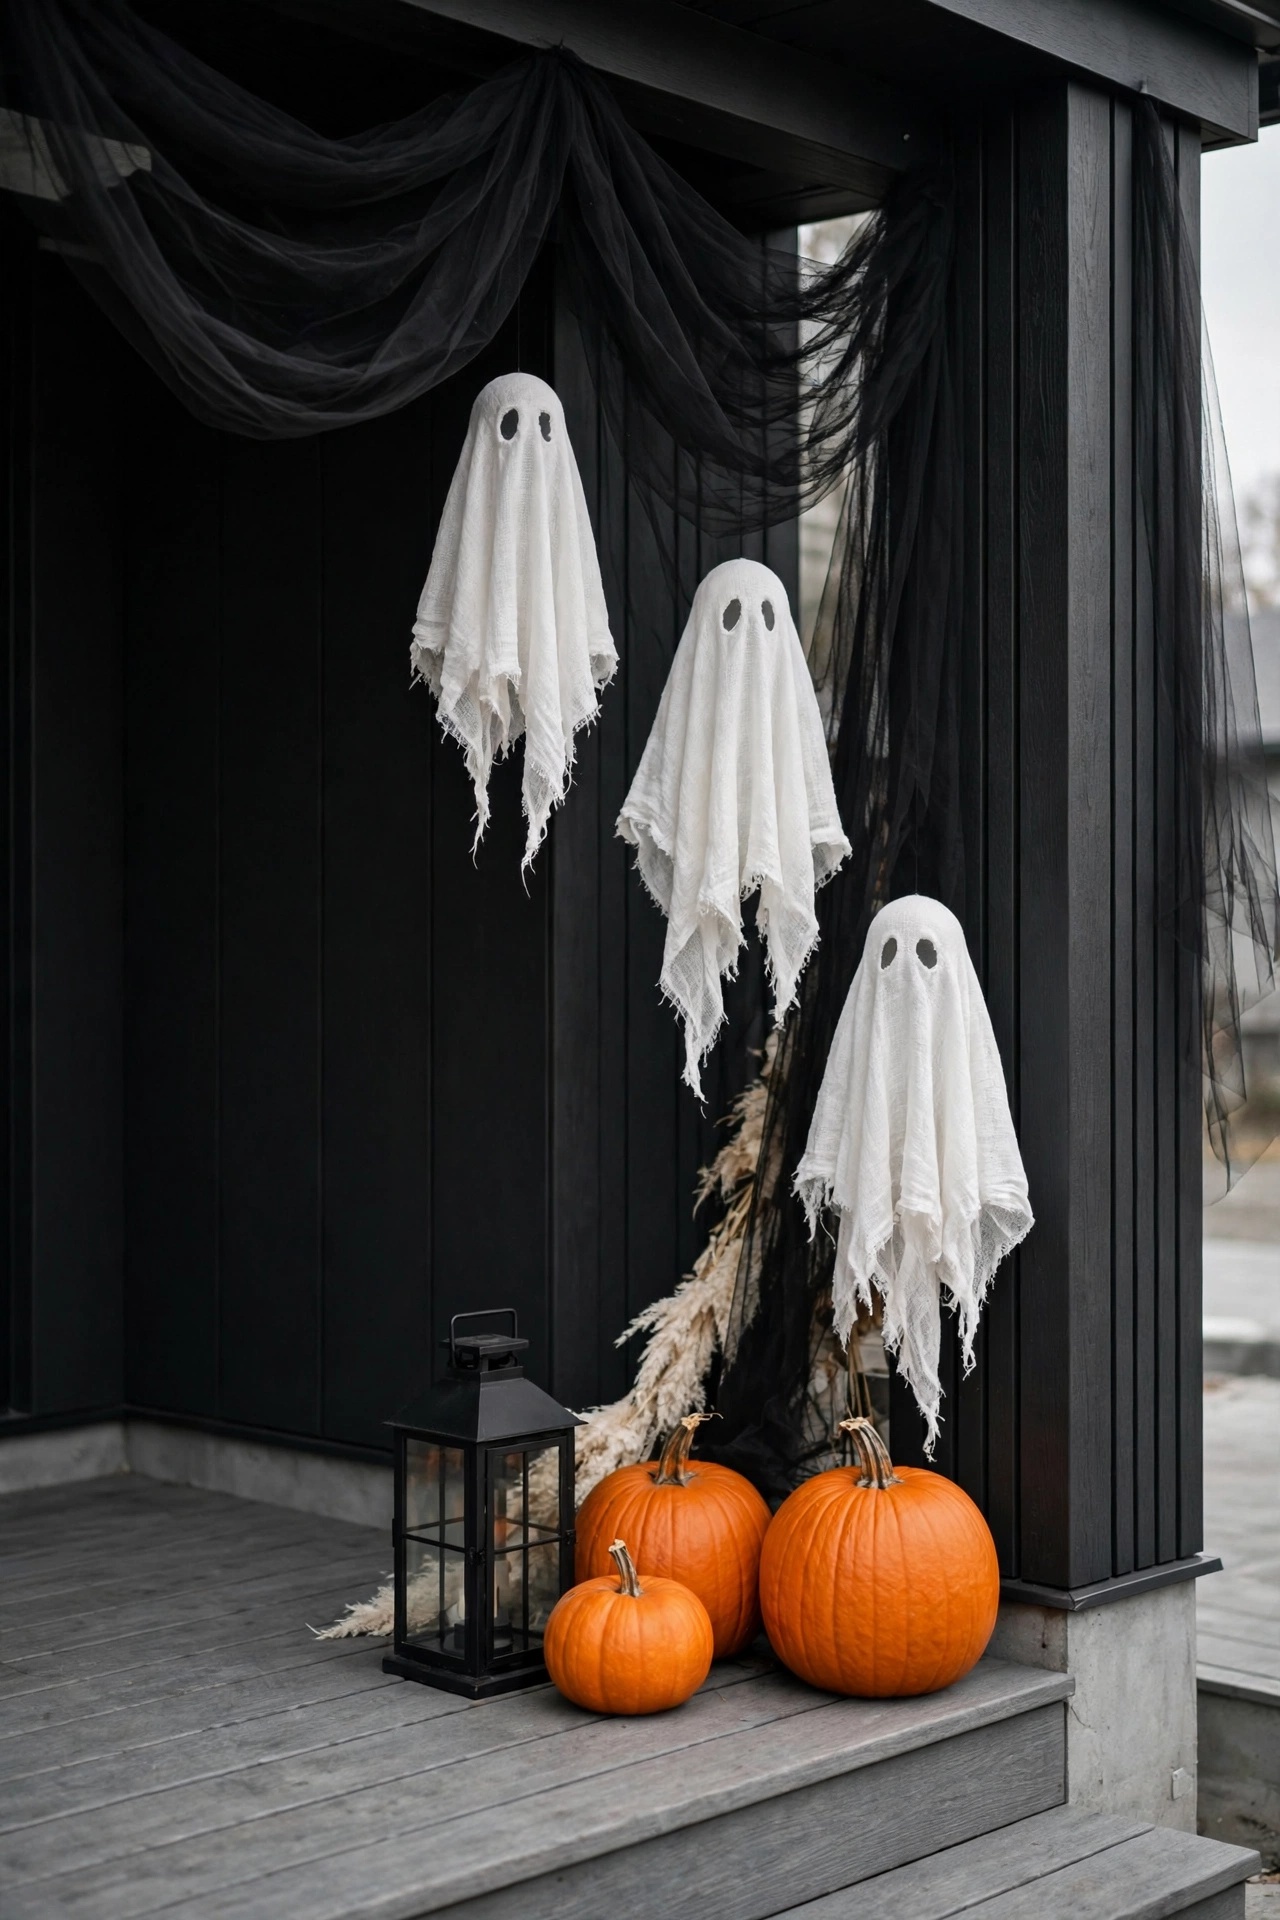
Choose one dominant color for 60% of your display, one secondary color for 30%, and one accent for 10%. Repaint or swap any prop outside the palette, since a single off-color prop breaks the color story. The 60-30-10 split gives the eye a resting point and keeps bright orange from overwhelming the scene.
Long-Term Care That Keeps Outdoor Halloween Decorations Lasting for Years
21. Seal Painted Props With Clear Outdoor Acrylic Spray
Unsealed paint streaks and peels in the first rain. Moisture lifts pigment and warps foam, so your gray tombstones turn blotchy before October ends. Two coats of clear sealer lock the paint down, block UV fade, and keep your props looking sharp for several seasons.
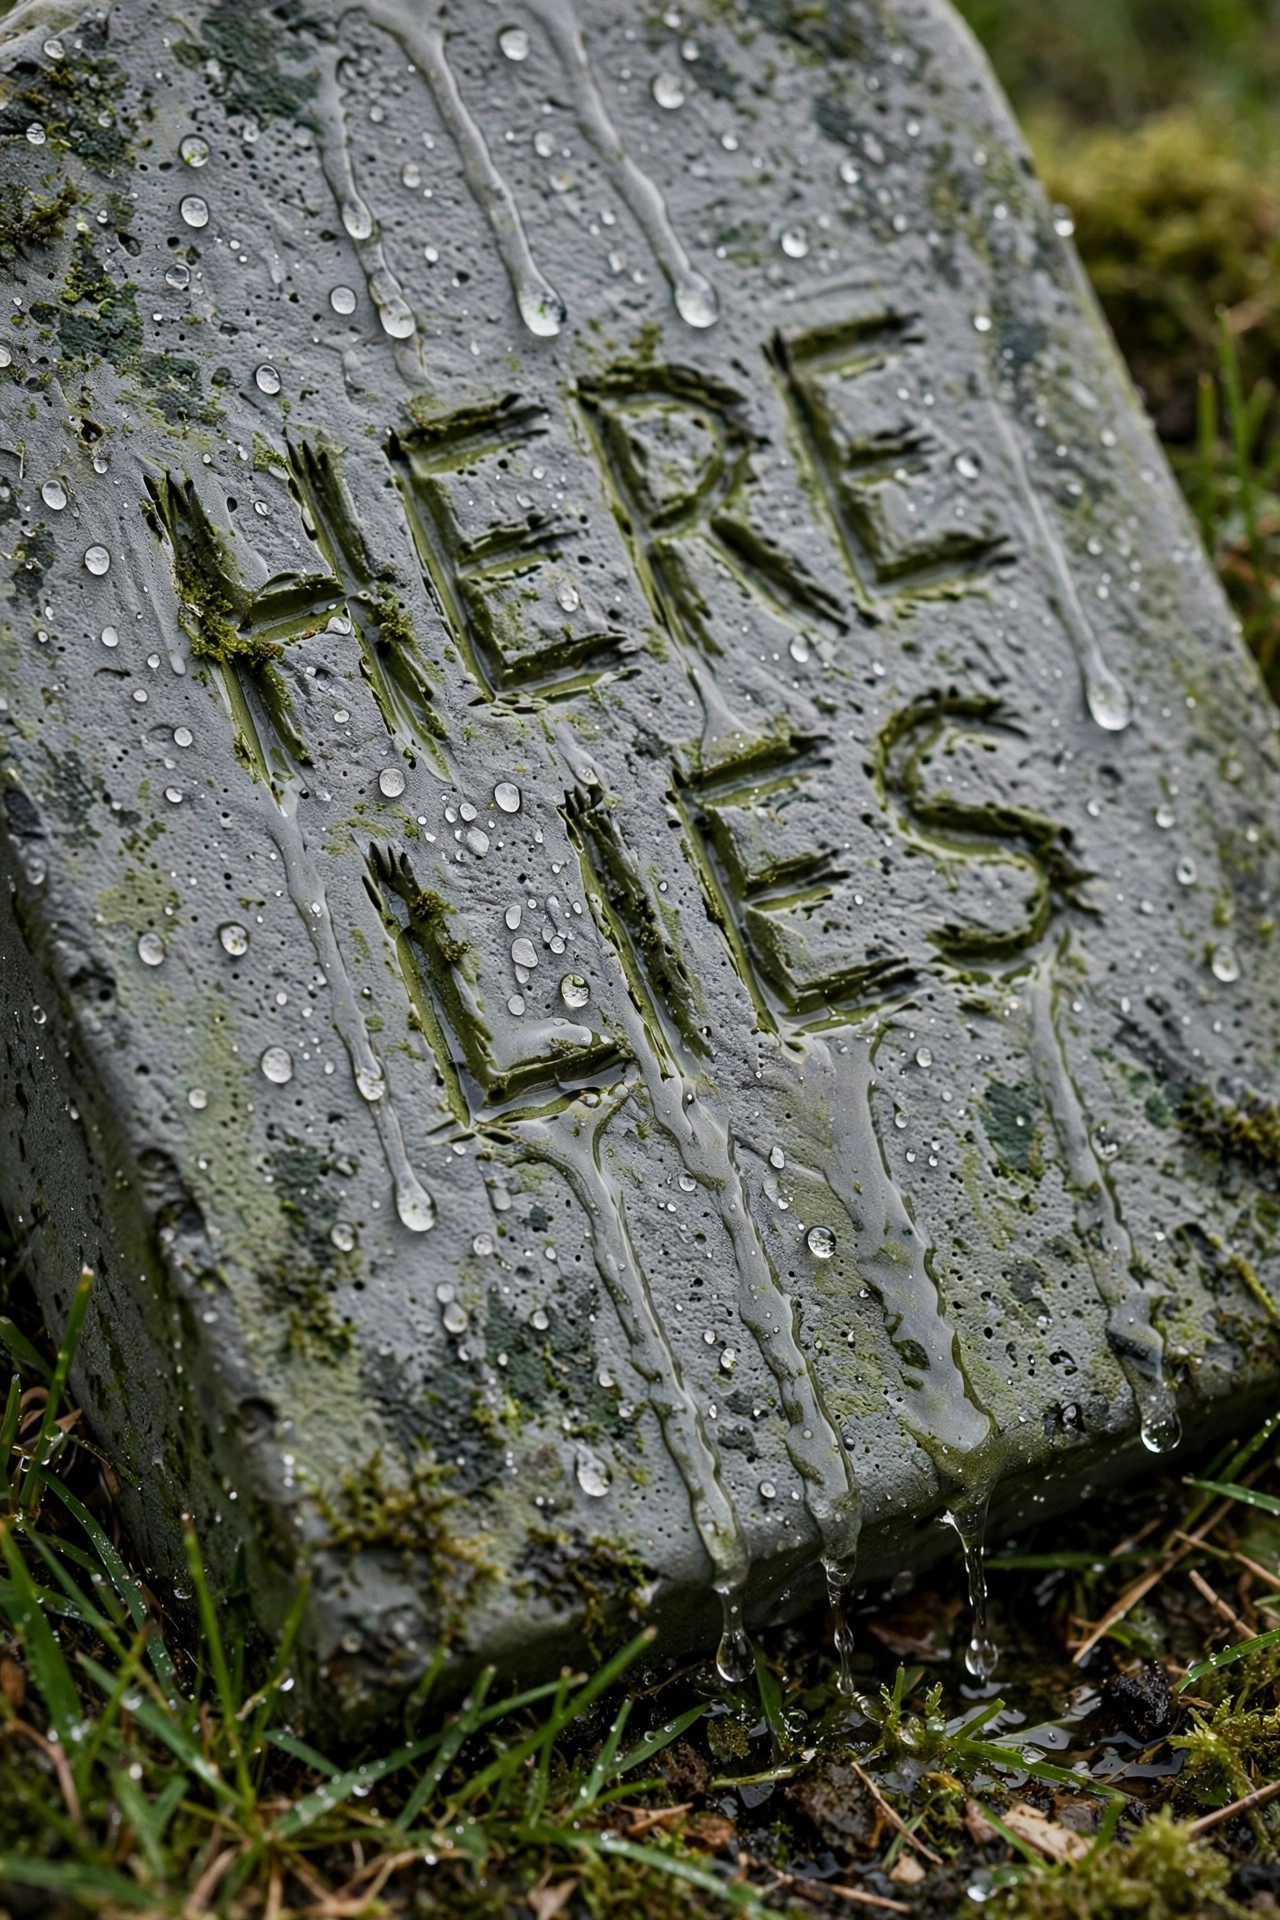
Wait 24 hours after painting, then apply 2 thin coats of clear outdoor acrylic sealer, 20 minutes apart. Spray plastic and wood props, but brush water-based sealer onto polystyrene foam, because aerosol solvents melt it. Test every sealer on a scrap of foam first, because a failed test costs one inch of foam instead of one tombstone.
22. Secure Every Prop Against Wind With Ground Stakes
One gust turns your display into a mess. Light foam props act like sails, and a single windy night leaves tombstones flat and ghosts tangled in the hedge. Properly staked props stay exactly where you placed them, protect your layout, and save you from repairing the display after every windy night.
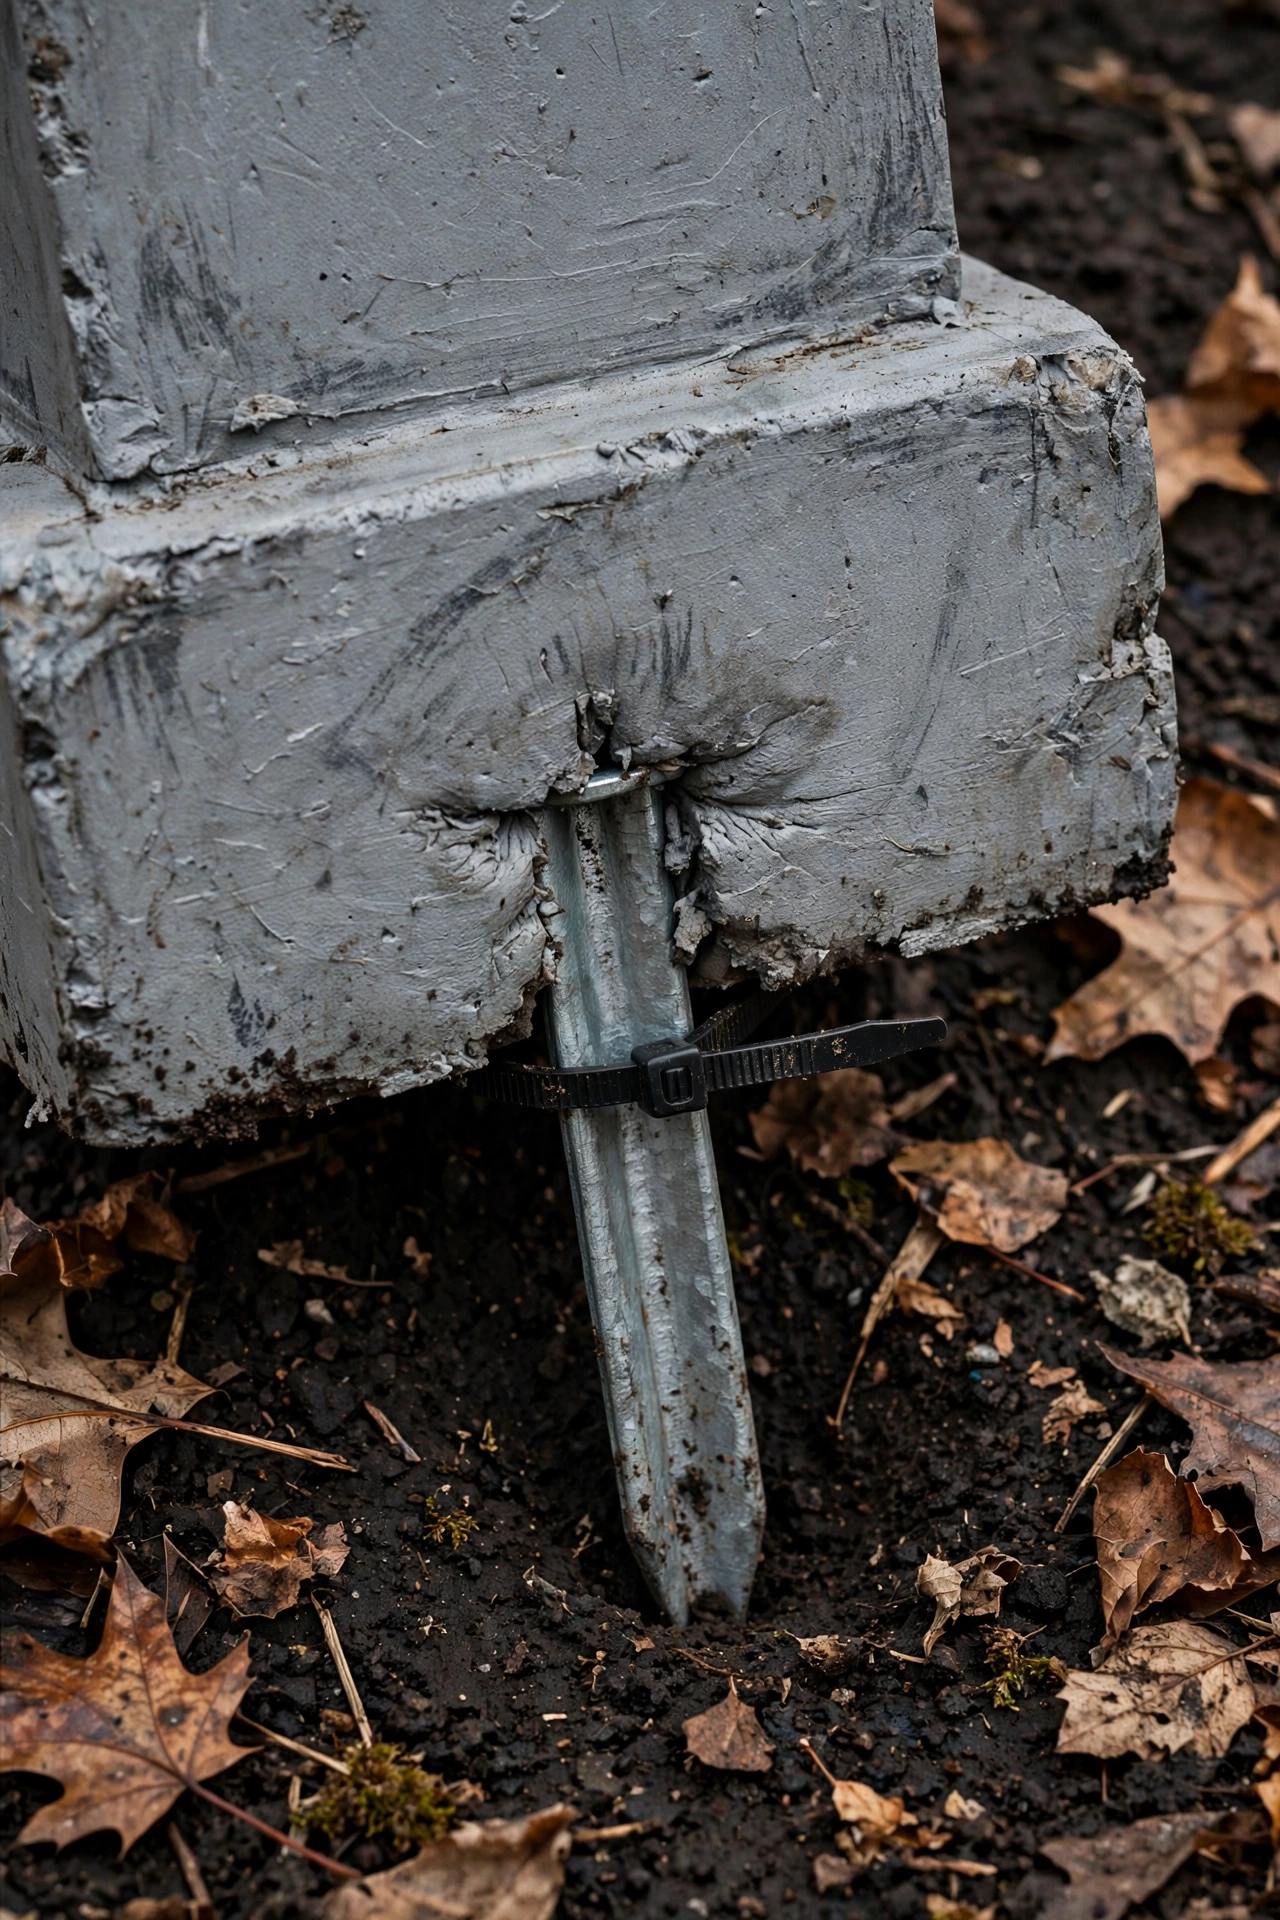
Drive two 12-inch metal stakes through the base of every tombstone before you set it upright. Anchor any prop taller than 4 feet to a 24-inch rebar stake with zip ties, driven a full 12 inches into the soil. Staked props also stay put when kids and pets brush past.
23. Store Decorations in Labeled Bins After Halloween
Crushed props mean rebuilding from zero next year. Props tossed into a garage pile bend, crack, and mildew, which erases the savings you made by building them yourself. Labeled, dry bins protect every build, make next year’s setup a one-afternoon job, and keep your props in display-ready shape.
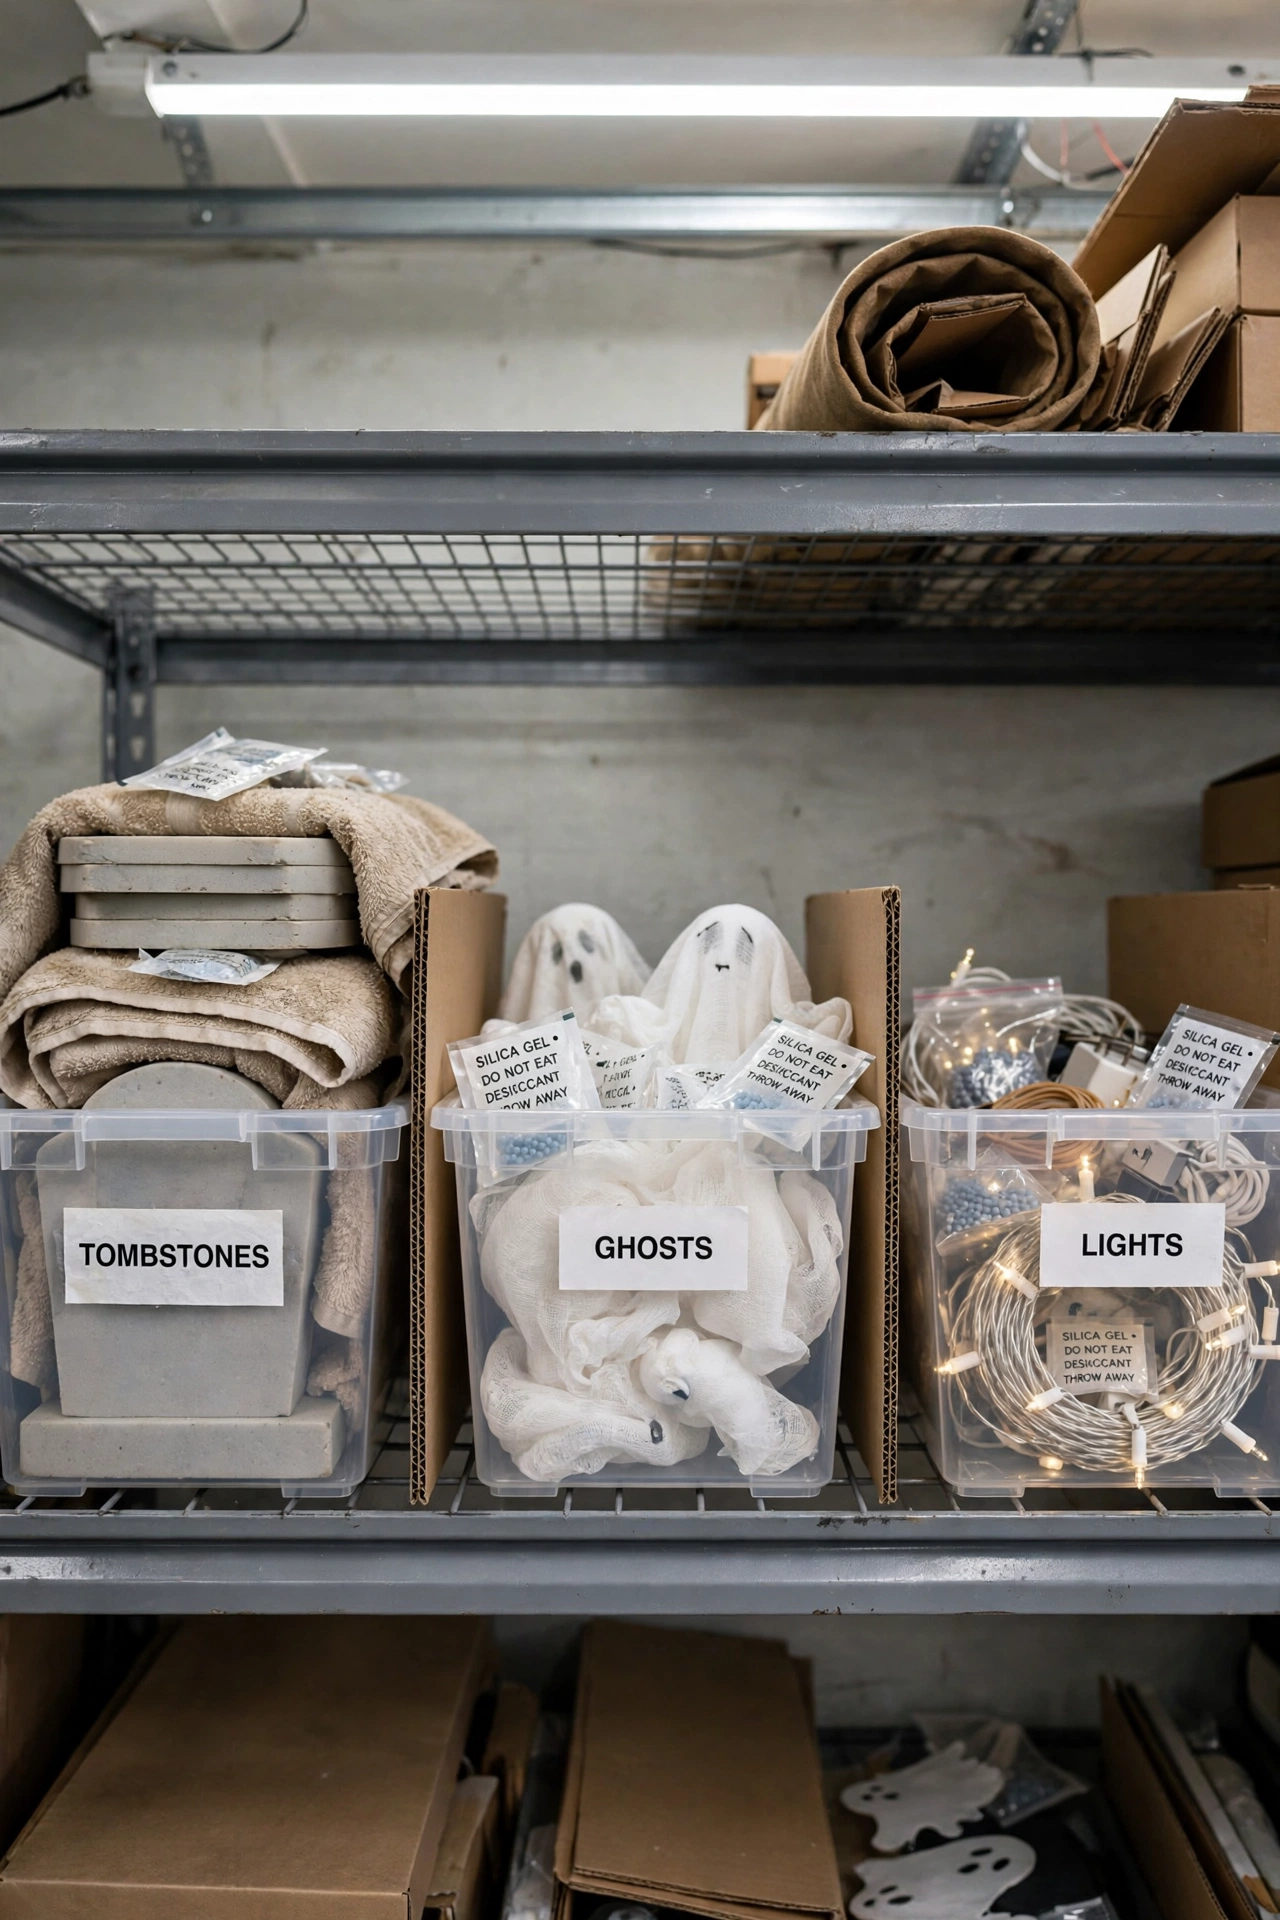
Wipe every prop dry, then wrap tombstones in old towels and stack them flat in a 27-gallon clear bin. Drop 2–3 silica gel packets in each bin and label the lid with the contents and the year. Flat stacking prevents the warping that ruins foam edges in storage.
Common DIY Halloween Outdoor Decoration Mistakes That Ruin Your Display
DIY Halloween Decorations Outdoor by Space and Situation
Small Apartment Balcony
Limit your display to a 3 × 6 foot zone and build vertically. Hang 3 cheesecloth ghosts from the balcony ceiling at 12, 18, and 24 inches, stack 3 pumpkins in a 3-tier cluster in one corner, and wrap the railing in tulle with battery LEDs. Skip fog and speakers, which carry to neighbors. One anchor prop under 4 feet keeps the scale right.
Rental With No-Drill Rules
Use removable adhesive hooks rated above the weight you hang, and tie lightweight props to railings with black zip ties. Swap ground stakes for weighted bases: fill a 5-gallon bucket with sand and slide a pole into it. Choose battery LED lighting over hardwired fixtures. Every build in this guide works without a permanent fastener.
Large Suburban Yard
Divide the lawn into 3 zones: entry, graveyard, and focal prop, with 8–10 feet of open grass between them. Scale tombstones up to 24–36 inches and build 7-piece groups. Add a second fog machine and two extra spotlights per zone so far corners never disappear after dark. Place a path light every 6 feet to link the zones.
Rainy or Windy Climate
Build everything from 2-inch foam, corrugated plastic, and sealed fabric, and stake every prop 12 inches deep. Choose IP65-rated lights and covered outdoor GFCI outlets. Skip paper, unsealed cheesecloth, and fog machines, which disperse in wind. Place the display close to the house, where walls block gusts, and keep props under 4 feet to cut the sail effect.
Frequently Asked Questions
How do you decorate outside for Halloween?
Measure your display zone, then build in this order: focal prop, graveyard groups, porch frame, lighting, and finishing touches. Limit your palette to three colors, light from ground level at 18–24 inches, and group props in odd numbers. This order prevents rework and makes every later step easier.
What are the biggest mistakes when decorating outdoors for Halloween?
The most common mistakes are using indoor paper and cardboard, spacing props in even rows, lighting only from above, and skipping stakes. One material swap or placement change fixes each: switch to foam or corrugated plastic, group props in odd numbers, add ground spotlights, and stake every base.
How do you make cheap outdoor Halloween decorations from scratch?
Buy 2-inch insulation foam, cheesecloth, fabric stiffener, and black tulle first; these four materials cover tombstones, ghosts, and porch swags. Spend 50% of your budget on one focal prop, 30% on lighting, and 20% on accents. Dollar-store skeleton hands, spiders, and LED candles fill the rest.
How do you decorate a small porch for Halloween without drilling?
Use removable adhesive hooks rated above your prop’s weight, tie garlands to railings with zip ties, and hang cobwebs with removable tape. Replace ground stakes with weighted bases such as a sand-filled bucket. A 6 × 6 foot landing holds 2–3 props without blocking the door.
Are LED or incandescent lights better for outdoor Halloween decorations?
LED wins outdoors. LED strings run cool, draw far less power, and stay safe near webbing, tulle, and dry leaves. Incandescent bulbs run hot beside flammable synthetic cobweb. Choose outdoor-rated LED strings and plug them into a GFCI-protected outlet.
How often should you update your Halloween yard decorations?
Refresh one element every 7–10 days: swap one pumpkin, add a ghost, or change a spotlight color. Full rebuilds are unnecessary. Rotating 2 or 3 small pieces keeps neighbors noticing and leaves your base display intact all month.
Do DIY Halloween decorations hold up in rain?
Yes, when you build them from the right materials. Extruded polystyrene foam, corrugated plastic, and sealed cheesecloth all survive rain. Paper, cardboard, and unsealed fabric do not. Add two coats of sealer and keep electrical connections off the ground in covered, weatherproof boxes.
How much does it cost to decorate outside for Halloween?
Set a fixed total first, then apply the 50/30/20 split across focal prop, lighting, and accents. Building foam tombstones, cheesecloth ghosts, and jar lanterns from raw materials costs far less than buying finished props, and the focal prop is always your largest single expense.
How long do homemade outdoor Halloween decorations last?
Props built from 2-inch foam, corrugated plastic, and sealed paint last several seasons when you store them dry. Real pumpkins last days, not weeks. Store everything in labeled bins with silica gel packets, and rebuild only the pieces that show wear.
Conclusion
DIY Halloween decorations outdoor succeed when you plan first and build second. Measure your zone, choose weatherproof materials, group props in odd numbers, light from ground level, and stake everything down. Those five habits separate a display that looks intentional from a pile of props.
Start today: buy 2-inch foam and cheesecloth, then build Tip 8 first, because tombstones anchor every other element in the yard. Seal your work, store it dry in November, and next year’s display takes one afternoon instead of one weekend.