
A halloween living room transforms your entire home into an atmospheric centerpiece guests remember. The right layering of lighting, texture, and statement pieces creates drama without turning your space into a cluttered costume shop. This guide delivers 24 specific, actionable strategies for building a cohesive halloween living room from the ground up. Start with your color palette before you buy a single decoration.
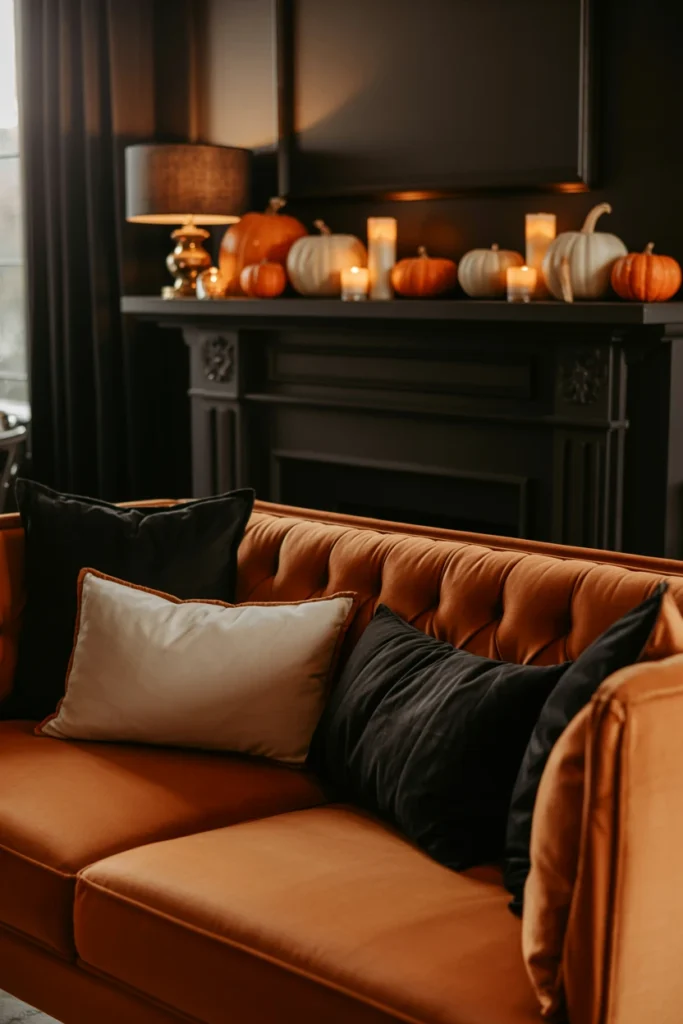
Before You Begin: 3 Foundation Steps for Your Halloween Living Room
These three steps prevent the single biggest halloween decorating mistake: buying pieces before deciding on a direction. A defined palette and focal point keep every purchase working toward one cohesive look instead of a random collection.
1. Choose a Halloween Color Palette Before Buying Decor
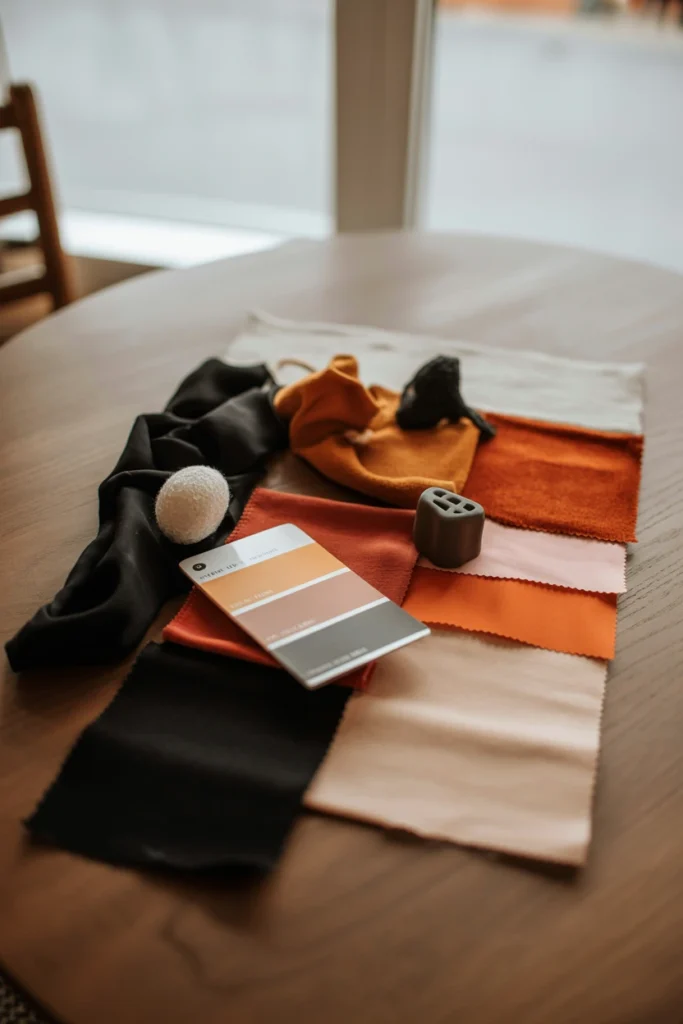
A living room without a locked color palette turns into visual noise within one season. Every extra color you introduce competes for attention and dilutes the impact of your best pieces. A three-color palette instantly reads as intentional and elevated instead of thrown together.
Start by pulling three colors directly from your existing sofa, rug, or wall art. Classic combinations include black, burnt orange, and cream, or deep purple, black, and antique gold — limit accent colors to 10% of the total palette. This constraint forces you to choose statement pieces more carefully, which genuinely upgrades the entire room’s cohesion.
| Palette Style | Best For |
| Black, orange, cream | Traditional halloween with modern edge |
| Purple, black, gold | Gothic, dramatic living rooms |
| Charcoal, rust, ivory | Neutral-leaning, minimalist homes |
| Green, black, silver | Witchy, apothecary-inspired spaces |
2. Anchor Your Halloween Living Room Around One Focal Point
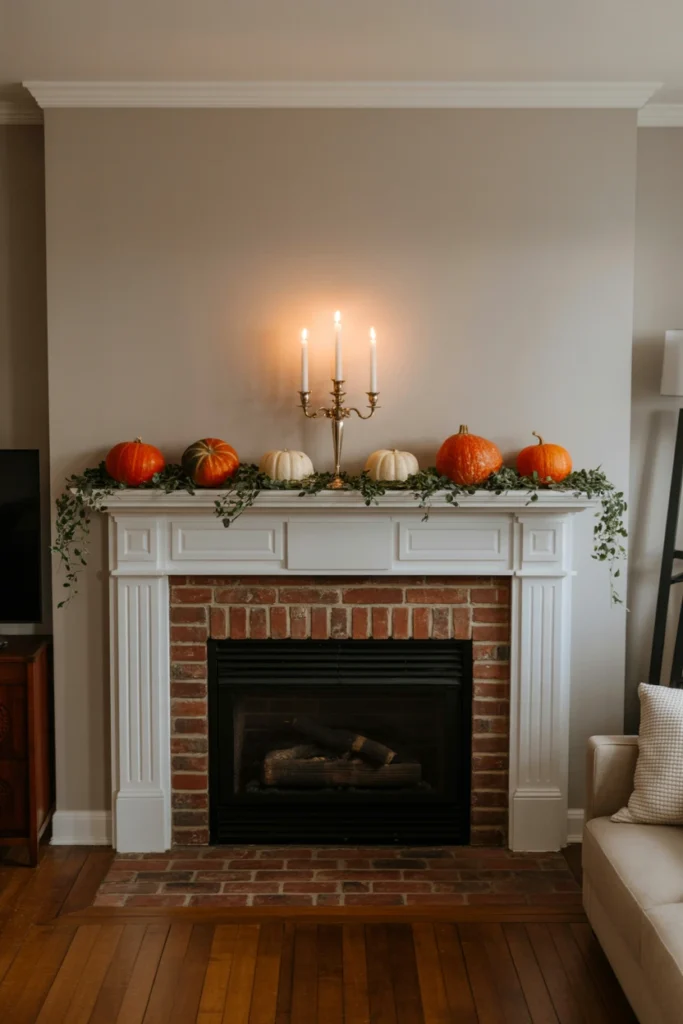
A halloween living room without a focal point scatters attention across five weak accents instead of one strong statement. Guests’ eyes need somewhere to land immediately upon entering the room. One anchor piece — a fireplace display, a skeleton, or a mirror vignette — defines the entire room’s energy.
Start by identifying the wall or surface guests see first when entering the room, typically the mantel or the wall opposite the entry. Build your largest, most dramatic piece there — a 5-foot skeleton or a fully styled mantel vignette — and keep every other accent smaller in scale. This hierarchy makes even a modest decor budget look professionally curated.
| Room Layout | Best Focal Point Location |
| Room with fireplace | Mantel, styled full-width |
| Open-concept space | Console table facing entry |
| Small apartment | Single accent wall or corner |
| Room with large window | Window seat or curtain display |
3. Assess Existing Furniture for Halloween Decor Compatibility

Halloween decor placed on the wrong furniture style clashes and reads as costume-store rather than curated. A tufted velvet sofa supports gothic elegance instantly, while a bright modern sectional needs a different visual approach entirely. Matching your decor style to your existing furniture prevents an expensive-looking mismatch.
Start by photographing your living room in daylight and noting your furniture’s dominant material — velvet, leather, wood, or linen. Velvet and wood surfaces pair naturally with gothic and vintage halloween styles, while linen and light wood suit a softer, autumnal approach with muted pumpkins and dried florals. Matching direction to furniture means fewer returns and a noticeably more cohesive final room.
| Furniture Style | Matching Halloween Direction |
| Velvet, dark wood | Gothic, dramatic, jewel-tone accents |
| Light wood, linen | Muted autumnal, dried florals, neutrals |
| Leather, industrial | Rustic, apothecary, aged-metal accents |
| Modern, minimalist | Monochrome black and white, sculptural |
Layer Moody Lighting Across Your Halloween Living Room
Lighting does more work than any single decoration in a halloween living room. This section covers how to replace flat overhead light with layered, atmospheric sources that transform the room after dark.
4. Replace Overhead Light with Warm Candlelight Zones
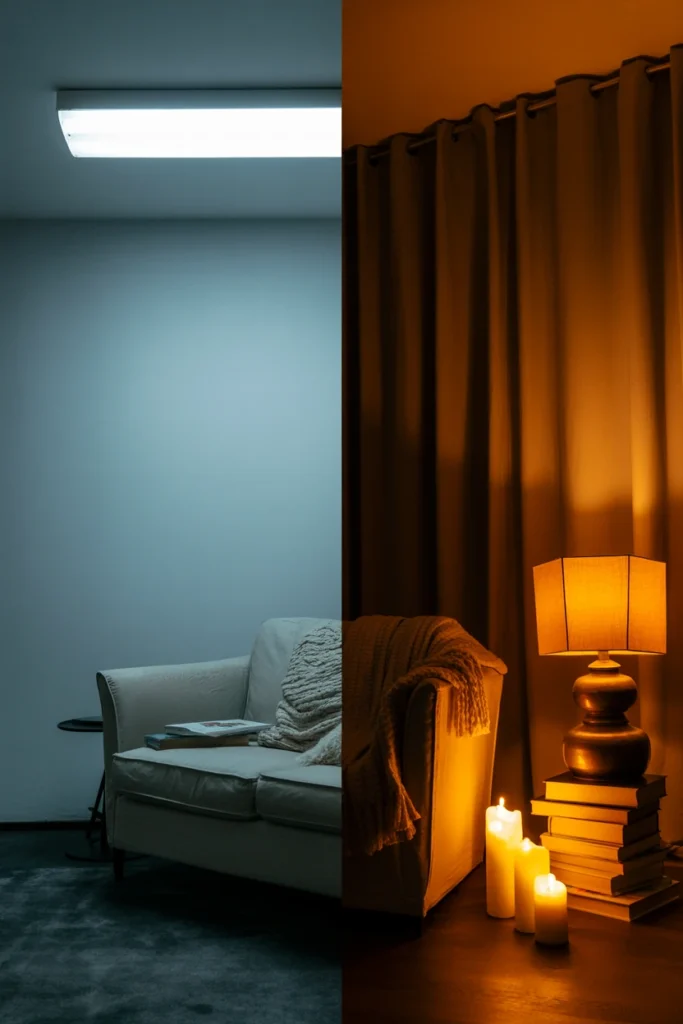
Bright overhead lighting flattens every halloween decoration into a daytime display. This single fixture eliminates shadow and mood, the two elements that make halloween styling genuinely effective at night. Switching to warm, low-level lighting instantly makes the same decor look twice as atmospheric.
Start by turning off your main overhead fixture completely after 6 p.m. throughout October. Replace it with three to four warm-toned lamps at varying heights around 2700K color temperature, positioned in different corners of the room. This layered approach also makes the room feel larger, since shadow creates the illusion of depth beyond the visible walls.
| Light Source | Placement | Effect |
| Table lamp, 2700K | Console or side table | Warm ambient glow |
| Floor lamp | Behind armchair | Tall shadow, dramatic corner |
| Battery candle | Mantel, in groups of 3 | Flickering focal point |
| Uplighting spot | Behind skeleton or plant | Silhouette effect on wall |
5. Install LED Flame Candles in High-Traffic Areas
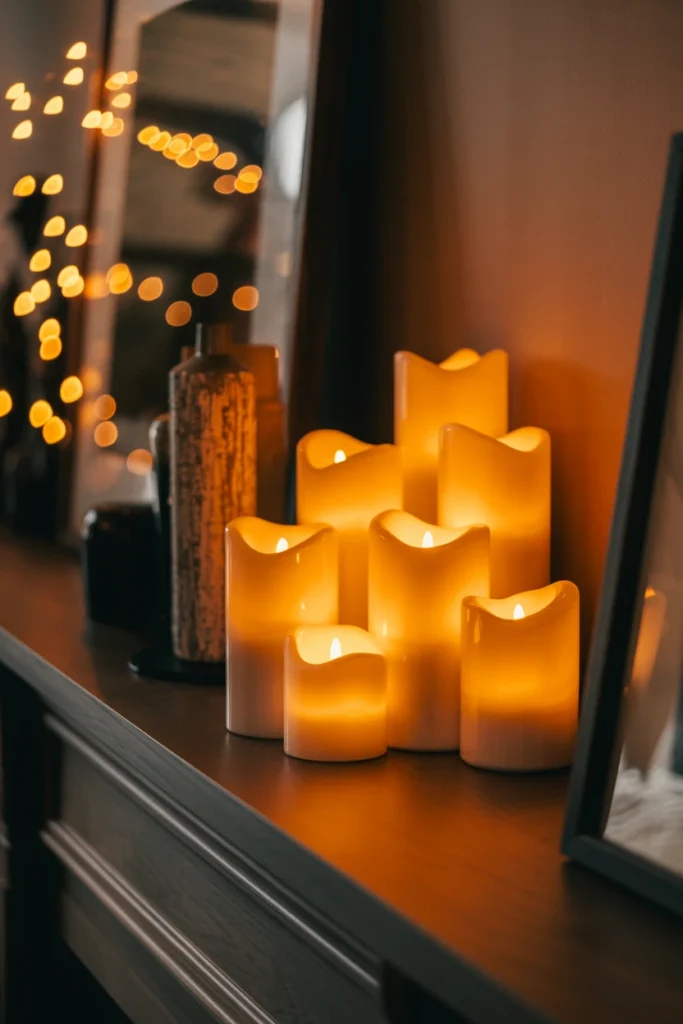
Real candles in a busy living room create a genuine fire hazard around trailing throws and paper decorations. This risk increases significantly once guests, kids, or pets move through the space during a gathering. Battery-powered LED flame candles remove the danger while keeping the exact flickering effect real flame provides.
Start by buying LED taper or pillar candles with a genuine flicker function, not a static glow — the flicker is what sells the illusion. Cluster five to seven candles at varying heights of 4, 8, and 12 inches on your mantel or console for a realistic vignette. This swap also means the candles can run unattended all evening during a party without any supervision required.
| Candle Type | Height Range | Best Placement |
| LED taper | 10-12 inches | Candelabra, formal display |
| LED pillar | 4-8 inches | Mantel clusters, shelves |
| Flameless votive | 2-3 inches | Coffee table groupings |
| Battery lantern | 8-14 inches | Floor accent, entry table |
6. Add String Lights Behind Sheer Curtains for Glow
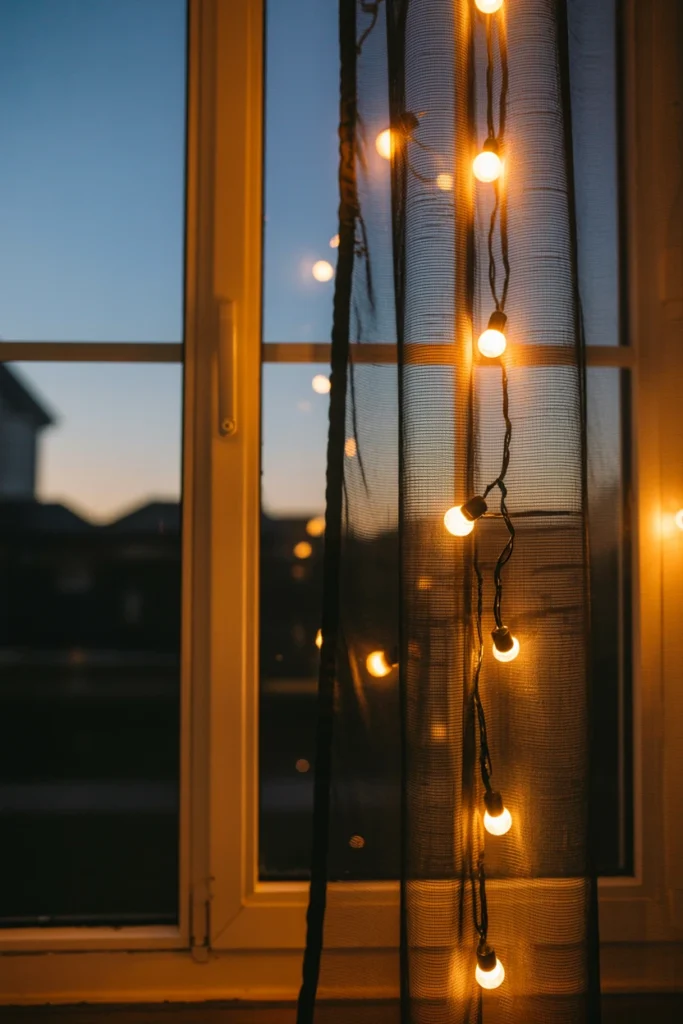
Halloween window treatments left plain waste one of the room’s largest visual surfaces after dark. A window facing the street or a courtyard is visible from outside every single evening in October. Layering string lights behind sheer fabric turns that same window into a glowing focal point.
Start by hanging a set of warm-white or orange micro string lights, roughly 100 bulbs, directly on the window frame behind your existing curtain. Layer a sheer black or cheesecloth panel over the lights so the glow diffuses rather than showing individual bulbs. This technique also makes the entire living room read as intentionally styled from the street, not just decorated indoors.
| Light Length | Window Size | Bulb Count |
| 10 feet | Small apartment window | 50 bulbs |
| 20 feet | Standard living room window | 100 bulbs |
| 33 feet | Large bay or picture window | 150 bulbs |
| Two 20-foot strands | Double or sliding doors | 200 bulbs |
7. Place Uplighting Behind Statement Halloween Pieces

A skeleton or large pumpkin display lit only from the front looks flat and two-dimensional. Front lighting eliminates the shadows that give any statement piece its dramatic silhouette. Uplighting placed directly behind the object throws a shadow onto the wall that doubles the visual impact instantly.
Start by placing a small battery or plug-in spotlight on the floor 6-8 inches behind your largest piece, angled upward toward the wall. Use a warm orange or purple gel filter over the light for a colored shadow effect rather than plain white light. This one change transforms a single skeleton or pumpkin stack into the room’s most photographed corner.
| Light Placement | Distance from Piece | Shadow Result |
| Directly behind, floor | 6-8 inches | Tall dramatic silhouette |
| Side angle, floor | 12 inches | Elongated diagonal shadow |
| Behind, elevated on stand | 18 inches | Softer, wider shadow spread |
| Two lights, both sides | 8 inches each | Symmetrical double shadow |
Style Your Mantel and Shelves for Halloween Impact
A mantel or set of open shelves gives your halloween living room a natural display structure. This section covers building vignettes that read as curated collections rather than random object placement.
8. Build a Layered Mantel Vignette with Varying Heights
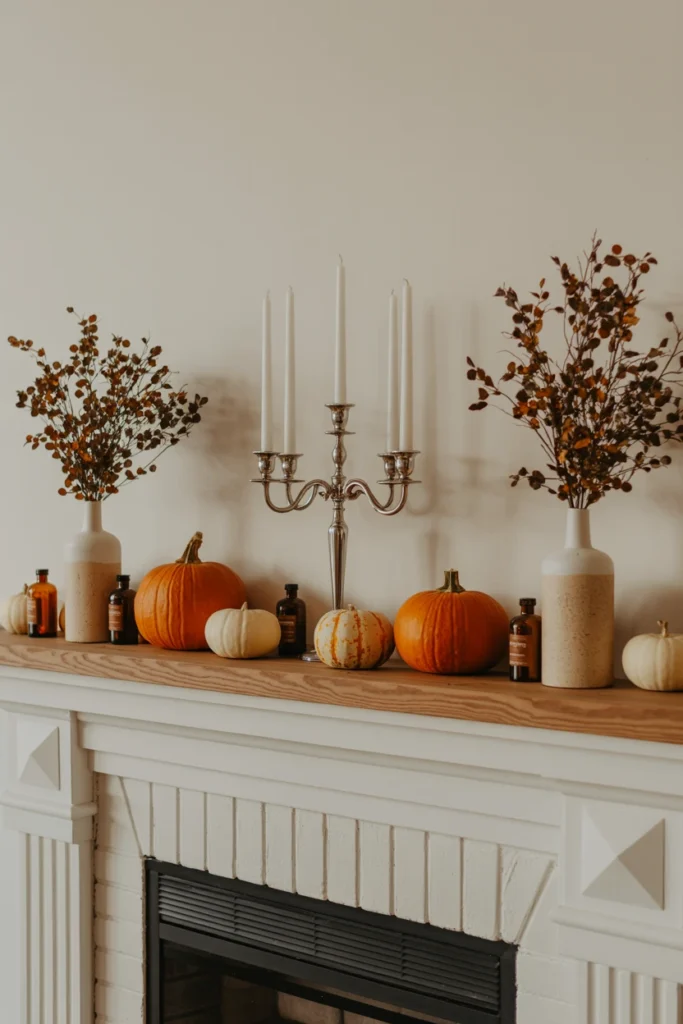
A mantel styled with objects of identical height reads as a straight line rather than a designed vignette. This flat arrangement wastes the mantel’s potential as the room’s strongest visual statement. Varying height across three tiers creates the layered look professional stylists rely on for every seasonal display.
Start by choosing one tall anchor piece at 18-24 inches, such as a candelabra or tall vase of dried branches, placed slightly off-center. Layer mid-height pieces at 8-12 inches on either side, then fill remaining gaps with short 3-5 inch objects like small pumpkins or bottles. This triangular height pattern also makes photographing the mantel significantly easier, since the composition already has built-in visual balance.
| Height Tier | Object Type | Placement |
| Tall, 18-24 in | Candelabra, dried branches | Off-center anchor |
| Mid, 8-12 in | Pumpkins, books, vases | Flanking the anchor |
| Short, 3-5 in | Small pumpkins, bottles | Filling remaining gaps |
| Flat, layered | Garland or draped fabric | Base of the mantel |
9. Group Pumpkins in Odd Numbers on the Mantel
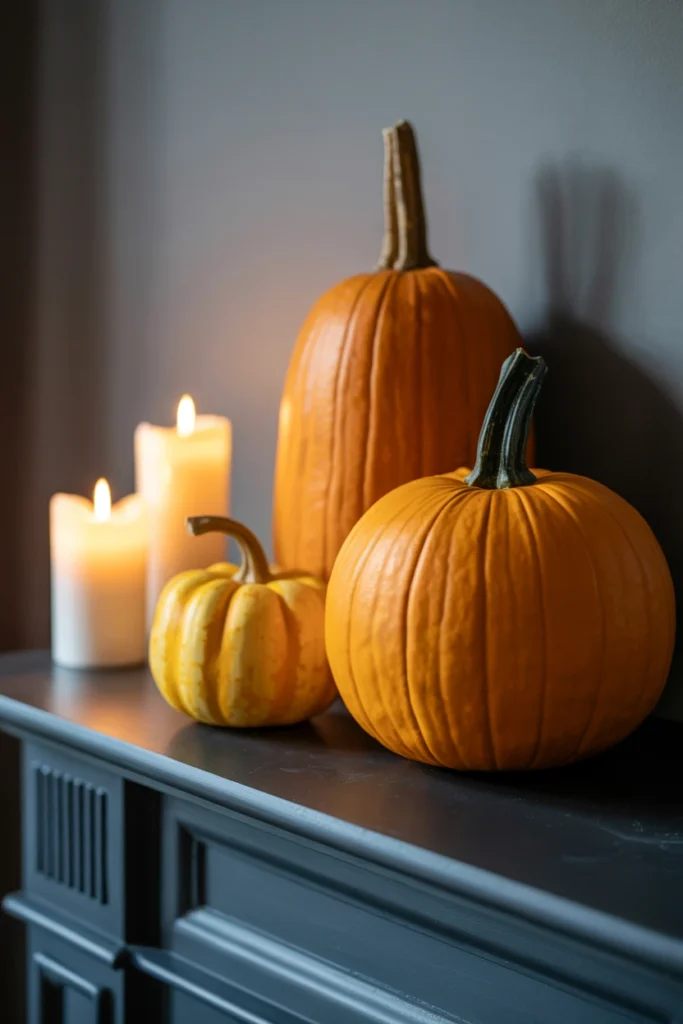
Two matching pumpkins placed side by side create visual symmetry that reads as staged rather than collected. Even-numbered groupings feel mechanical, while the human eye naturally reads odd numbers as more organic and intentional. Switching to groups of three or five pumpkins immediately upgrades the entire display’s perceived style.
Start by gathering pumpkins in three different sizes — roughly 4, 6, and 9 inches in diameter — rather than three identical ones. Cluster them tightly together with the tallest slightly behind the other two, never in a straight row. This varied-size grouping also gives you flexibility to add a fourth or fifth pumpkin later without disrupting the arrangement’s balance.
| Group Size | Pumpkin Sizes to Mix | Visual Result |
| Group of 3 | 4 in, 6 in, 9 in | Compact, balanced cluster |
| Group of 5 | 3, 4, 6, 8, 10 in | Fuller mantel-length display |
| Group of 3, mono | Same color, varied size | Cohesive, elegant statement |
| Group of 5, mixed | Varied colors and sizes | Bold, maximalist display |
10. Anchor Shelves with One Oversized Halloween Object

Open shelves filled with only small trinkets look cluttered and lack a clear starting point for the eye. Every object competing at the same small scale creates visual static across the entire shelf unit. One oversized piece per shelf gives the arrangement an immediate anchor everything else can build around.
Start by selecting one object per shelf that measures at least 12-14 inches tall, such as a large apothecary jar, a raven statue, or a stack of books topped with a pumpkin. Position this anchor at one-third of the shelf’s width, never dead center, following the classic rule of thirds. This asymmetry also leaves the remaining two-thirds of the shelf open for smaller supporting pieces without feeling crowded.
| Shelf Width | Anchor Object Height | Anchor Position |
| 24 inches | 10-12 inches | Left or right third |
| 36 inches | 12-14 inches | One-third from either end |
| 48 inches | 14-16 inches | Off-center, not middle |
| 60+ inches | 16-18 inches, or two anchors | Two-thirds split |
11. Mix Natural and Faux Textures on Open Shelves
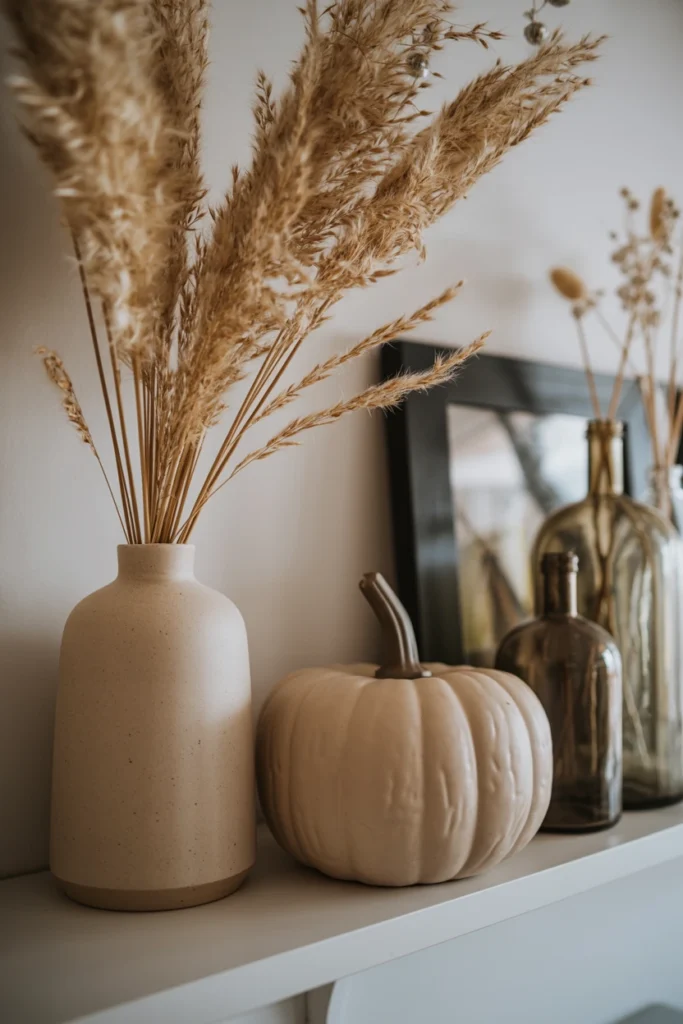
Shelves styled with only faux plastic decor read as cheap regardless of how much money was spent. A single material type across an entire shelf eliminates the textural contrast that makes vignettes feel expensive. Combining natural elements like dried florals with faux pieces creates the layered richness high-end displays always include.
Start by adding one natural element per shelf — dried pampas grass, preserved eucalyptus, or real mini pumpkins — alongside your existing faux decor. Position the natural piece in a ceramic or glass vessel rather than plastic, since the vessel material matters as much as the plant itself. This mix also extends your decor’s usable life, since dried natural elements last through the full season without wilting.
| Texture Pair | Natural Element | Faux Element |
| Rustic | Dried wheat, pampas grass | Ceramic pumpkin |
| Gothic | Preserved black roses | Resin skull or raven |
| Apothecary | Real dried herbs, bottles | Faux candle, glass jars |
| Woodland | Real branches, pinecones | Faux mushroom, owl figure |
Add Halloween Textiles and Soft Accents to the Living Room
Textiles change the entire feel of a halloween living room without requiring any structural decorating. This section covers pillows, throws, and window treatments that layer texture into the space.
12. Layer Black Velvet Throw Pillows on the Sofa
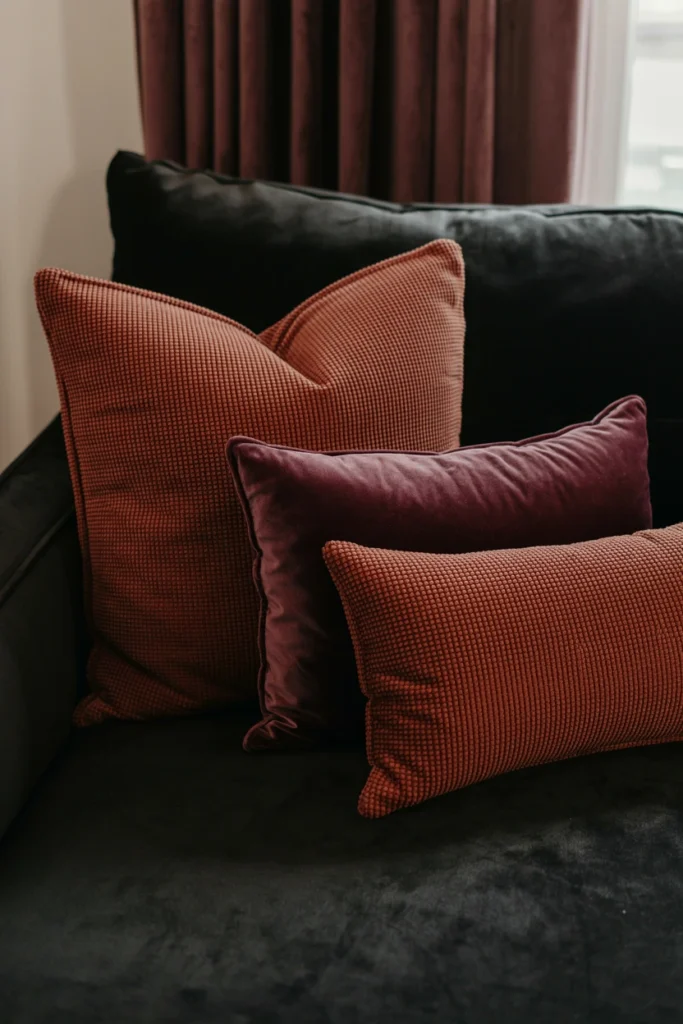
A sofa left in its everyday pillow set breaks the halloween styling the moment guests sit down. Seating is the largest surface area in most living rooms, and skipping it wastes significant visual real estate. Swapping in velvet pillows instantly extends the halloween palette across the room’s biggest surface.
Start by replacing two to three existing pillows with 18-20 inch velvet covers in black, deep plum, or burnt orange. Mix at least one textured pillow, such as a fringe-trimmed or tufted style, alongside the solid velvet pieces. This textile swap also softens any harsh overhead lighting still in use, since velvet absorbs light rather than reflecting it.
| Pillow Size | Fabric | Color Suggestion |
| 18×18 inch | Velvet | Black or deep plum |
| 20×20 inch | Velvet | Burnt orange |
| 12×20 lumbar | Textured weave | Charcoal or rust |
| 16×16 inch | Fringe-trimmed | Antique gold |
13. Drape a Textured Throw Blanket Across the Armchair
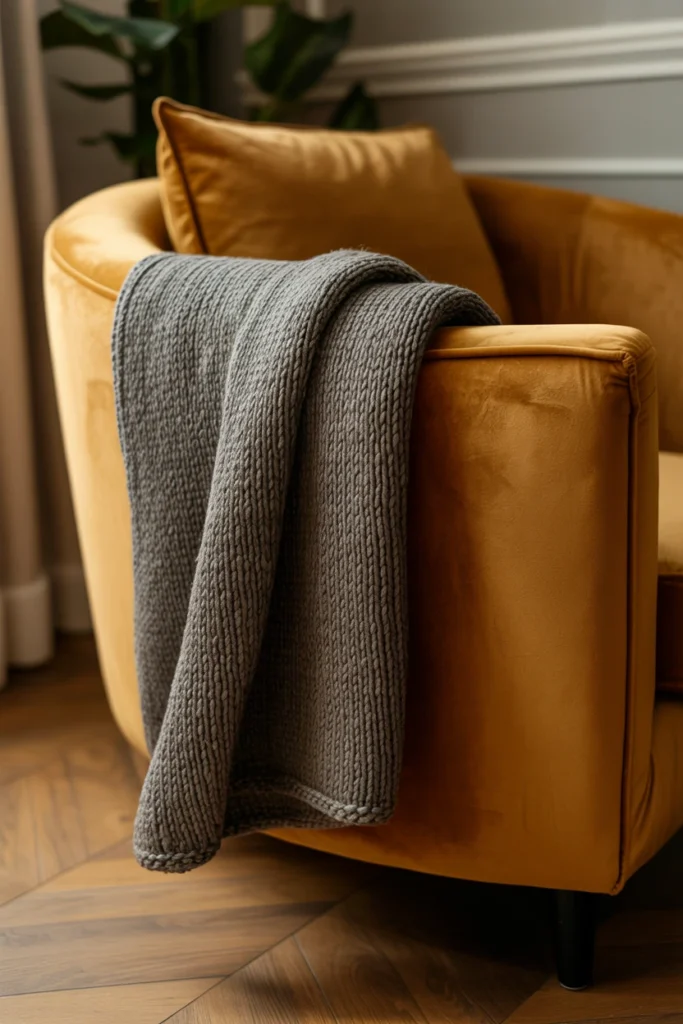
A halloween living room without a draped throw skips one of the easiest texture wins in the entire room. Bare furniture arms and backs read as unfinished once every other surface has been styled. A single throw draped correctly adds instant coziness and visual interest for minimal cost.
Start by choosing a chunky knit or faux-fur throw in a solid color that contrasts your armchair’s existing upholstery. Drape it diagonally across one arm rather than folding it flat, letting roughly one-third hang down. This asymmetrical drape also photographs significantly better than a folded throw, since the fabric creates natural movement and shadow.
| Throw Style | Best Chair Type | Drape Method |
| Chunky knit | Solid-color armchair | Diagonal, one-third hanging |
| Faux fur | Leather or velvet chair | Draped over the back |
| Woven cotton | Patterned upholstery | Folded lengthwise on arm |
| Sherpa-lined | Wood or rattan chair | Draped across the seat |
14. Switch Your Area Rug for a Deep Jewel-Tone Option
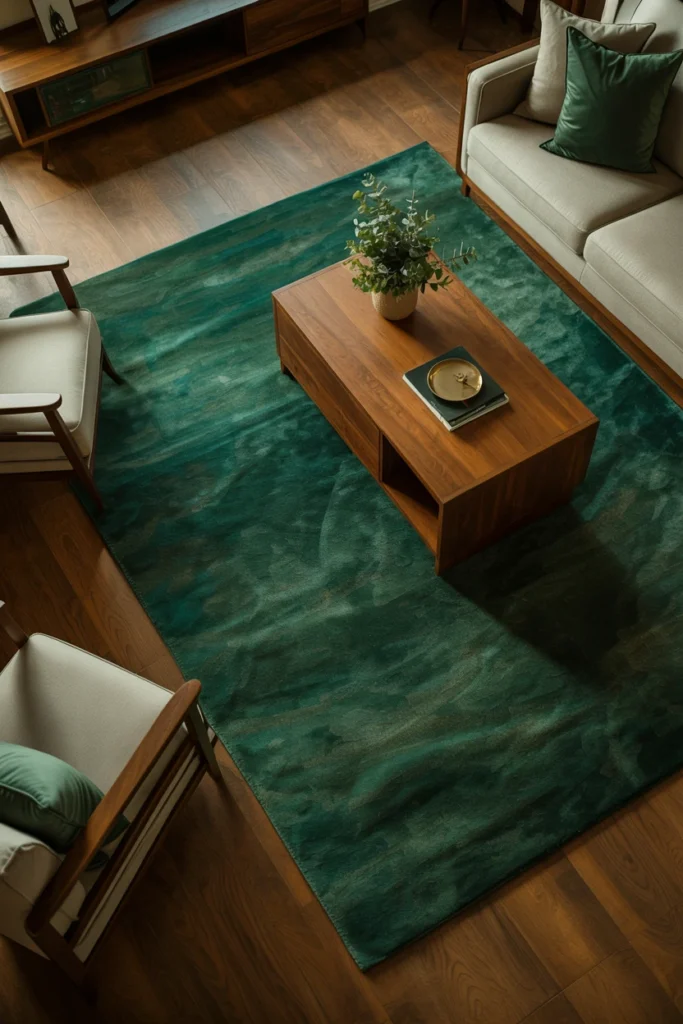
A pastel or light-colored rug undercuts every dark halloween accent placed above it. The rug covers the room’s largest single surface, so its tone sets the baseline for the entire palette. Switching to a deep jewel-tone rug grounds the whole room and makes lighter accents pop by contrast.
Start by measuring your current rug and choosing a replacement in deep emerald, burgundy, or eggplant at the same dimensions to fit your existing furniture layout. Layer the new rug under your coffee table with all four legs on the rug, following the standard sizing rule. This single swap also makes your existing neutral furniture look intentionally paired with the season rather than untouched.
| Room Size | Recommended Rug Size | Jewel Tone Option |
| Small apartment | 5×8 feet | Deep emerald |
| Standard living room | 8×10 feet | Burgundy |
| Large living room | 9×12 feet | Eggplant purple |
| Layered look | 6×9 over existing neutral | Charcoal with rust pattern |
15. Hang Cobweb Sheers Over Existing Window Panels
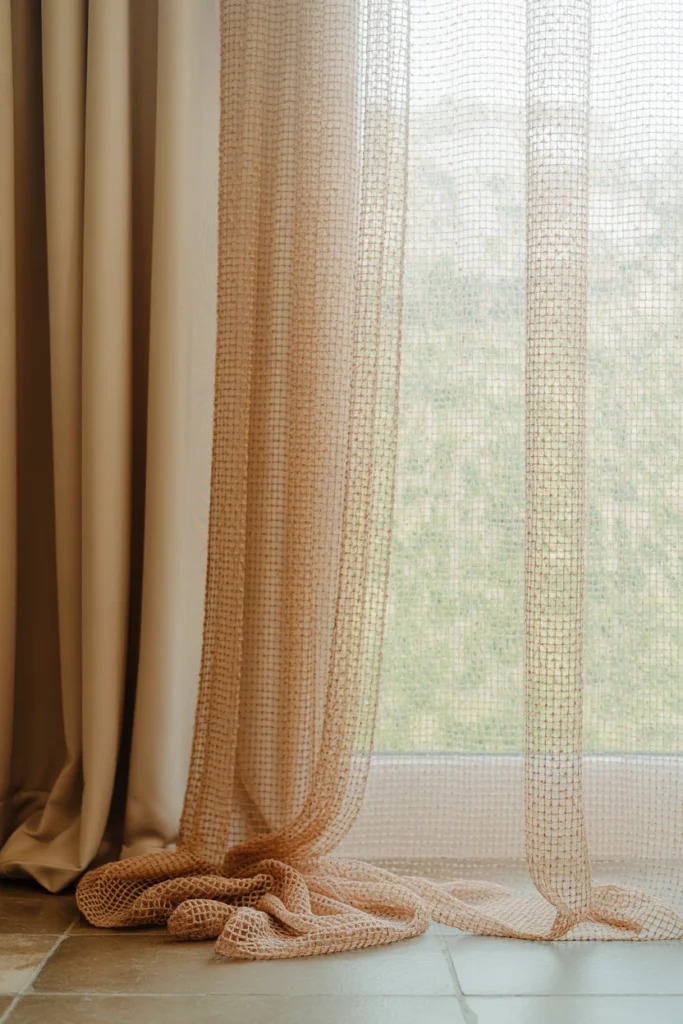
Standard window panels left unchanged skip an entire wall’s worth of halloween atmosphere. Windows catch afternoon and evening light differently than any other surface, making them uniquely suited to seasonal texture. Layering a cobweb-textured sheer over your existing panels adds atmosphere without removing your everyday curtains.
Start by hanging a lightweight cheesecloth or cobweb-mesh sheer panel on a second rod in front of your existing curtains, using the same width as your window. Let the sheer hang slightly longer than the panel behind it, pooling 1-2 inches on the floor for a distressed look. This layered approach also means you can remove the sheer in five minutes come November without touching your everyday window treatment.
| Sheer Type | Window Width | Hang Length |
| Cheesecloth | Standard 36-48 in | Floor length, slight pool |
| Cobweb mesh | Wide 60+ in | Floor length, straight |
| Distressed lace | Narrow 24-30 in | Sill length |
| Black tulle layer | Any width | Floor length, sheer double |
Choose Statement Pieces That Define Your Halloween Living Room
Statement pieces carry the visual weight of a halloween living room. This section covers the large-scale objects that define the room’s overall style and give it a memorable identity.
16. Place a Life-Size Skeleton as a Seated Accent

A skeleton propped stiffly against a wall reads as a prop rather than a design element. This static positioning wastes the piece’s potential to feel like an intentional, almost furniture-like addition to the room. Seating the skeleton naturally in a chair or on the floor integrates it into the room’s actual layout.
Start by placing a 5-6 foot posable skeleton seated in an accent chair or on the floor beside the sofa, with legs crossed or one arm resting on the armrest. Dress the skeleton in a simple black robe or drape a throw blanket over its lap to soften the look. This seated positioning also makes the skeleton read as a design object year-round, since many buyers keep it out through Thanksgiving.
| Skeleton Size | Placement | Styling Detail |
| 3-4 feet | Side table or shelf | Small robe, holding a book |
| 5 feet | Accent chair, seated | Legs crossed, arm on rest |
| 6 feet | Floor, leaning on sofa | Draped throw over lap |
| 6+ feet | Corner, standing anchor | Top hat or period costume |
17. Style a Vintage Apothecary Bottle Display

A random collection of colored bottles without grouping logic looks like clutter rather than a curated display. Bottles of mismatched heights placed in a straight line create the same flat-line problem as an unstyled mantel. Grouping apothecary bottles by height and color creates an instantly recognizable gothic-vintage vignette.
Start by collecting 6-8 glass bottles in amber, green, and cobalt at varying heights between 4 and 14 inches, available at most craft or thrift stores. Add handwritten or printed apothecary-style labels reading words like “elixir” or “potion” to each bottle for authenticity. This detail-level styling also works as a genuine conversation piece, since guests frequently pick up and read each label individually.
| Bottle Color | Suggested Height | Label Theme |
| Amber | 8-10 inches | “Tonic,” “Elixir” |
| Cobalt blue | 10-14 inches | “Poison,” “Potion” |
| Green | 4-6 inches | “Serum,” “Extract” |
| Clear with liquid | 6-8 inches | “Antidote,” “Brew” |
18. Mount a Gothic-Style Mirror Above the Console
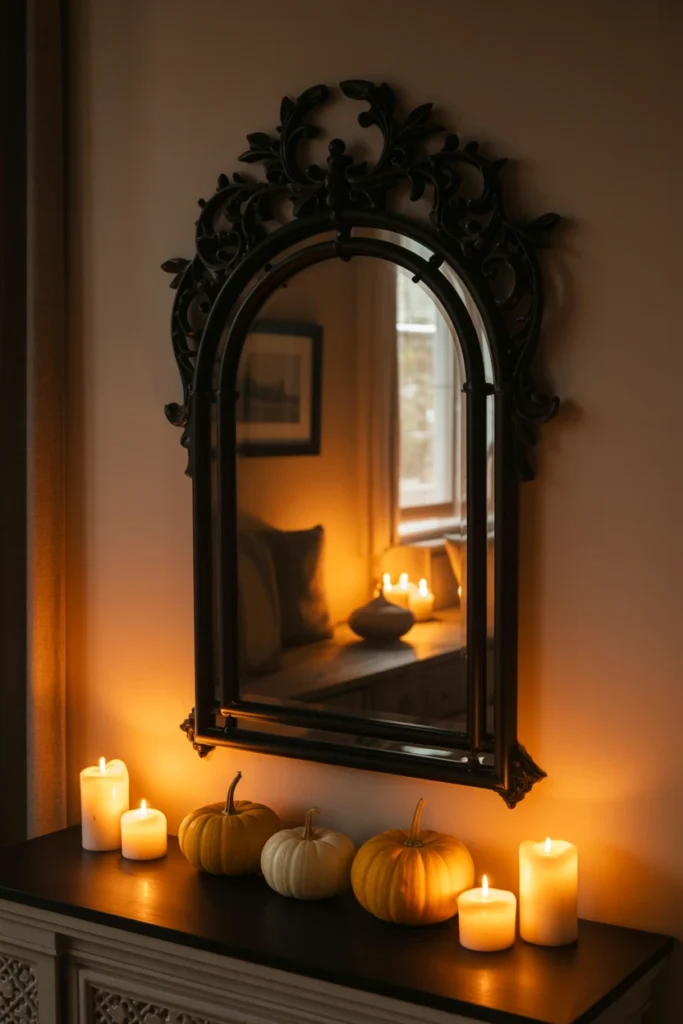
A plain, everyday mirror left in place during October wastes a prime opportunity for a dramatic focal point above eye level. Wall space above a console or sofa often sits empty of seasonal styling entirely. A gothic-framed mirror instantly adds height and drama without requiring any floor space.
Start by choosing a mirror with an ornate black or aged-brass frame, sized to roughly two-thirds the width of the console beneath it. Hang the mirror so its center sits at eye level, typically 60-65 inches from the floor. This placement also reflects your layered candlelight from earlier in the room, doubling the perceived glow without adding a single extra light source.
| Mirror Frame | Console Width | Mirror Width |
| Ornate black | 36 inches | 24 inches |
| Aged brass | 48 inches | 30-32 inches |
| Arched gothic | 60 inches | 36-40 inches |
| Round vintage | Any width | 24-28 inches |
19. Arrange a Cluster of Carved Pumpkins by the Hearth

An empty hearth or fireplace floor during October skips one of the room’s most natural display zones. This lower-level space is frequently left bare because it sits below typical eye-line styling. Filling it with a cluster of carved and natural pumpkins grounds the entire mantel display above it.
Start by arranging five to seven pumpkins of varying sizes, from 6 to 16 inches, directly on the hearth floor or just in front of it. Carve only the largest one or two pumpkins with simple geometric or silhouette designs, leaving smaller ones uncarved to extend their lifespan. This floor-level cluster also visually balances the mantel display above, giving the whole fireplace wall a complete top-to-bottom composition.
| Pumpkin Count | Size Range | Carving Approach |
| 3 pumpkins | 8-14 inches | Carve the largest only |
| 5 pumpkins | 6-16 inches | Carve two, leave three plain |
| 7 pumpkins | 6-18 inches | Carve three, mix real/faux |
| No fireplace | Use a tray, same count | Same carving ratio applies |
Finish Your Halloween Living Room with Styling Details
Small finishing details separate an average halloween living room from a genuinely polished one. This section covers the last-pass touches that pull every earlier element together.
20. Layer Spider Accents Along the Bookshelf Edge
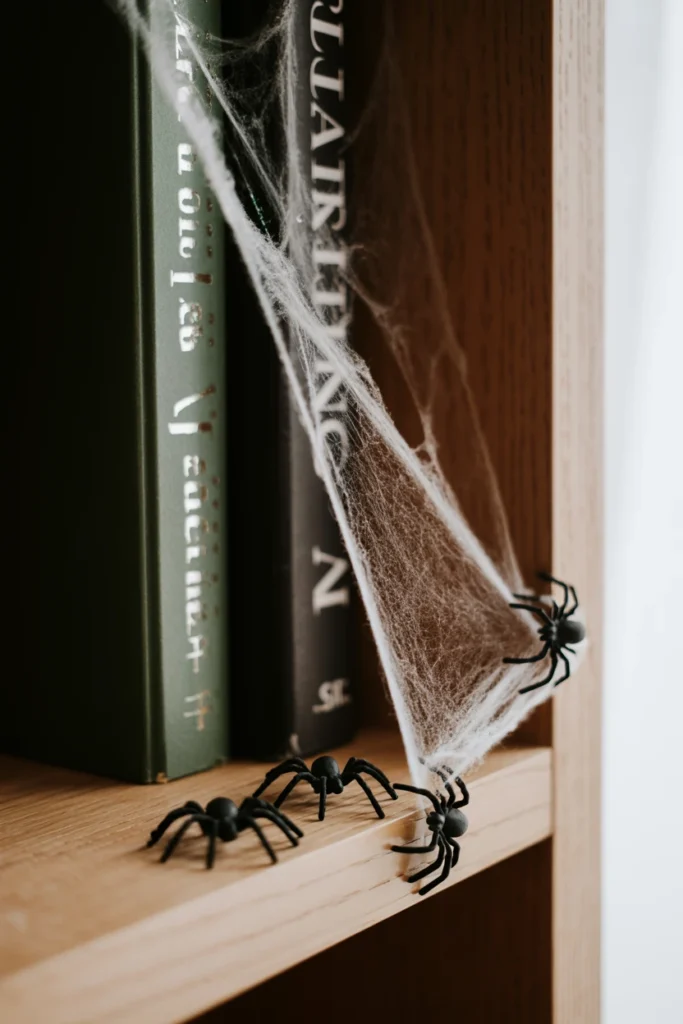
Halloween decor that stays confined to the mantel and coffee table leaves the rest of the room feeling untouched. A bookshelf running the full height of a wall is frequently skipped entirely during seasonal styling. Adding small spider accents along its edges extends the theme without requiring any new furniture pieces.
Start by placing three to five small faux spiders, roughly 2-3 inches wide, along the edges of two or three shelves, never every shelf. Combine the spiders with a thin trail of stretched cobweb fabric draped between two adjacent books. This restrained placement also prevents the bookshelf from tipping into costume-shop territory, since fewer, well-placed spiders read as more sophisticated than dozens scattered everywhere.
| Spider Placement | Quantity | Shelf Selection |
| Shelf edge, hanging | 3-5 spiders | Every other shelf |
| Cobweb corner | 1 web per corner | Top and bottom shelf only |
| Between books | 2-3 spiders | Middle shelf |
| Full shelf theme | 5-7 spiders | One dedicated “spooky” shelf |
21. Style the Coffee Table with a Themed Tray Vignette
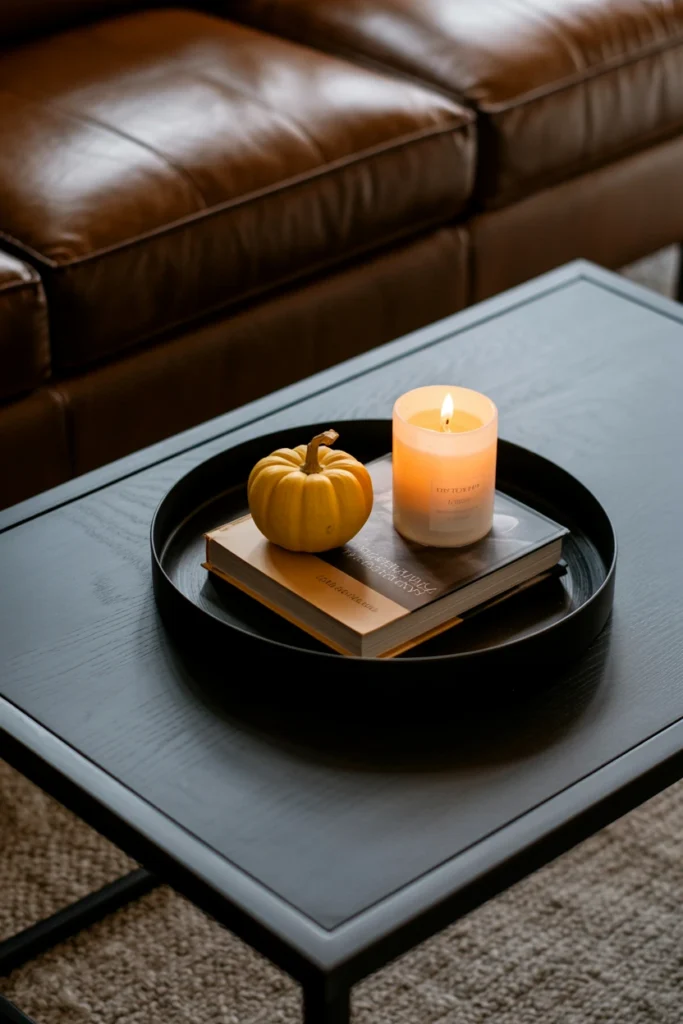
Items scattered loosely across a coffee table without a tray look disorganized regardless of how nice each individual piece is. A coffee table sits at the room’s visual center, making an unstyled surface especially noticeable. Containing your display within a single tray instantly organizes the vignette and makes it feel curated.
Start by choosing a black or aged-metal tray roughly 16-20 inches wide as your base, then build a three-piece vignette on top: one candle, one small pumpkin, and one stack of books or a small object. Keep every item within the tray’s boundary, never letting pieces spill onto the bare table surface. This contained approach also makes the entire vignette easy to move in five seconds when guests need table space for drinks or food.
| Tray Size | Vignette Items | Placement |
| 12×16 inch | Candle, small pumpkin | Coffee table end |
| 16×20 inch | Candle, pumpkin, books | Coffee table center |
| Round, 14 inch | Candle, single object | Side table |
| 20×24 inch | Candle, pumpkin, vase, books | Ottoman or large table |
22. Limit Your Halloween Decor to Three Signature Colors
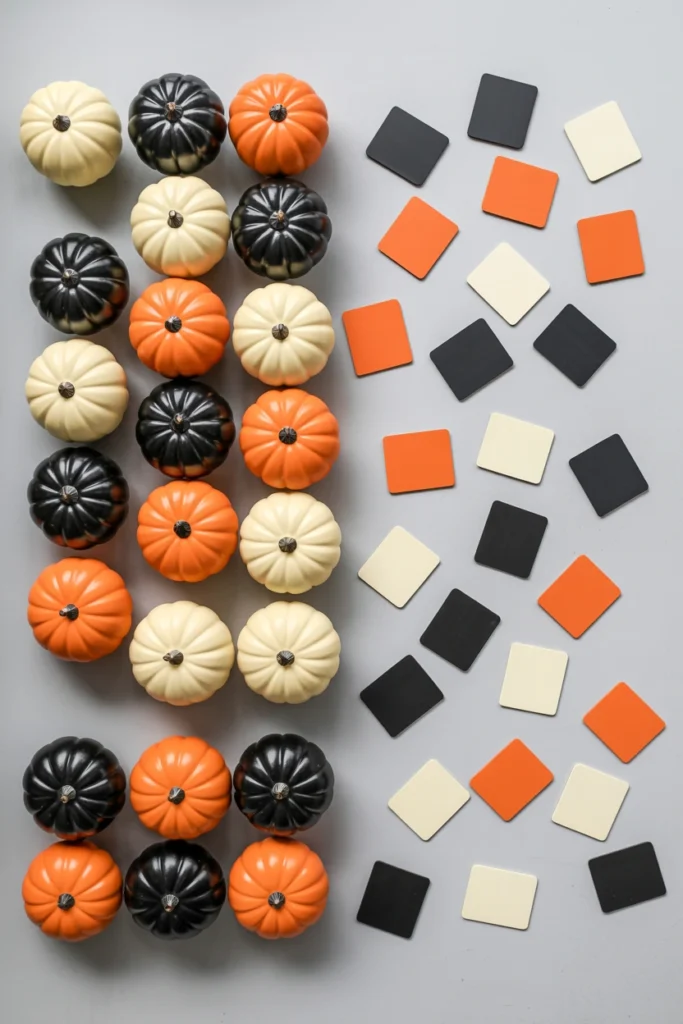
Halloween decor pulled from multiple past seasons frequently drifts toward five or six competing colors without anyone noticing gradually. Each additional color beyond three actively works against the cohesive look built throughout the rest of the room. Auditing and removing off-palette pieces is the single fastest way to make an existing collection look newly curated.
Start by laying out every halloween item you own on the floor and sorting each piece into your locked three-color palette or a “does not match” pile. Store the non-matching pieces for next year or donate them, keeping only what supports your current palette. This audit also reveals gaps in your collection, showing you exactly which one or two new pieces would complete the room rather than guessing at random purchases.
| Item Count Owned | Recommended Keep Ratio | Action for Excess |
| Under 10 items | Keep 80% | Store or donate mismatches |
| 10-20 items | Keep 60-70% | Sort into labeled bins |
| 20-30 items | Keep 50% | Rotate half each year |
| 30+ items | Keep top-tier only | Sell or donate the rest |
Maintain Your Halloween Living Room Decor All Season
A halloween living room needs upkeep to look fresh through the entire month of October. This section covers the habits that keep your display looking intentional from the first day through Halloween night.
23. Replace Real Pumpkins Before They Soften

A softening or collapsing pumpkin left on display undermines the polish of every other element in the room. Real pumpkins begin to soften within 7-10 days of carving, especially near warm indoor lighting. Replacing them proactively keeps the entire vignette looking fresh rather than visibly decaying.
Start by checking every real pumpkin twice weekly for soft spots, mold at the stem, or a sunken carved face. Replace carved pumpkins every 7-10 days and uncarved ones every 3-4 weeks, keeping a backup pumpkin or two on hand. This rotation habit also means your display never has an obvious weak point on the one night guests actually see it, Halloween itself.
| Pumpkin State | Replace By | Warning Sign |
| Carved, indoors | Day 7-10 | Sunken face, mold at cuts |
| Uncarved, indoors | Week 3-4 | Soft spots, wrinkled skin |
| Near heat/lighting | Day 5-7 | Faster softening near warmth |
| Faux pumpkin | No replacement needed | N/A |
24. Establish a Weekly Reset Routine for Displaced Decor

Halloween decor shifts out of place constantly once guests, kids, or pets move through a lived-in living room. A single displaced pillow or tilted pumpkin gradually pulls the whole room away from its original styled state. A five-minute weekly reset prevents this slow drift and keeps the room photograph-ready throughout October.
Start by picking one consistent day each week — Sunday evening works well — to walk through the room and reset pillows, straighten pumpkin clusters, and check that candles still have working batteries. Take a phone photo of your finished vignettes on day one so you have a reference to reset against each week. This simple habit also catches burnt-out LED candles or fallen spider webs before guests notice them at a party.
| Reset Task | Frequency | Time Needed |
| Pillow and throw fluff | Weekly | 2 minutes |
| Pumpkin cluster check | Weekly | 2 minutes |
| Battery/light check | Weekly | 1 minute |
| Full room photo compare | Every 2 weeks | 3 minutes |
Common Halloween Living Room Mistakes That Ruin the Effect
These eight mistakes appear most frequently in halloween living rooms and actively work against a polished result. Correcting each one costs little to nothing beyond a change in approach.
| Mistake | Why It Hurts the Space | Better Alternative |
| Using more than four colors | Creates visual noise, looks thrown together | Lock a three-color palette |
| Leaving overhead lights on | Flattens shadow, kills atmosphere | Switch to warm layered lamps |
| Even-numbered pumpkin groups | Reads as staged, mechanical | Group in odd numbers, varied sizes |
| Skipping the coffee table | Center of room looks unfinished | Add a contained tray vignette |
| Real candles near throws | Genuine fire hazard | Use LED flicker candles |
| Identical-height mantel objects | Reads flat, lacks depth | Layer three height tiers |
| Overcrowding every shelf | Looks cluttered, not curated | Anchor with one oversized piece |
| Ignoring window treatments | Wastes largest wall surface | Layer sheers with string lights |
Halloween Living Room Decor by Space and Style
Small apartment living room
A small apartment living room has limited floor space and often shared walls, making noise and bulk key constraints. Every piece needs to earn its place since there is no room for excess decor.
Key strategies for small apartment living rooms:
- Choose one statement piece instead of three smaller ones to avoid visual crowding
- Use vertical shelving to display decor above furniture rather than on the floor
- Select battery-operated lighting since outlet access is often limited
- Fold and store a second rug rather than layering two in a small footprint
- Prioritize the window and mantel over floor-based displays to save square footage
- Keep the color palette to two tones instead of three for a calmer small space
Open-concept living room
An open-concept living room flows directly into the kitchen or dining area, meaning halloween styling needs to read cohesively from multiple angles. Decor visible from three sides requires a different approach than a single-wall display.
Key strategies for open-concept living rooms:
- Style the back of shelving units and console tables, since they are visible from the kitchen
- Use a taller anchor piece so it reads clearly across a longer sightline
- Repeat one signature color across the living and adjacent dining zone for flow
- Avoid decor with a single “front” side, choosing pieces styled to look finished from all angles
- Place lighting to bridge the two zones rather than isolating it in one corner
- Keep floor-level decor minimal to preserve open walking paths between zones
Rental living room
A rental living room restricts wall-mounted decor and paint changes, limiting how permanent any styling can be. Every choice needs to be removable without damage or deposit risk.
Key strategies for rental living rooms:
- Use removable adhesive hooks rated for at least 5 pounds for any hanging decor
- Choose freestanding mirrors and shelving instead of wall-mounted options
- Rely on rugs, throws, and pillows for palette changes instead of paint
- Use command strips rather than nails for any lightweight wall accents
- Select battery string lights instead of hardwired fixtures for window treatments
- Photograph the room’s original state before decorating to ensure an easy reset
Family living room with kids
A family living room with kids needs decor that survives daily foot traffic, sticky hands, and curious pets. Fragile or low-hanging pieces face a much higher risk of damage in this setting.
Key strategies for family living rooms with kids:
- Place breakable items like glass bottles on higher shelves out of reach
- Choose flame-free LED candles exclusively when kids are regularly in the room
- Select a skeleton or statement piece with a stable, weighted base to prevent tipping
- Avoid small choking-hazard decor like tiny spiders on low tables
- Use washable slipcovers or throws in case of spills near new textiles
- Keep floor-level pumpkin displays pushed against walls rather than in walkways
Frequently Asked Questions
How do you decorate a living room for Halloween?
Start by locking a three-color palette and one clear focal point before buying any decor. Layer warm lighting, textiles, and one statement piece like a skeleton or styled mantel around that focal point. Building outward from a single anchor keeps the halloween living room cohesive instead of cluttered.
What Halloween decorations should you avoid in a living room?
Avoid real open-flame candles near throws, pillows, or paper decor due to genuine fire risk. Skip more than four colors in one room, since it creates visual clutter rather than a styled look. Cheap plastic decor without any natural texture mixed in also tends to look less polished.
How do you decorate a living room for Halloween on a budget?
Focus your budget on one statement piece and lighting, since these two elements carry the most visual weight. Use items already in your home, like books, vases, and dried branches, styled with a new color lens. A locked three-color palette also prevents overspending on decor that ends up mismatched.
How do you decorate a small living room for Halloween?
Choose one statement piece instead of several smaller ones to avoid crowding a limited floor plan. Use vertical shelving and window treatments to add halloween styling without consuming floor space. A two-color palette works especially well in a small halloween living room, keeping the look calm rather than chaotic.
Should you do black and orange or a different color scheme?
Black and orange remains the most traditional halloween living room palette and works well with most furniture styles. Deep purple, charcoal, and jewel tones create a more elegant, gothic-leaning alternative for formal spaces. The right choice depends on matching your existing furniture material and your home’s overall style.
How often should you refresh Halloween living room decor?
Perform a full styling reset weekly to catch displaced pillows, tilted pumpkins, and dead batteries. Replace real carved pumpkins every 7-10 days and uncarved ones every three to four weeks. This maintenance schedule keeps a halloween living room looking intentional through the entire month of October.
Does elegant Halloween decor work for family living rooms?
Elegant halloween decor works in family living rooms when fragile or hazardous pieces are placed out of reach. Choose flame-free candles, weighted statement pieces, and washable textiles to balance style with daily durability. A three-color palette and one strong focal point still apply regardless of household activity level.
How much does it cost to decorate a living room for Halloween?
A basic halloween living room refresh using existing furniture and a few new accents typically costs $75-150. A fuller room with a statement skeleton, new pillows, and layered lighting runs $200-400 depending on piece quality. Costs drop significantly each following year, since most pieces reuse across multiple seasons.
How do you keep Halloween decorations looking fresh all month?
Rotate real pumpkins on a set schedule and replace dead LED candle batteries as soon as they’re noticed. Perform a five-minute weekly reset to straighten pillows, pumpkin clusters, and any shifted decor. This consistent, low-effort routine prevents the slow visual decline most halloween living rooms experience by late October.
Conclusion
A halloween living room built on a locked color palette and one strong focal point outperforms a room filled with random seasonal purchases. Start with your lighting first, since it transforms every other piece in the room after dark. Choose one statement item this week, whether a skeleton, mantel vignette, or styled console, and build outward from there.
Consistent small maintenance, not one large decorating effort, keeps a halloween living room looking sharp through the entire season. A well-planned halloween living room reads as effortless precisely because every piece was chosen with intention.