
A vintage glamour bedroom transforms an ordinary room into a space that feels curated, opulent, and unmistakably intentional. This look combines tufted velvet, brass and mirrored surfaces, and jewel-tone color into a bedroom that photographs like a 1930s film set and functions like a modern retreat. This guide delivers 22 specific, actionable steps for building that room from the foundation up. Start with the color story and the furniture anchor before adding a single accessory.
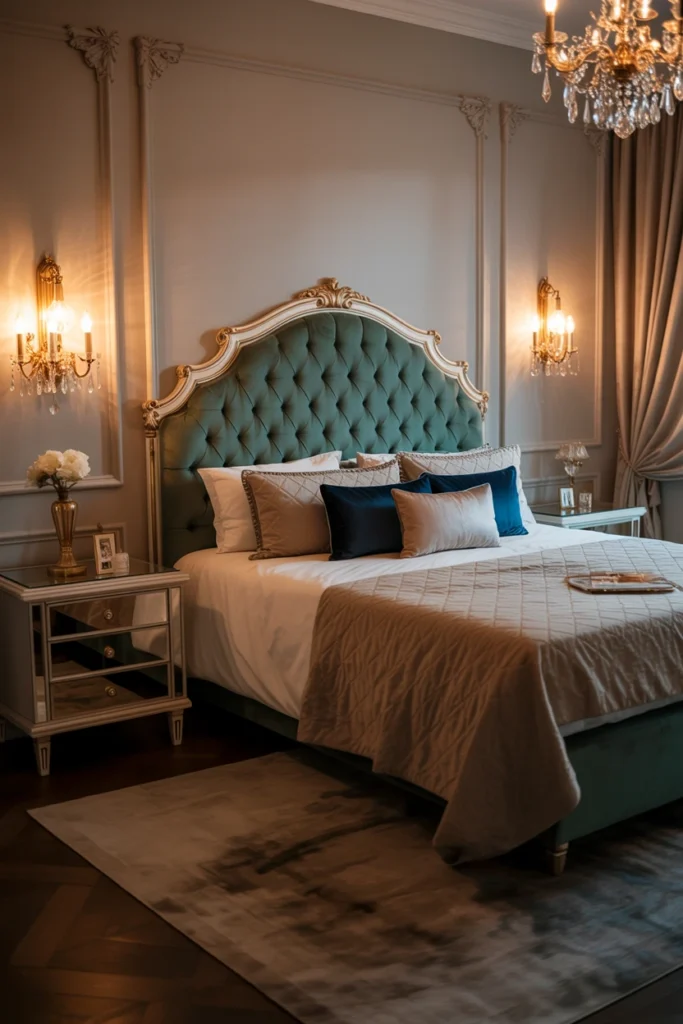
Before You Begin: 3 Foundation Steps for Vintage Glamour
These three steps determine whether every later purchase works together or fights for attention. Skip them and the room ends up as a collection of glam pieces rather than a cohesive vintage glamour bedroom. Each step takes under an hour but saves significant money on returns and mismatched pieces.
1. Establish a Jewel-Tone and Metallic Color Story
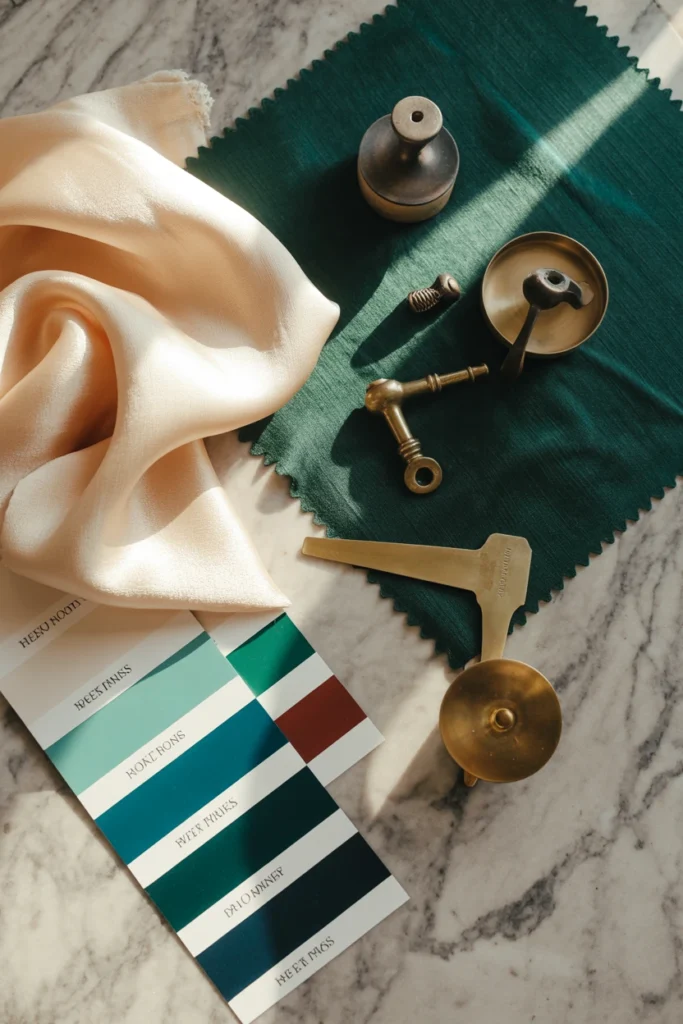
Most vintage glamour bedrooms fail before the first piece of furniture arrives. The room ends up with mismatched metals and clashing jewel tones that read as cluttered instead of curated, wasting the entire budget on pieces that fight each other. A locked color story prevents every future purchase from being a gamble.
Start by choosing exactly one dominant jewel tone — emerald, sapphire, or deep plum — and one metal finish, brass or chrome, never both. Limit the palette to that jewel tone, one neutral (cream or blush), and the single metal across 90% of visible surfaces. Locking this ratio early means every lamp, frame, and hardware piece purchased later matches automatically instead of requiring a return.
| Jewel Tone | Best Paired Metal |
| Emerald green | Brass or antique gold |
| Sapphire blue | Chrome or polished nickel |
| Deep plum | Brass or rose gold |
| Charcoal black | Chrome or gunmetal |
2. Choose One Statement Furniture Anchor First
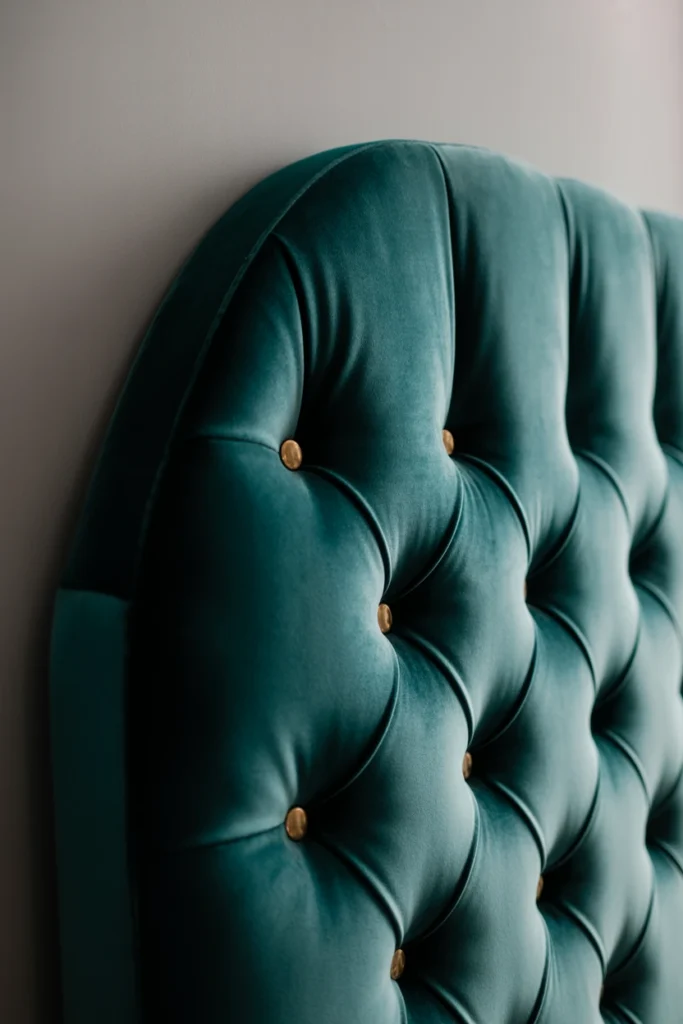
A vintage glamour bedroom needs a single visual anchor before anything else. Buying textiles and lighting first, then shopping for the anchor piece last, forces every existing item to compromise around whatever furniture eventually fits. The anchor piece must be selected and purchased before any accessory shopping begins.
Start by selecting either the bed frame or the dresser as the room’s anchor — never both at once. Choose a piece with at least one glamour signature: tufted velvet upholstery, a curved silhouette, or a mirrored front, sized to occupy roughly 40% of the wall it sits against. Building outward from one confirmed anchor keeps every later decision faster and cheaper.
| Anchor Choice | Why It Works |
| Tufted velvet headboard | Softens the room, adds texture instantly |
| Mirrored dresser | Reflects light, doubles perceived space |
| Curved Art Deco vanity | Creates a secondary focal point |
| Channel-tufted bench | Works in smaller rooms as the anchor |
3. Set a Realistic Budget Split Across Furniture and Textiles
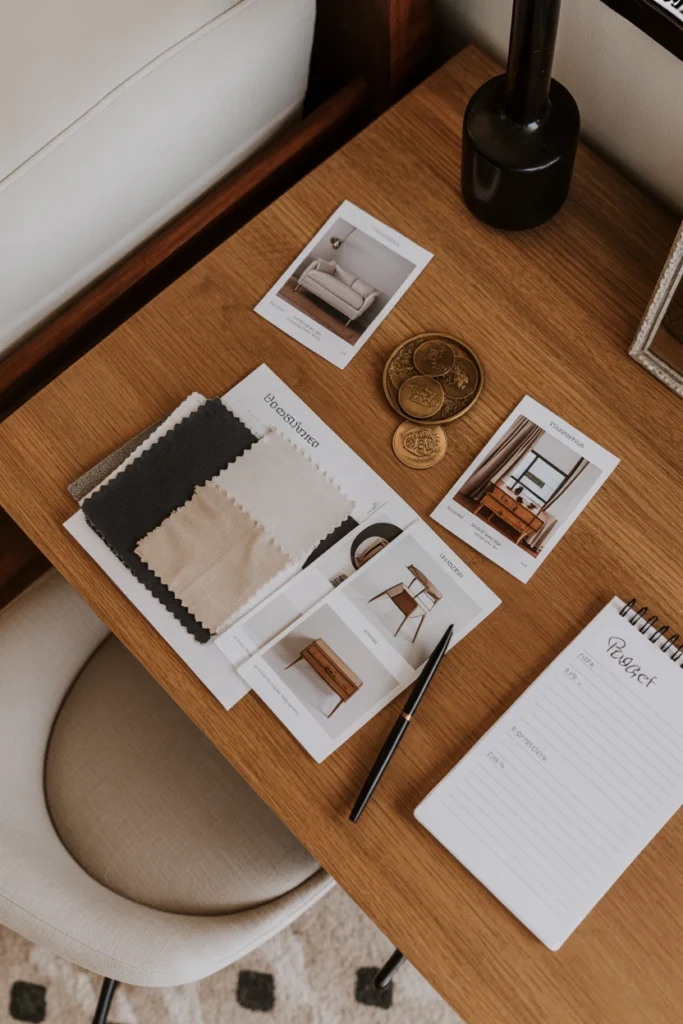
Vintage glamour bedrooms get expensive fast when every dollar goes toward furniture and nothing remains for textiles. A room with a $3,000 bed and a $20 throw pillow reads as unfinished, because texture and lighting carry as much visual weight as the furniture itself. An unbalanced budget produces a room that looks half-decorated regardless of how much was spent.
Start by splitting the total budget into three brackets: 50% furniture, 30% textiles and lighting, 20% accessories and hardware. Reserve at minimum 150–300 of that textile bracket specifically for velvet pillows, a duvet, and drapery fabric. This split prevents the common mistake of an expensive bed frame sitting on bare, budget bedding.
| Budget Bracket | Percentage | Example ($2,000 Total) |
| Furniture | 50% | $1,000 |
| Textiles & lighting | 30% | $600 |
| Accessories & hardware | 20% | $400 |
| Contingency (recommended) | Add 10% | $200 |
Statement Furniture and Mirrored Pieces
Furniture carries the vintage glamour bedroom’s silhouette, and mirrored or lacquered finishes do the work of amplifying light and depth. This section covers the four furniture pieces that define the look beyond the anchor piece selected earlier.
4. Anchor the Room With a Tufted Velvet Headboard
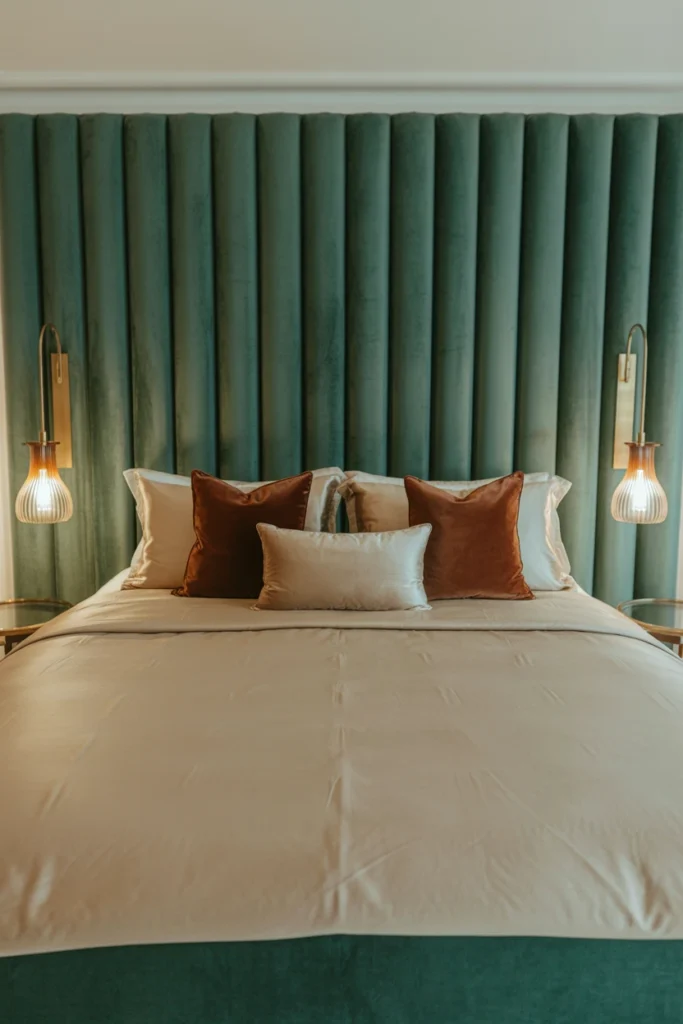
A plain platform bed frame reads as generic no matter how much glamour surrounds it. The headboard sits directly at eye level from the doorway, making it the single most visible surface in the entire room. A weak headboard undermines every other glamour element placed around it.
Start by measuring the bed frame width and ordering a headboard 4–6 inches wider on each side for a substantial silhouette. Choose deep channel-tufting or diamond tufting in velvet, not linen, since velvet holds the light-catching sheen this style depends on. A wider headboard also creates negative space above the bed for layered wall decor later.
| Bed Size | Recommended Headboard Width |
| Twin (39 in) | 47–51 inches |
| Queen (60 in) | 68–72 inches |
| King (76 in) | 84–88 inches |
| California King (72 in) | 80–84 inches |
5. Install a Mirrored or Lacquered Nightstand Pair
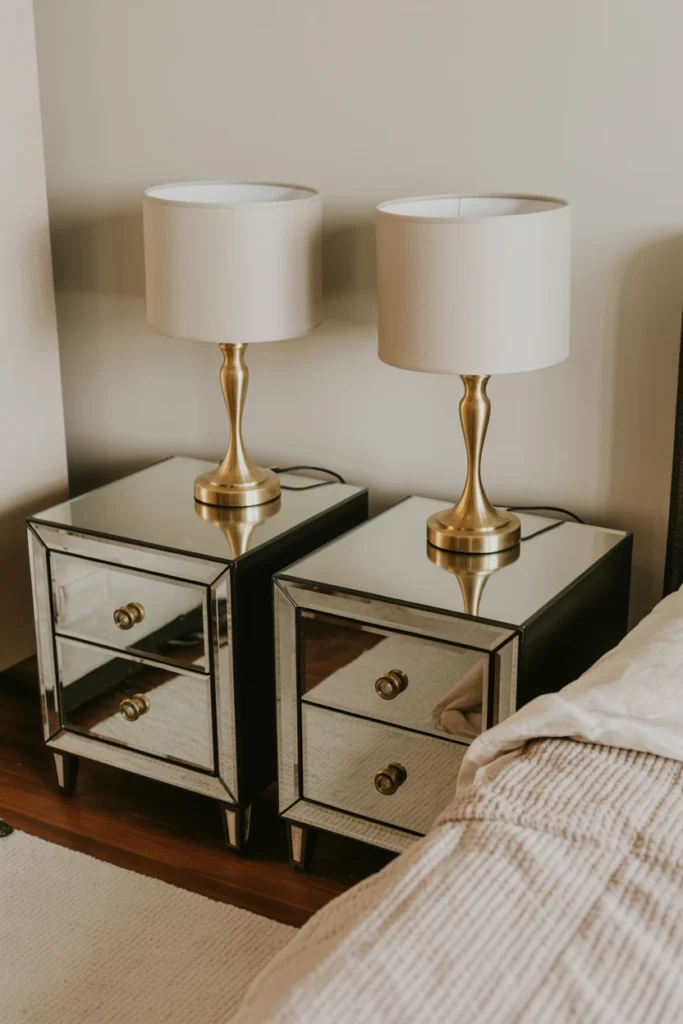
Mismatched or bulky wood nightstands break the light-reflective quality that defines vintage glamour. Two different nightstands, or a single oversized one, disrupts the symmetry this style depends on for its polished, intentional appearance. Symmetry reads as luxury; asymmetry reads as leftover furniture.
Start by ordering an identical pair — never mix styles — in mirrored glass or high-gloss lacquer, sized no wider than 24 inches to avoid crowding the bed. Position each nightstand exactly 2–3 inches from the bed frame on both sides. The mirrored surfaces also bounce lamp light across the ceiling at night, adding ambient glow beyond their function.
| Nightstand Finish | Best Bedroom Size |
| Mirrored glass | Small to medium rooms needing light reflection |
| High-gloss lacquer | Any size, easier to maintain than mirror |
| Brass and glass combo | Larger rooms with more floor space |
| Lacquered wood with brass pulls | Budget-conscious rooms |
6. Choose a Curved Art Deco Dresser Silhouette
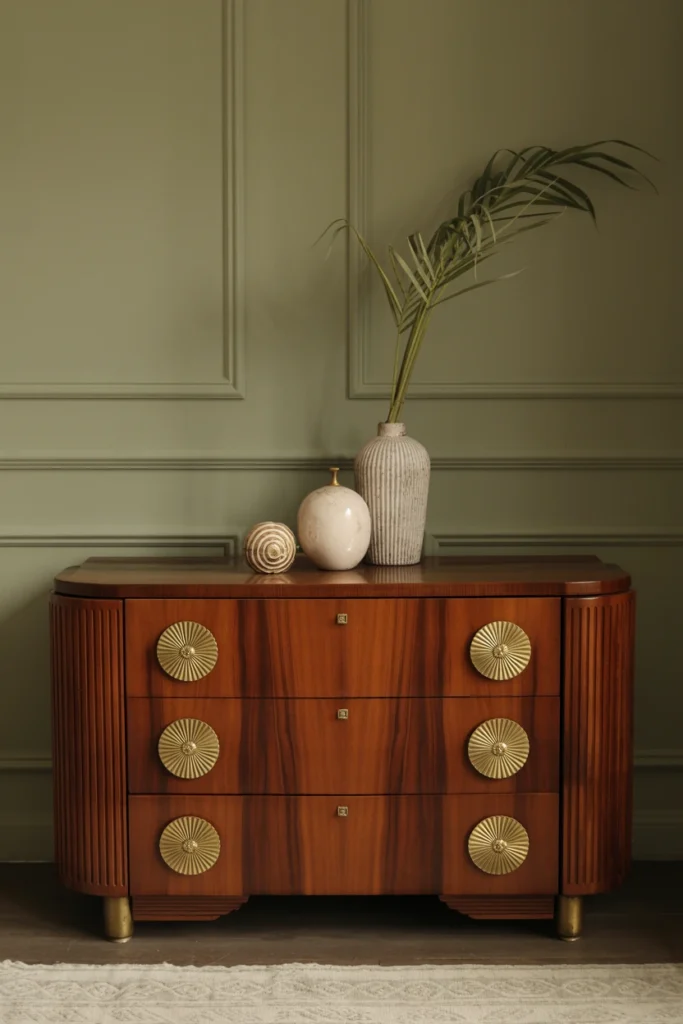
A straight-edged, boxy dresser looks like standard bedroom furniture regardless of its finish. Sharp rectangular lines contradict the flowing, sculptural silhouettes that define Art Deco and Hollywood Regency design from the 1930s. A boxy dresser undercuts the anchor piece even when placed in the same room.
Start by selecting a dresser with at least one curved or waterfall edge and fan-shaped or sunburst brass hardware. Limit the dresser top to no more than three decorative objects to avoid crowding its curved lines. The curve also softens a bedroom with mostly rectangular furniture, breaking up harsh angles across the room.
| Dresser Style | Signature Detail |
| Waterfall dresser | Rounded, cascading front edge |
| Bombe chest | Curved, bulging front and sides |
| Demilune dresser | Half-moon silhouette |
| Sunburst-hardware dresser | Straight body, curved brass pulls |
7. Place a Bench With Turned Legs at the Foot of the Bed
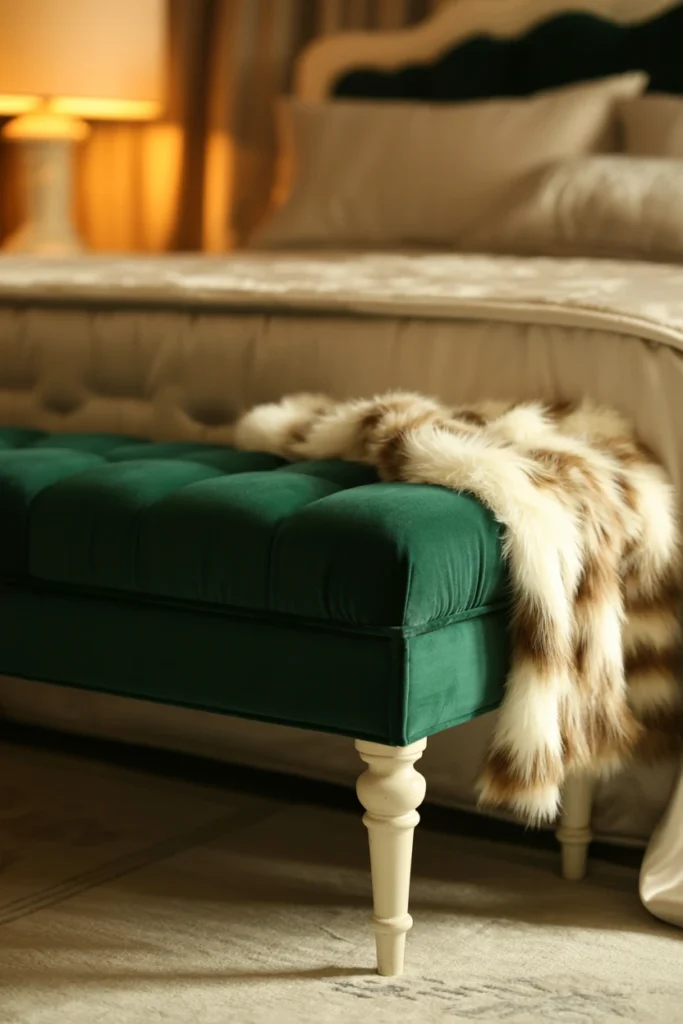
An empty stretch of floor at the foot of the bed leaves the vintage glamour bedroom feeling unfinished, no matter how strong the headboard looks. That gap also removes a practical seating and styling surface the room needs for both function and photographs. A bare foot-of-bed area is one of the most common gaps in an otherwise finished room.
Start by measuring the bed’s total width and selecting a bench 6–12 inches shorter to keep proportions balanced. Choose turned or fluted wood legs with a velvet or channel-tufted top cushion in the room’s accent color. This bench also gives the room a spot to drape a throw blanket for an additional texture layer.
| Bed Width | Recommended Bench Length |
| Twin/Full (54–75 in) | 36–42 inches |
| Queen (60 in) | 48–54 inches |
| King (76 in) | 60–66 inches |
| California King (72 in) | 54–60 inches |
Luxe Textiles and Velvet Layering
Textiles account for roughly a third of the visual weight in a vintage glamour bedroom. This section covers pillows, bedding, drapery, and throws, each chosen for texture and light response rather than pattern alone.
8. Layer Velvet Throw Pillows in Odd Numbers
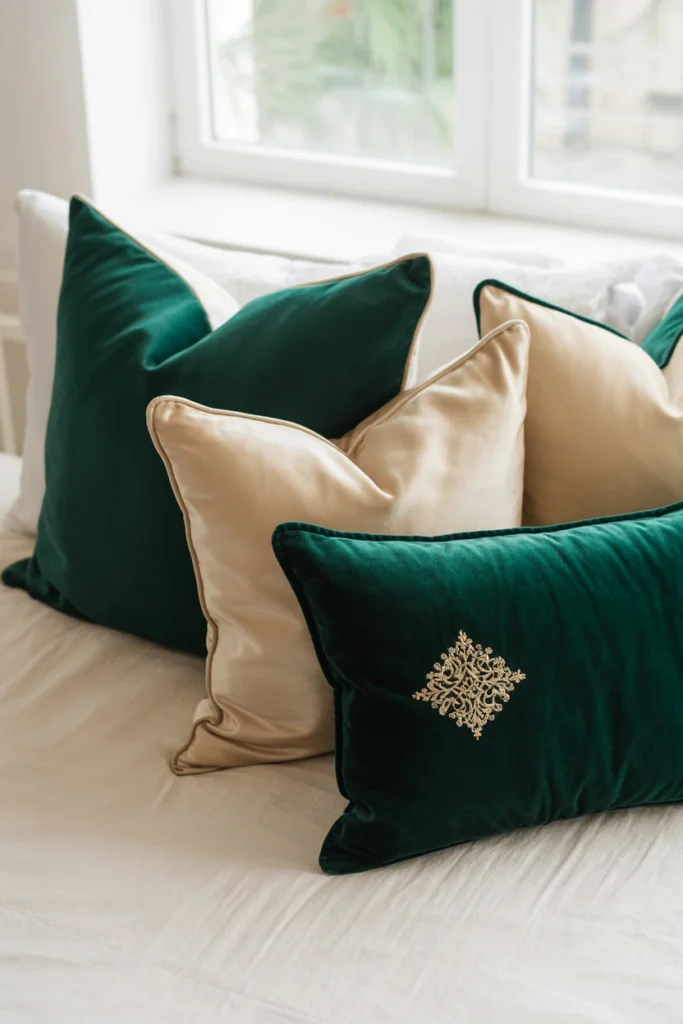
A bed with two matching pillows and nothing else looks like a standard hotel room, not a styled glamour bedroom. Even-numbered pillow arrangements read as staged and generic, while odd-numbered groupings read as collected and intentional. Flat pillow arrangements are one of the fastest ways to undercut an otherwise strong headboard.
Start by layering exactly 5 pillows: two standard shams, two decorative velvet squares, and one lumbar pillow in a contrasting jewel tone. Mix velvet with one metallic or embroidered accent pillow, never more than one patterned piece. This five-pillow ratio also keeps the arrangement easy to reset each morning without overwhelming the bed.
| Pillow Count | Visual Effect |
| 2 pillows | Reads as unstyled, hotel-basic |
| 3 pillows | Minimal but intentional |
| 5 pillows | Full, curated glamour look |
| 7+ pillows | Risks overcrowding smaller beds |
9. Add a Silk or Satin Duvet as a Base Layer
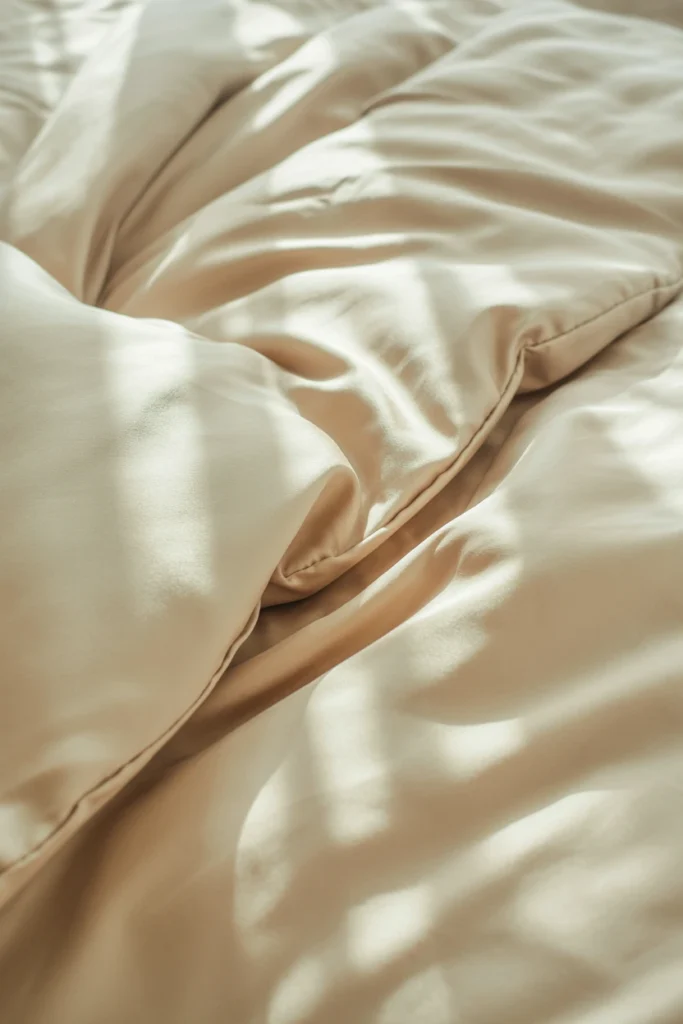
Cotton or linen bedding absorbs light instead of reflecting it, flattening the entire glamour effect the room is built around. A matte duvet sitting under velvet pillows creates a jarring texture mismatch that reads as inconsistent rather than layered. The base layer sets the tone for every textile placed on top of it.
Start by selecting a silk or sateen duvet cover in the room’s neutral tone — cream, ivory, or blush — never the jewel-tone accent color. Choose a minimum 300-thread-count sateen if silk exceeds budget, since sateen provides a similar sheen at a fraction of the cost. This lighter base color also allows the velvet accent pillows to stand out as the dominant color statement.
| Fabric | Approx. Cost (Queen) | Sheen Level | <br>|—|—|—| | Silk | 150–400 | Very high | | Sateen | 40–90 | Moderate-high | | Cotton percale | 30–60 | Matte | | Linen | 80–150 | Matte |
10. Hang Floor-Length Curtains in Heavy Damask
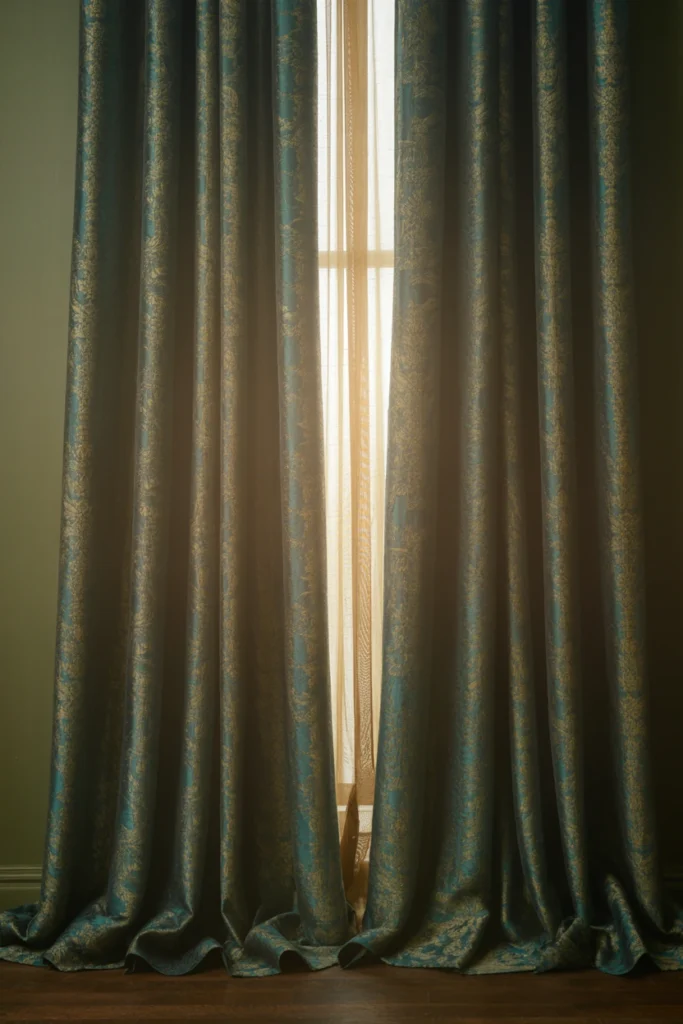
Short, budget curtains that stop above the windowsill instantly cheapen a vintage glamour bedroom, regardless of how strong the furniture looks. Cropped drapery breaks the vertical, dramatic line this style depends on to feel expensive and expansive. Undersized curtains are one of the most visually obvious budget-decor signals in the entire room.
Start by mounting curtain rods 4–6 inches above the window frame and extending them 8–10 inches past each side. Choose floor-length or puddling-length heavy damask or velvet panels, never sheer fabric alone. The extra rod width also makes the window itself appear significantly larger than its actual frame.
| Curtain Length | Effect |
| Sill-length | Reads as budget, cuts the room short |
| Floor-length (touching floor) | Standard glamour finish |
| Puddling (2–4 in extra fabric) | Maximum drama, formal spaces |
| Above-floor (gap visible) | Avoid — looks unfinished |
11. Place a Faux Fur or Ostrich Feather Throw
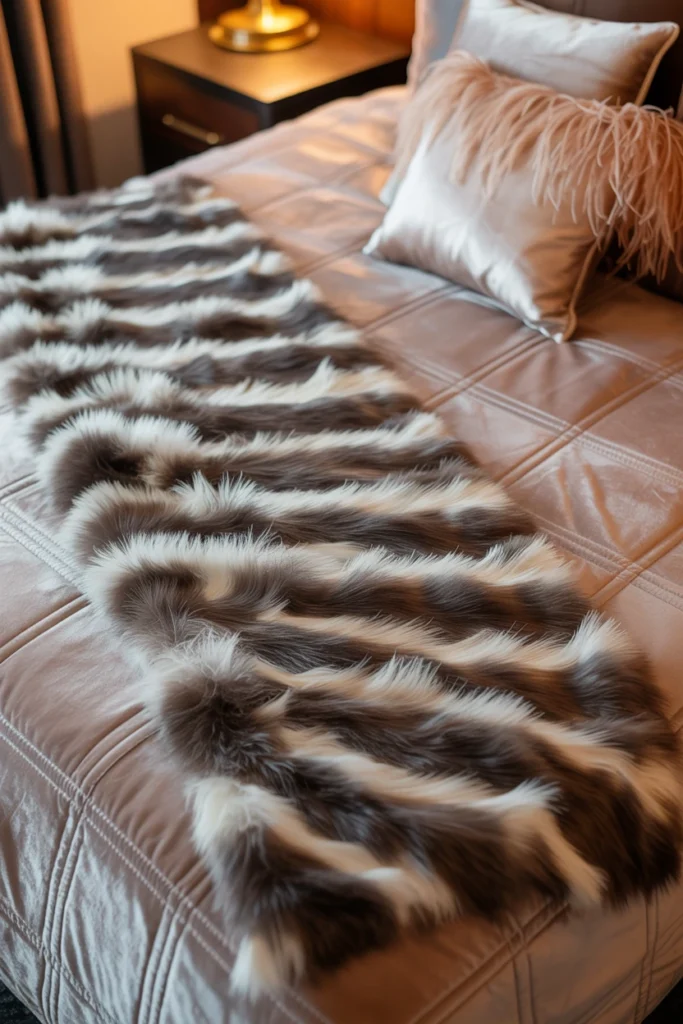
A bed styled with only pillows and a duvet is missing the tactile layer that separates true vintage glamour from generic modern decor. Texture contrast is what makes a photograph or a room read as luxurious instead of flat. Skipping this layer leaves the bed looking one step short of finished.
Start by draping a faux fur throw diagonally across the foot of the bed or folded lengthwise across the bench. Choose a texture that contrasts the velvet pillows — fur against velvet, or feather trim against smooth satin. This contrast layer is frequently the single detail guests notice first when entering the room.
| Throw Material | Best Placement |
| Faux fur | Draped diagonally across the bed |
| Ostrich feather trim pillow | Mixed into the pillow arrangement |
| Chenille throw | Folded across the bench |
| Velvet throw | Layered under the fur for depth |
Lighting and Metallic Accents
Lighting does more work in a vintage glamour bedroom than in almost any other style, since brass and crystal fixtures double as decor. This section covers the three lighting layers and the metal accents that tie the room together.
12. Install a Crystal or Beaded Chandelier
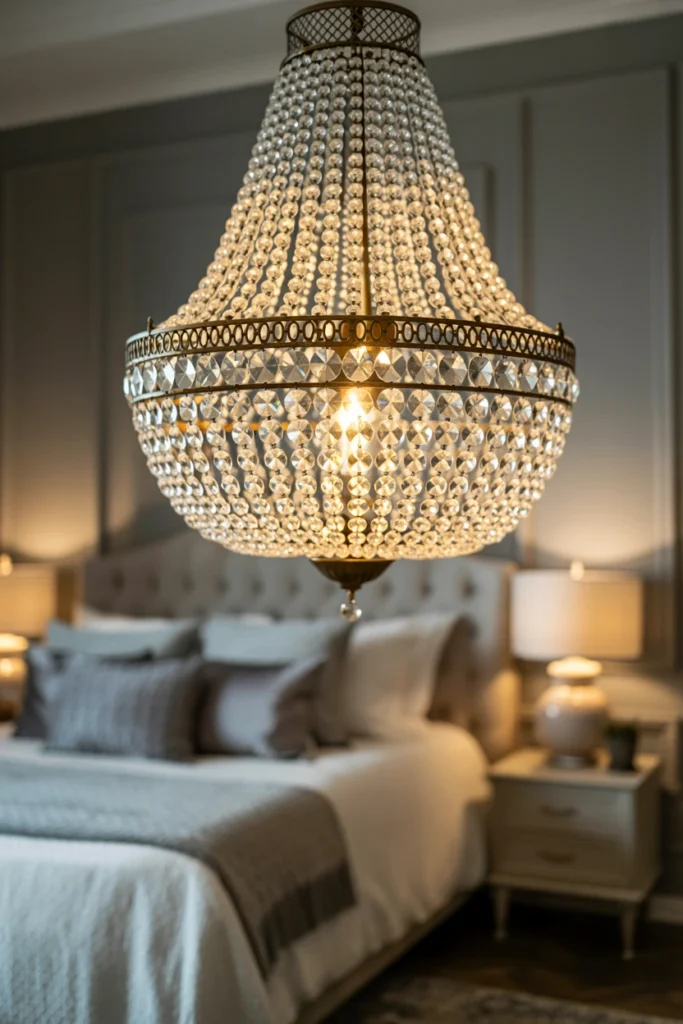
Overhead lighting from a standard flush-mount fixture flattens the entire room and eliminates the sparkle vintage glamour depends on. A single ceiling light with no crystal or reflective element leaves the room’s highest focal point empty. This gap is visible from every angle of the room, including doorway sightlines.
Start by measuring ceiling height and selecting a chandelier that hangs 30–36 inches above the bed frame if ceilings exceed 8 feet. Choose a crystal, glass-bead, or brass-cage design rather than a fabric shade, and confirm the fixture width is roughly one-third the bed’s width. This fixture also becomes the room’s primary light-scatter source after sunset, casting patterned light across the ceiling.
| Ceiling Height | Chandelier Drop |
| 8 feet | 24–30 inches |
| 9 feet | 30–36 inches |
| 10 feet | 36–42 inches |
| Vaulted/sloped | Use adjustable-drop fixture |
13. Mount Brass Sconces on Either Side of the Bed
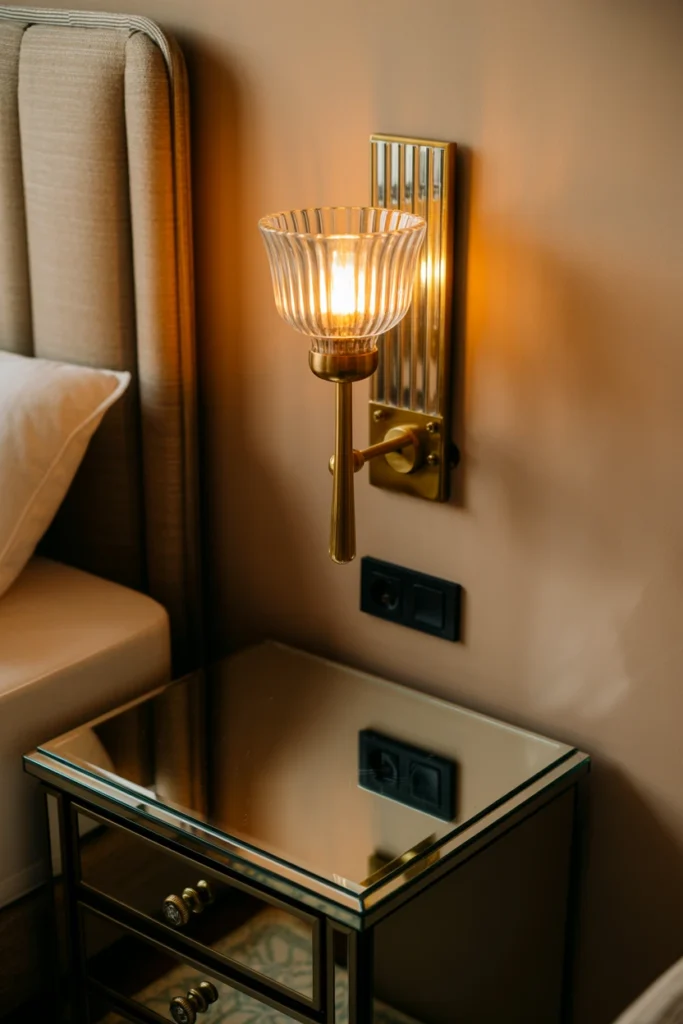
Two matching table lamps are the default choice, but they consume nightstand surface space that mirrored trays and books need. A cluttered nightstand undercuts the clean, curated look the mirrored pair was chosen to create. Lamps alone also leave the wall above the headboard visually empty.
Start by mounting hardwired or plug-in brass sconces 24–28 inches above each nightstand surface, centered on the headboard’s edge. Choose a fluted glass or fabric-shade sconce style, matched to the chandelier’s metal finish exactly. Wall-mounted sconces free up roughly 60% more nightstand surface for styling objects.
| Sconce Height Above Nightstand | Effect |
| Under 20 inches | Too low, glare at eye level |
| 24–28 inches | Correct reading and ambient height |
| Over 32 inches | Light spreads too high, weak task lighting |
| Adjustable arm | Best for reading in bed |
14. Choose Lamps With Fringe or Fluted Glass Shades
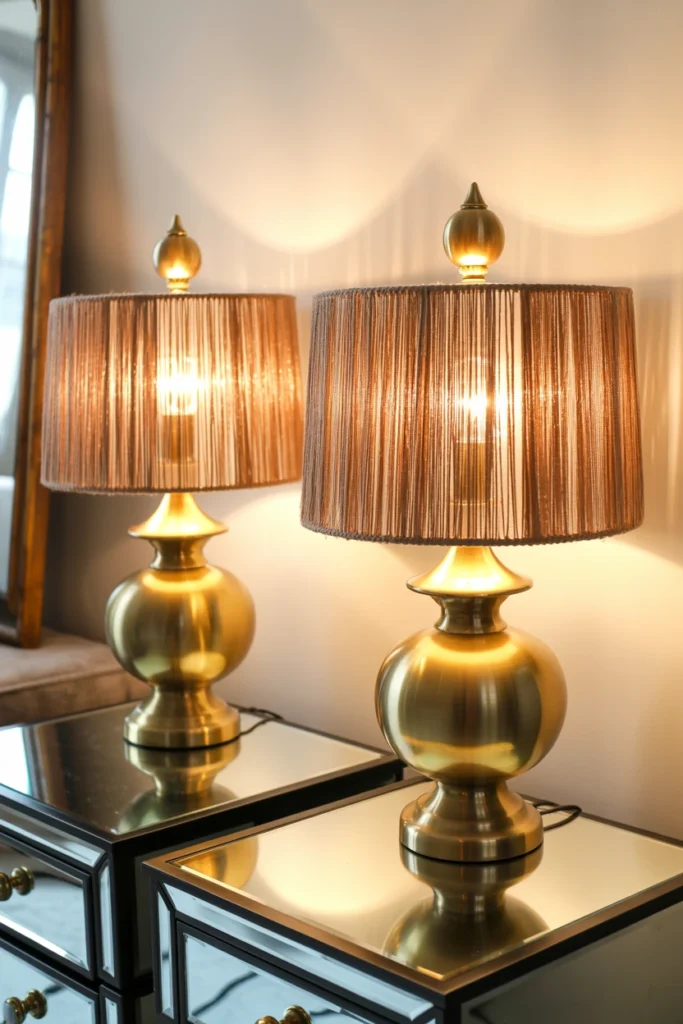
If sconces are not an option, a plain drum-shade lamp still reads as generic regardless of the base finish underneath it. The shade is the most visible part of any lamp, so a basic shade undermines an otherwise expensive lamp base. This mismatch is a common budget mistake in otherwise well-planned rooms.
Start by pairing a brass or crystal lamp base with a pleated, fluted, or fringe-trimmed shade rather than a flat linen drum. Keep both lamps identical in height, ideally 22–26 inches, to preserve the symmetry established by the nightstand pair. A fringe-trimmed shade also softens the light output, casting a warmer glow than an exposed bulb.
| Lamp Shade Style | Light Quality |
| Plain drum | Harsh, generic diffusion |
| Fluted glass | Bright, decorative sparkle |
| Fringe-trimmed fabric | Soft, warm ambient glow |
| Pleated silk | Warm, formal diffusion |
15. Layer Three Light Sources at Different Heights
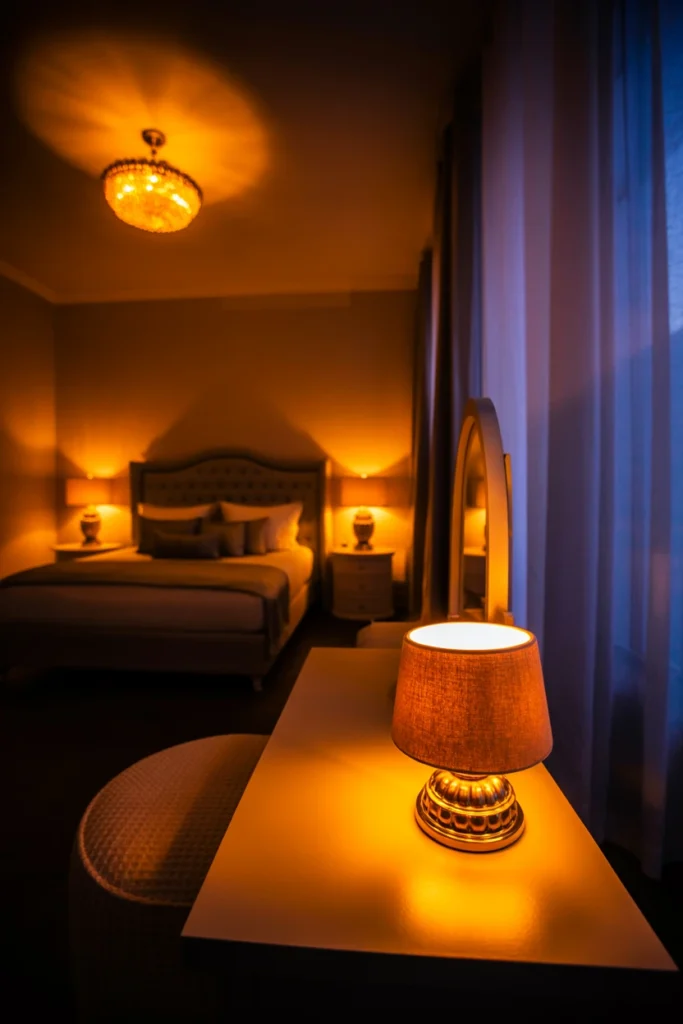
A room lit by only the overhead chandelier looks flat in photographs and harsh in person, no matter how ornate the fixture is. Single-source lighting eliminates the shadow and glow variation that makes a room feel layered instead of lit like a showroom. This is one of the most overlooked details in otherwise well-decorated glamour bedrooms.
Start by confirming three distinct light heights exist: ceiling chandelier, sconces or lamps at nightstand height, and one low accent light such as a vanity lamp or floor lamp. Set each source on a separate switch or smart plug so heights can be dimmed independently. This layering also lets the room shift from bright daytime lighting to soft evening ambiance without changing a single fixture.
| Light Layer | Height | Purpose |
| Overhead chandelier | Ceiling | Primary ambient light |
| Sconces/lamps | Nightstand height | Reading, task light |
| Accent lamp | Vanity or floor level | Mood, low glow |
| String or LED strip (optional) | Behind headboard | Subtle backlight glow |
Art Deco Color and Pattern Choices
Color and pattern reinforce everything the furniture and lighting have already established. This section covers walls, wallpaper, and how to balance bold pattern against the room’s solid velvet pieces.
16. Apply a Deep Jewel-Tone Accent Wall
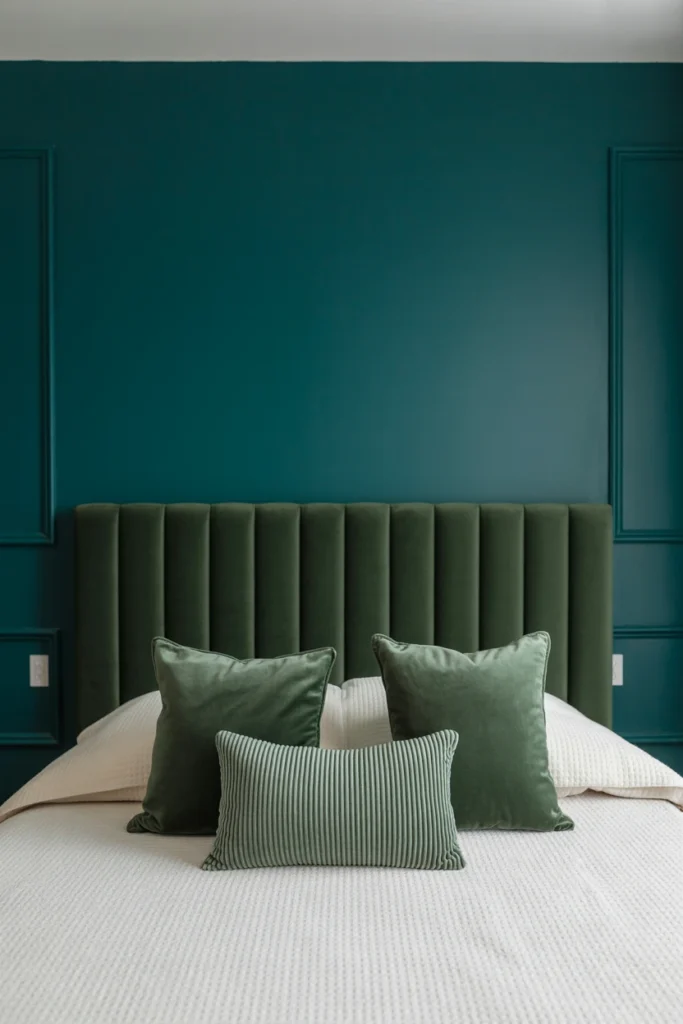
An all-white or all-beige bedroom cannot support a vintage glamour theme regardless of how ornate the furniture is. Neutral walls absorb the sparkle from brass and crystal fixtures instead of reflecting it back into the room. A pale wall color is one of the most common reasons a well-furnished glamour bedroom still looks incomplete.
Start by painting the wall directly behind the headboard in the jewel tone locked during the foundation step, using a satin or eggshell finish rather than flat matte. Keep the remaining three walls in the neutral tone chosen earlier to avoid overwhelming the room. A satin finish also reflects lamp and chandelier light more effectively than a flat finish, amplifying the room’s overall glow.
| Wall Finish | Light Reflection |
| Flat matte | Lowest, absorbs light |
| Eggshell | Moderate, subtle sheen |
| Satin | High, ideal for accent walls |
| Semi-gloss | Very high, best for trim only |
17. Introduce Geometric Art Deco Wallpaper in One Zone
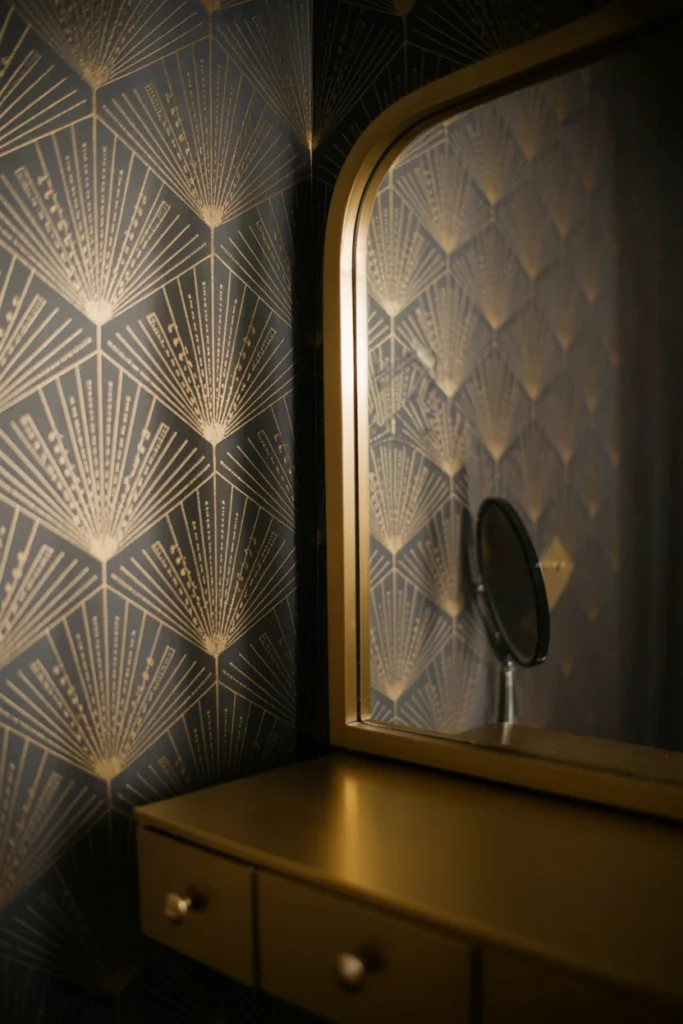
Painting every wall the same jewel tone flattens the room and removes the layered depth vintage glamour depends on for visual interest. A single flat color across all four walls looks closer to a modern minimalist room than a Hollywood Regency one. Pattern is what signals this specific design era rather than glamour in general.
Start by applying geometric, sunburst, or fan-motif wallpaper to a single accent zone — behind the vanity or inside a closet nook — rather than the entire room. Choose a metallic-ink wallpaper in the room’s established metal finish so it catches light the same way the hardware does. Limiting the wallpaper to one zone also keeps the cost significantly lower than papering the full room.
| Wallpaper Zone | Approx. Sq Ft Needed |
| Vanity nook | 20–40 sq ft |
| Closet interior | 30–60 sq ft |
| Full accent wall | 80–120 sq ft |
| Ceiling accent | 100–150 sq ft |
18. Balance Bold Pattern With Solid Velvet Upholstery
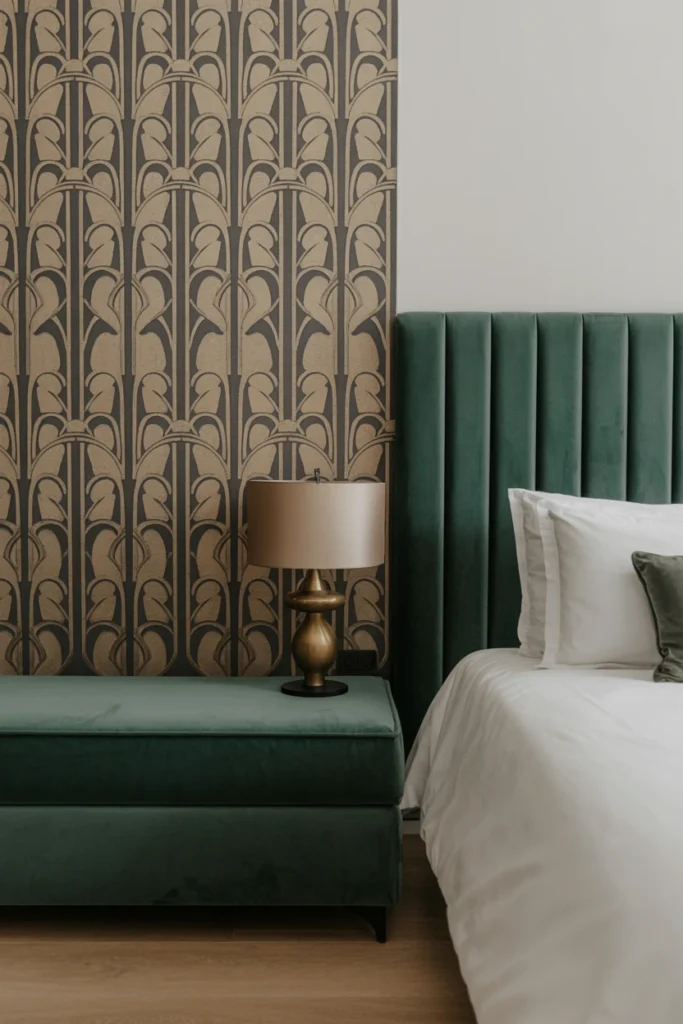
Pairing patterned wallpaper with a patterned headboard or patterned drapery creates visual competition instead of a cohesive focal hierarchy. Two competing patterns in the same sightline forces the eye to search for a focal point instead of resting on one. This clash is one of the fastest ways to undo the wallpaper’s intended impact.
Start by confirming that every upholstered surface in the room — headboard, bench, pillows beyond the one accent piece — remains solid velvet, not patterned fabric. Reserve pattern exclusively for the wallpaper zone and, at most, one accent pillow. This solid-versus-pattern ratio keeps the wallpaper as the room’s clear focal statement rather than one competing element among several.
| Pattern Placement | Rule |
| Wallpaper | One zone only, bold pattern allowed |
| Headboard/bench | Solid velvet, no pattern |
| Pillows | Max 1 patterned piece of 5 |
| Rug | Solid or subtle texture, no bold pattern |
Styling and Finishing Touches for Old Hollywood Glamour
The final layer of a vintage glamour bedroom lives in the small surfaces: the vanity corner and the objects grouped across it. These finishing touches are what separate a furnished room from a fully styled one.
19. Build a Vanity Corner With a Round Mirror
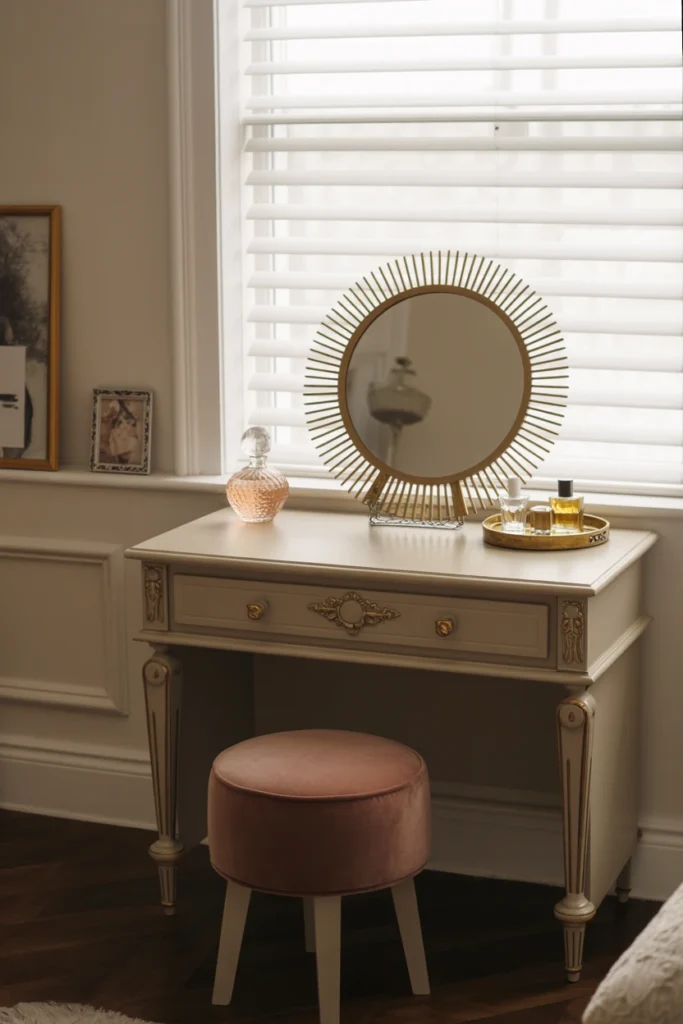
A vintage glamour bedroom without a vanity corner is missing its most photograph-worthy feature and its clearest style signal. Bedrooms without a dedicated styling surface tend to default their mirror and accessories onto the dresser, crowding a surface meant for storage. A missing vanity corner is one of the most noticeable gaps to anyone familiar with this design style.
Start by placing a small writing desk or vanity table with a round or sunburst-framed mirror in an unused corner, ideally near natural light. Pair it with a single upholstered stool in the same velvet as the bench. This corner also gives the room a second seating option beyond the bed, useful for both function and staging photographs.
| Vanity Type | Best Room Size |
| Wall-mounted fold-down vanity | Small bedrooms, rentals |
| Freestanding vanity table | Medium to large bedrooms |
| Repurposed writing desk | Budget-conscious setups |
| Built-in nook vanity | Larger primary suites |
20. Group Vintage Perfume Bottles and Trinket Trays
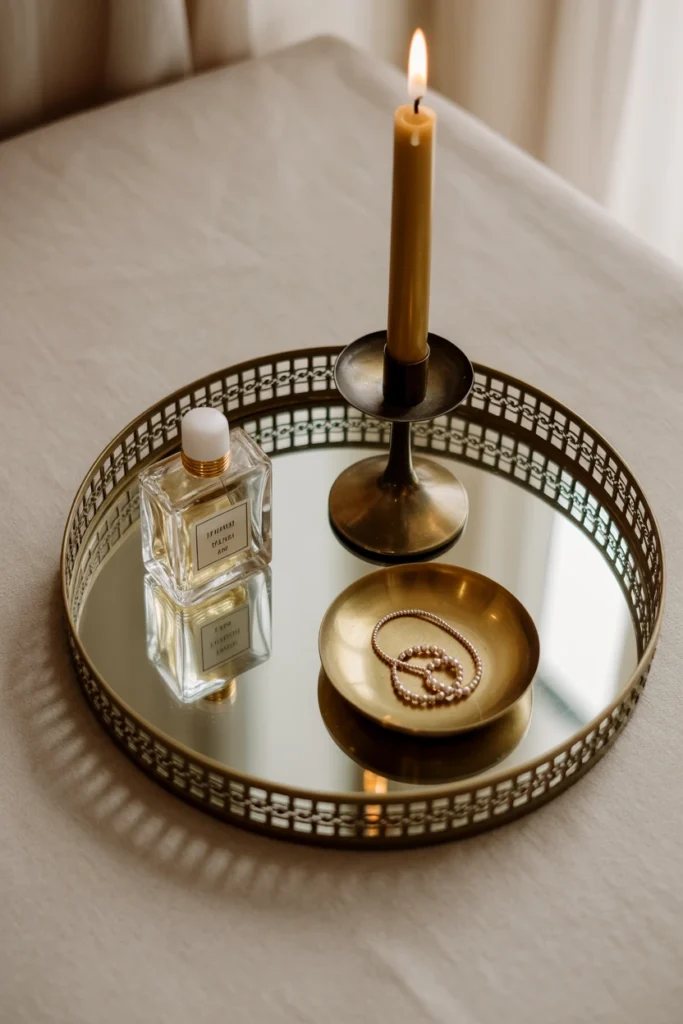
A bare vanity or dresser top undercuts the mirrored and brass surfaces chosen specifically to catch and reflect light. Empty reflective surfaces waste their own function, since they need small objects to actually create visible sparkle and reflection. This is a low-cost detail that a surprising number of otherwise well-decorated rooms skip entirely.
Start by grouping 3–5 objects on a mirrored or brass tray: a perfume bottle set, a small jewelry dish, and one taper candle in a brass holder. Keep the grouping within a single tray footprint rather than scattering items across the full surface. This contained grouping also makes the vanity easier to keep tidy, since every object has a defined home.
| Object Count on Tray | Visual Result |
| 1–2 objects | Reads as sparse |
| 3–5 objects | Curated, intentional |
| 6+ objects | Risks clutter |
| Tray-free (scattered) | Loses cohesion |
Maintenance and Long-Term Care for Vintage Glamour Pieces
Vintage glamour materials — velvet, brass, and mirror — need different upkeep than standard furniture finishes. This final section covers the habits that keep the room looking finished months after the initial setup.
21. Establish a Velvet and Brass Care Routine
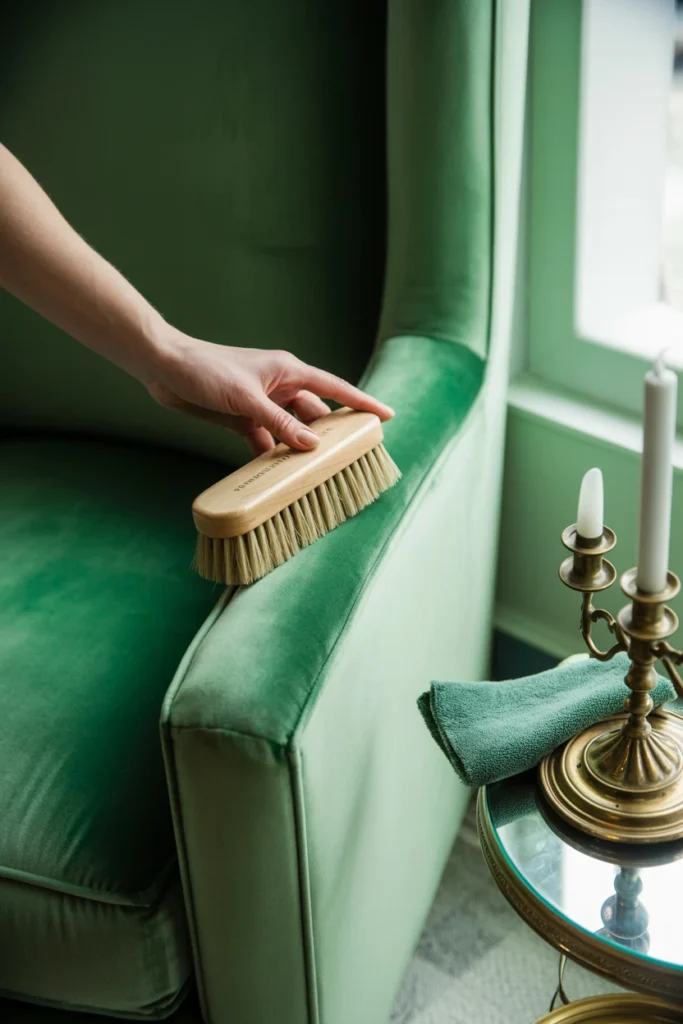
Velvet crushes and brass tarnishes faster than most owners expect, and neglecting both slowly erodes the room’s original impact. A dull, tarnished brass fixture next to crushed velvet upholstery reads as worn rather than vintage, undoing months of careful styling. This deterioration happens gradually enough that it is easy to miss until the contrast becomes obvious.
Start by brushing velvet surfaces weekly with a soft-bristle upholstery brush in the direction of the nap to prevent permanent crush marks. Wipe unlacquered brass with a microfiber cloth and a brass-safe polish every 4–6 weeks, skipping lacquered brass entirely since it does not tarnish the same way. This routine takes under 15 minutes monthly and prevents the two most common signs of wear in this style.
| Material | Maintenance Frequency |
| Velvet upholstery | Brush weekly |
| Unlacquered brass | Polish every 4–6 weeks |
| Lacquered brass | Dust only, no polish needed |
| Mirrored surfaces | Wipe with glass cleaner weekly |
22. Rotate Seasonal Accents Without Losing the Theme
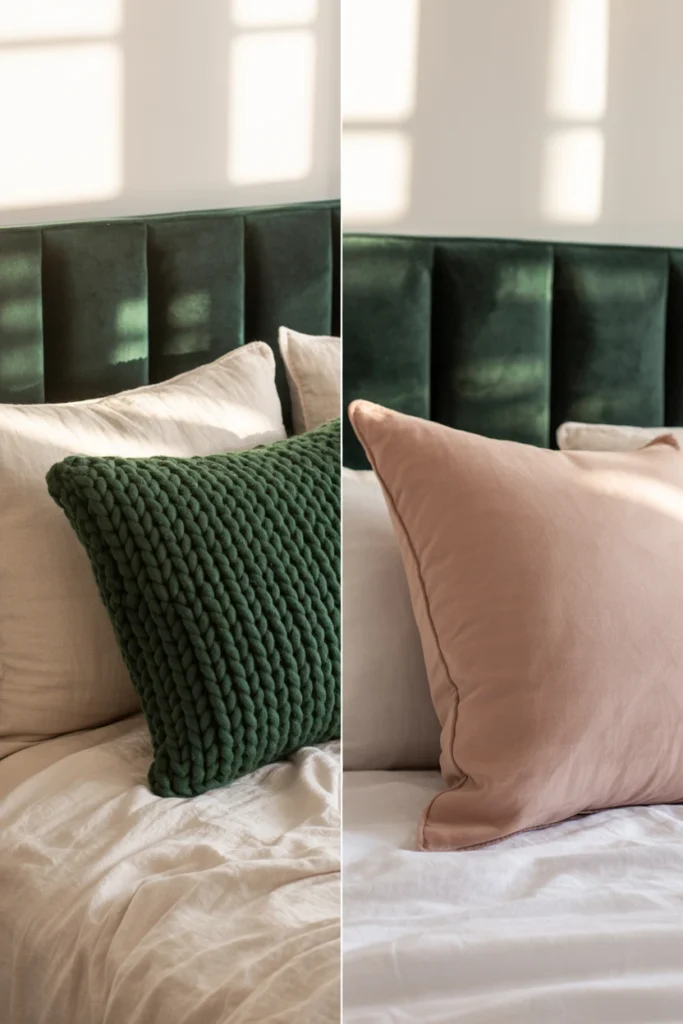
A vintage glamour bedroom that never changes starts to feel static, even though the core furniture and color story should stay fixed. Swapping out the entire room every season is expensive and risks breaking the cohesive palette built during the foundation steps. A room that never refreshes small details reads as untouched rather than lived-in and curated.
Start by rotating only the smallest textile layer — the throw blanket and one accent pillow — every 3–4 months, keeping every other element fixed. Choose seasonal swaps within the same jewel-tone family, such as shifting from emerald to a deeper forest green in winter. This small, controlled rotation keeps the room feeling current without touching the furniture, lighting, or wallpaper investment.
| Season | Suggested Swap |
| Winter | Deeper jewel tone, faux fur throw |
| Spring | Lighter accent pillow, fresh florals on vanity |
| Summer | Satin throw instead of fur, brighter jewel accent |
| Fall | Velvet in warmer jewel tone, candle scent change |
Common Vintage Glamour Bedroom Mistakes That Ruin the Look
Most vintage glamour bedrooms fail from a handful of repeatable mistakes rather than a lack of budget. Reviewing this table before finalizing the room catches the errors that are hardest to notice once furniture is already in place.
| Mistake | Why It Hurts the Space | Better Alternative |
| Mixing brass and chrome finishes | Breaks the single-metal rule, reads as mismatched | Commit to one metal across 90% of surfaces |
| Using a flat matte wall finish | Absorbs light instead of reflecting it | Switch to satin or eggshell paint |
| Choosing sill-length curtains | Cuts the room’s vertical line short | Mount rods high, use floor-length panels |
| Leaving the vanity corner empty | Wastes the room’s most photograph-worthy feature | Add a small vanity table and round mirror |
| Overcrowding the nightstand | Undoes the clean, curated symmetry | Move lighting to wall-mounted sconces |
| Skipping the faux fur or feather layer | Removes the tactile contrast the style depends on | Add one textured throw across the bed |
| Papering all four walls in bold pattern | Overwhelms the room, removes focal hierarchy | Limit pattern to one accent zone |
| Ignoring brass and velvet upkeep | Tarnish and crushed nap age the room quickly | Follow a monthly 15-minute care routine |
Vintage Glamour Bedroom Ideas by Room Type and Budget
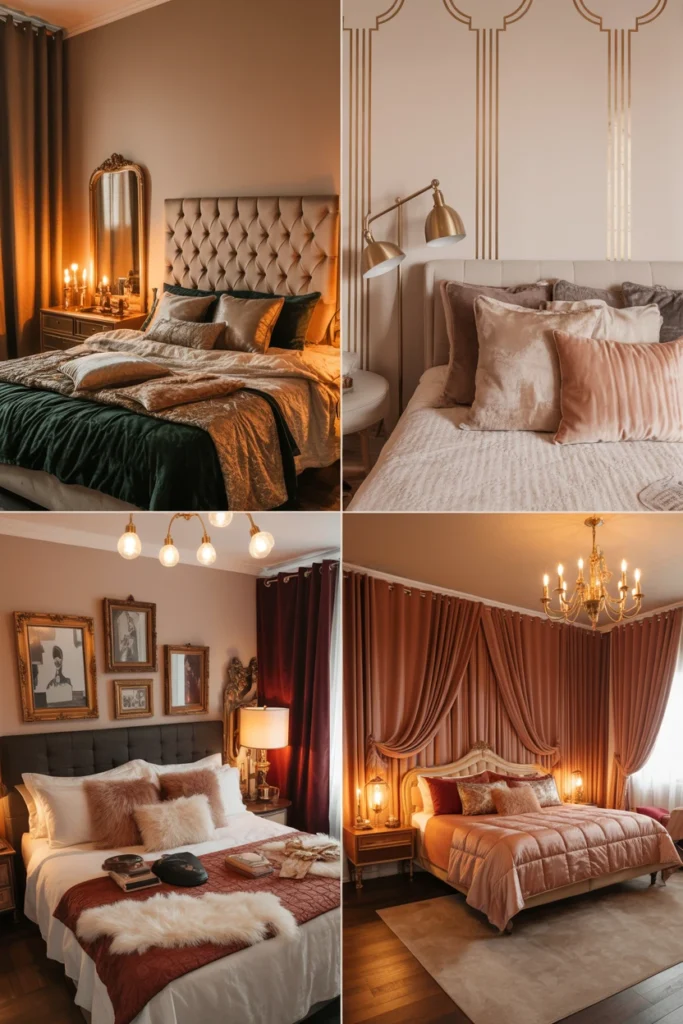
Small Bedroom
Small bedrooms need every glamour element scaled down without losing the style’s core signatures. The main constraint is floor space, not budget, so furniture selection matters more than quantity.
Key strategies for small bedrooms:
- Choose a channel-tufted bench instead of a full vanity table to save floor space
- Mount sconces instead of table lamps to free up nightstand surface entirely
- Use a single oversized round mirror instead of a full vanity mirror set
- Select nightstands under 20 inches wide to keep walking paths clear
- Limit the accent wall to the headboard wall only, skipping additional wallpaper zones
- Choose a smaller chandelier sized to one-quarter of the room’s width, not one-third
Rental-Friendly Approach
Renters need every glamour element to be removable without damaging walls or losing a security deposit. The main constraint is permanence, not style, so temporary solutions replace anything requiring installation.
Key strategies for rentals:
- Use peel-and-stick wallpaper for the Art Deco accent zone instead of traditional paper
- Choose a plug-in chandelier with a hook mount instead of a hardwired fixture
- Add brass command-hook sconce alternatives instead of wall-mounted hardwired sconces
- Select a freestanding full-length mirror instead of a wall-mounted vanity mirror
- Use removable wall decals for pattern instead of paint on the accent wall
- Choose furniture pieces that transport easily for the next move
Budget-Conscious Glamour
A limited budget still supports this style when spending concentrates on the highest-impact pieces first. The main constraint is prioritization, not the total number of items purchased.
Key strategies for budget glamour:
- Spend the largest single line item on the velvet headboard, not the dresser
- Choose sateen bedding over silk to preserve sheen at a lower cost
- Source vintage brass hardware and mirrors from secondhand shops instead of new retailers
- Paint the accent wall instead of installing wallpaper for the jewel-tone statement
- Buy one high-quality faux fur throw instead of multiple lower-quality textiles
- Limit the vanity tray grouping to thrifted glass and brass pieces
Primary Suite / Larger Room
Larger primary suites can support additional zones without crowding the core furniture layout. The main constraint is avoiding a sparse, underfurnished feel across the extra square footage.
Key strategies for larger rooms:
- Add a full seating area with an accent chair in the same velvet as the headboard
- Extend wallpaper across a full second accent wall instead of one small zone
- Choose a larger chandelier with a wider crystal spread to fill the taller ceiling volume
- Add a freestanding full-length mirror in addition to the vanity mirror
- Install a second sconce pair flanking a reading nook away from the bed
- Layer an area rug under the full bed frame instead of only at the foot of the bed
Frequently Asked Questions
How do I make my bedroom look vintage glamour?
Start with the three foundation steps: lock one jewel tone and one metal finish, choose a single furniture anchor, and set a budget split across furniture and textiles. Building the room in that order prevents the mismatched-metal and clashing-pattern mistakes that undermine most vintage glamour bedrooms. Add velvet textiles, brass lighting, and a vanity corner once the foundation is set.
What are common vintage glamour bedroom mistakes?
The most common mistake is mixing metal finishes, such as combining brass hardware with chrome lighting in the same room. A close second is leaving walls in flat matte paint, which absorbs light instead of reflecting the sparkle from crystal and mirrored surfaces. Skipping the vanity corner and overcrowding nightstands are also frequent errors.
How do I start a vintage glamour bedroom on a budget?
Prioritize the velvet headboard as the single highest-impact purchase, since it anchors the entire room’s silhouette. Use sateen bedding instead of silk, paint an accent wall instead of installing wallpaper, and source brass hardware secondhand. A budget vintage glamour bedroom still needs the same color-story and single-anchor rules as a full-budget version.
Does vintage glamour work in a small bedroom?
Vintage glamour works in small bedrooms when furniture is scaled down and wall-mounted lighting replaces table lamps. A channel-tufted bench, sconces instead of lamps, and a single oversized mirror preserve the look without crowding the floor. Skipping a full vanity table in favor of a slim mirror is the most effective small-space adjustment.
How do I choose between brass and chrome for a vintage glamour bedroom?
Brass suits warmer jewel tones like emerald and plum, while chrome pairs more naturally with cooler tones like sapphire blue. The choice should match whichever tone was locked during the foundation color-story step, not personal preference alone. Mixing both metals in the same room is the single most common finish mistake in this style.
How often should I refresh a vintage glamour bedroom?
Rotate only the smallest textile layer — one throw blanket and one accent pillow — every 3–4 months to keep the room feeling current. The core furniture, lighting, and wallpaper should remain fixed and are not part of the seasonal rotation. Frequent full-room changes break the cohesive palette the foundation steps were built to protect.
Does this style work for a rental apartment?
Vintage glamour adapts to rentals using peel-and-stick wallpaper, plug-in chandeliers, and command-hook sconce alternatives instead of anything requiring installation. Freestanding mirrors and furniture replace wall-mounted vanity pieces so nothing damages the walls. The style’s core elements — velvet, brass, and jewel tone — all come in rental-safe versions.
How much does a vintage glamour bedroom cost?
A budget-conscious version can be built for roughly 800–1,500 using sateen bedding, painted accent walls, and secondhand brass hardware. A full-budget room with silk bedding, a crystal chandelier, and new furniture typically runs 3,000–6,000. The 50/30/20 furniture-to-textile-to-accessory split applies at any total budget level.
How do I maintain velvet and brass in a vintage glamour bedroom?
Brush velvet surfaces weekly with a soft-bristle brush in the direction of the nap to prevent permanent crush marks. Polish unlacquered brass every 4–6 weeks with a brass-safe polish, but skip polishing on lacquered brass entirely. This 15-minute monthly routine prevents the two most visible signs of wear in vintage glamour rooms.
Conclusion
A vintage glamour bedroom comes together through sequence, not spending. Start with the color story and one furniture anchor before purchasing a single accessory. From there, layer velvet textiles, brass lighting at three heights, and a styled vanity corner to complete the room.
Results depend on consistent upkeep, not a single decorating weekend. A vintage glamour bedroom, built in this order and maintained monthly, holds its impact for years rather than months.